

What’s supported
Supported actions
This connector supports:- Proxy Actions, using the base URL
https://api.reply.io.
Example integration
To define an integration for Reply, create a manifest file that looks like this:Before you get started
To connect Reply with Ampersand, you will need a Reply account. Reply offers a free trial that includes API access.Creating an API key for Reply
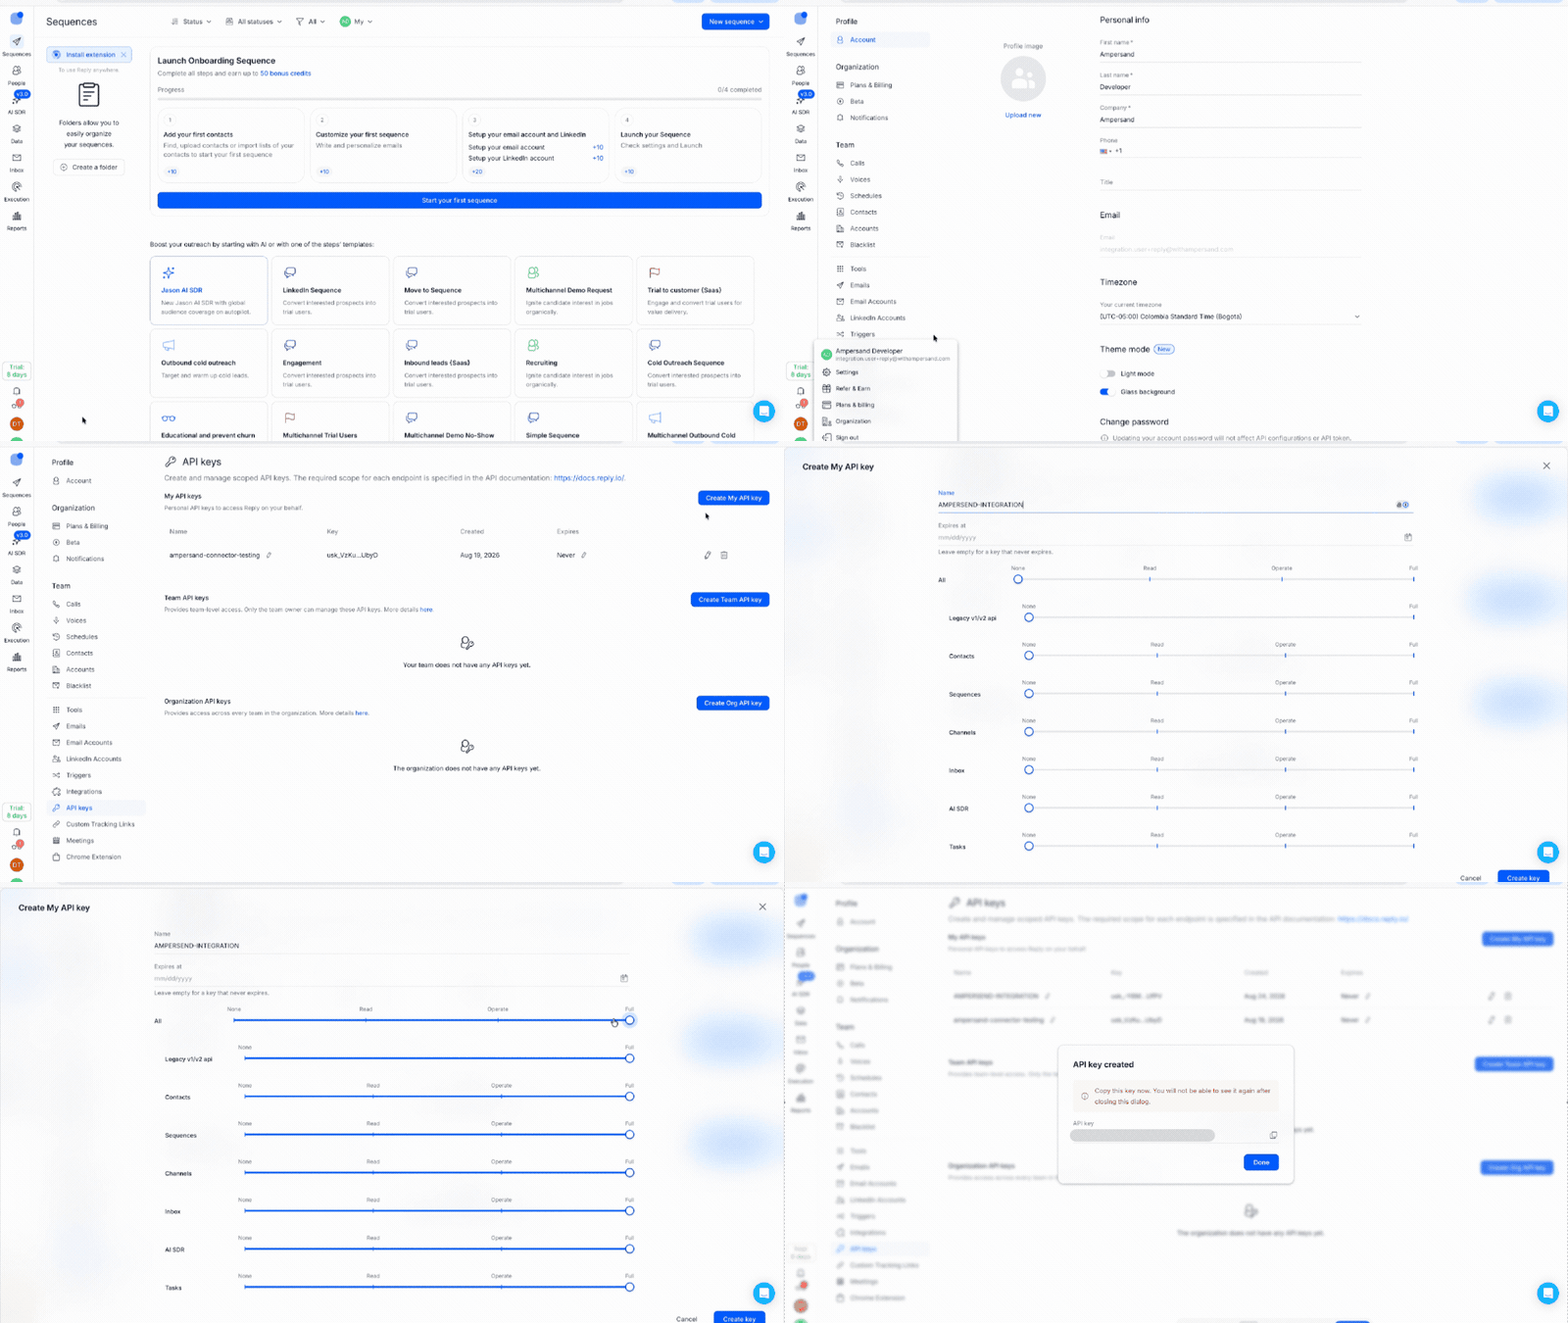
- Sign in to your Reply account.
- Go to Settings, then select API keys.
- Click Create My API key and enter a descriptive name for the key.
- Leave the expiration date empty for a key that never expires, or set a date to make the key expire.
- Set the permission sliders to cover the scopes that your integration needs. The sliders default to None, and a key created without permissions returns
401 Unauthorizedon every request. - Click Create key, then copy the key.
Using the connector
This connector uses API Key auth, which means that you do not need to set up a Provider App before getting started. (Provider apps are only required for providers that use OAuth2 Authorization Code grant type.) To start integrating with Reply:- Create a manifest file like the example above.
- Deploy it using the amp CLI.
- Embed the InstallIntegration UI component. The UI component will prompt the customer for their API key.
- Start making Proxy Calls, and Ampersand will automatically attach the correct header required by API Key auth. Please note that this connector’s base URL is
https://api.reply.io.