What’s Supported
Supported Actions
This connector supports:- Proxy Actions, using the base URL
https://api.miro.com.
Before You Get Started
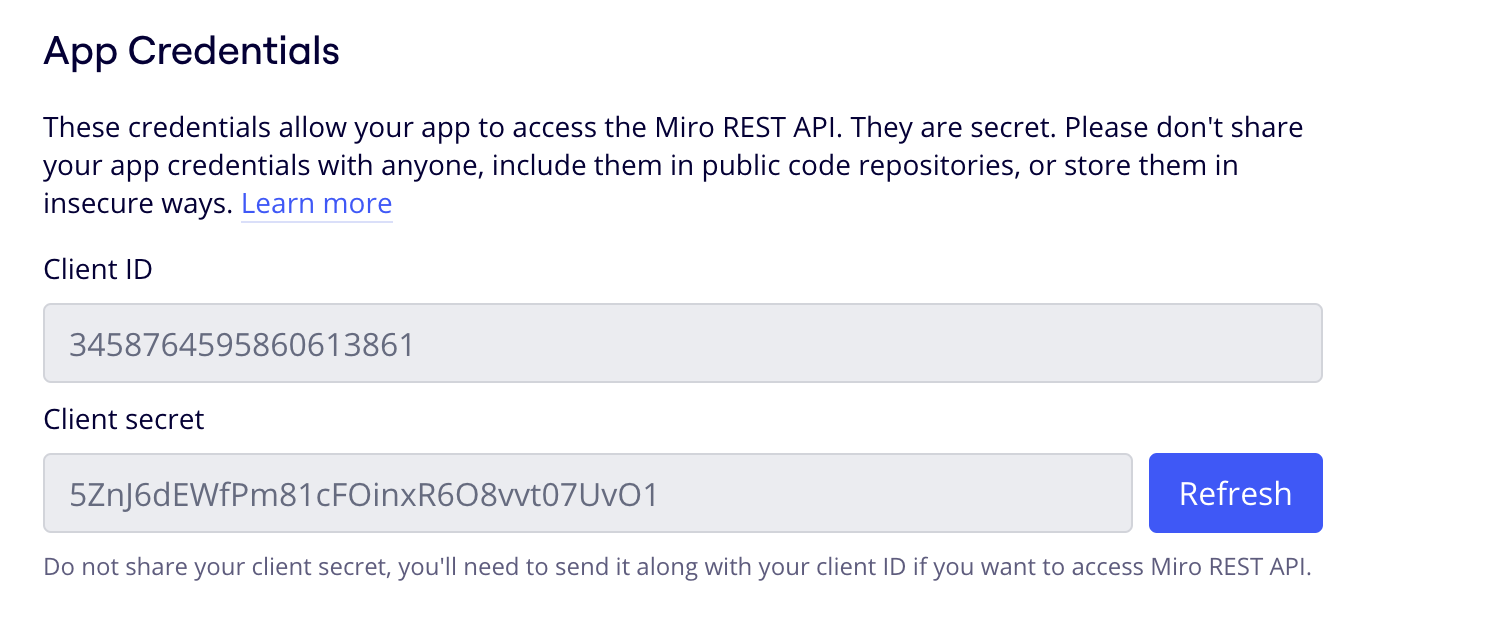
To connect Miro with Ampersand, you will need a Miro Account. Once your account is created, you’ll need to configure an app in Miro and obtain the following credentials from your app:- Client ID
- Client Secret
Create a Miro Account
Here’s how you can sign up for a Miro account:- Go to the Miro Sign Up page.
- Sign up using your preferred method.
Creating a Miro App
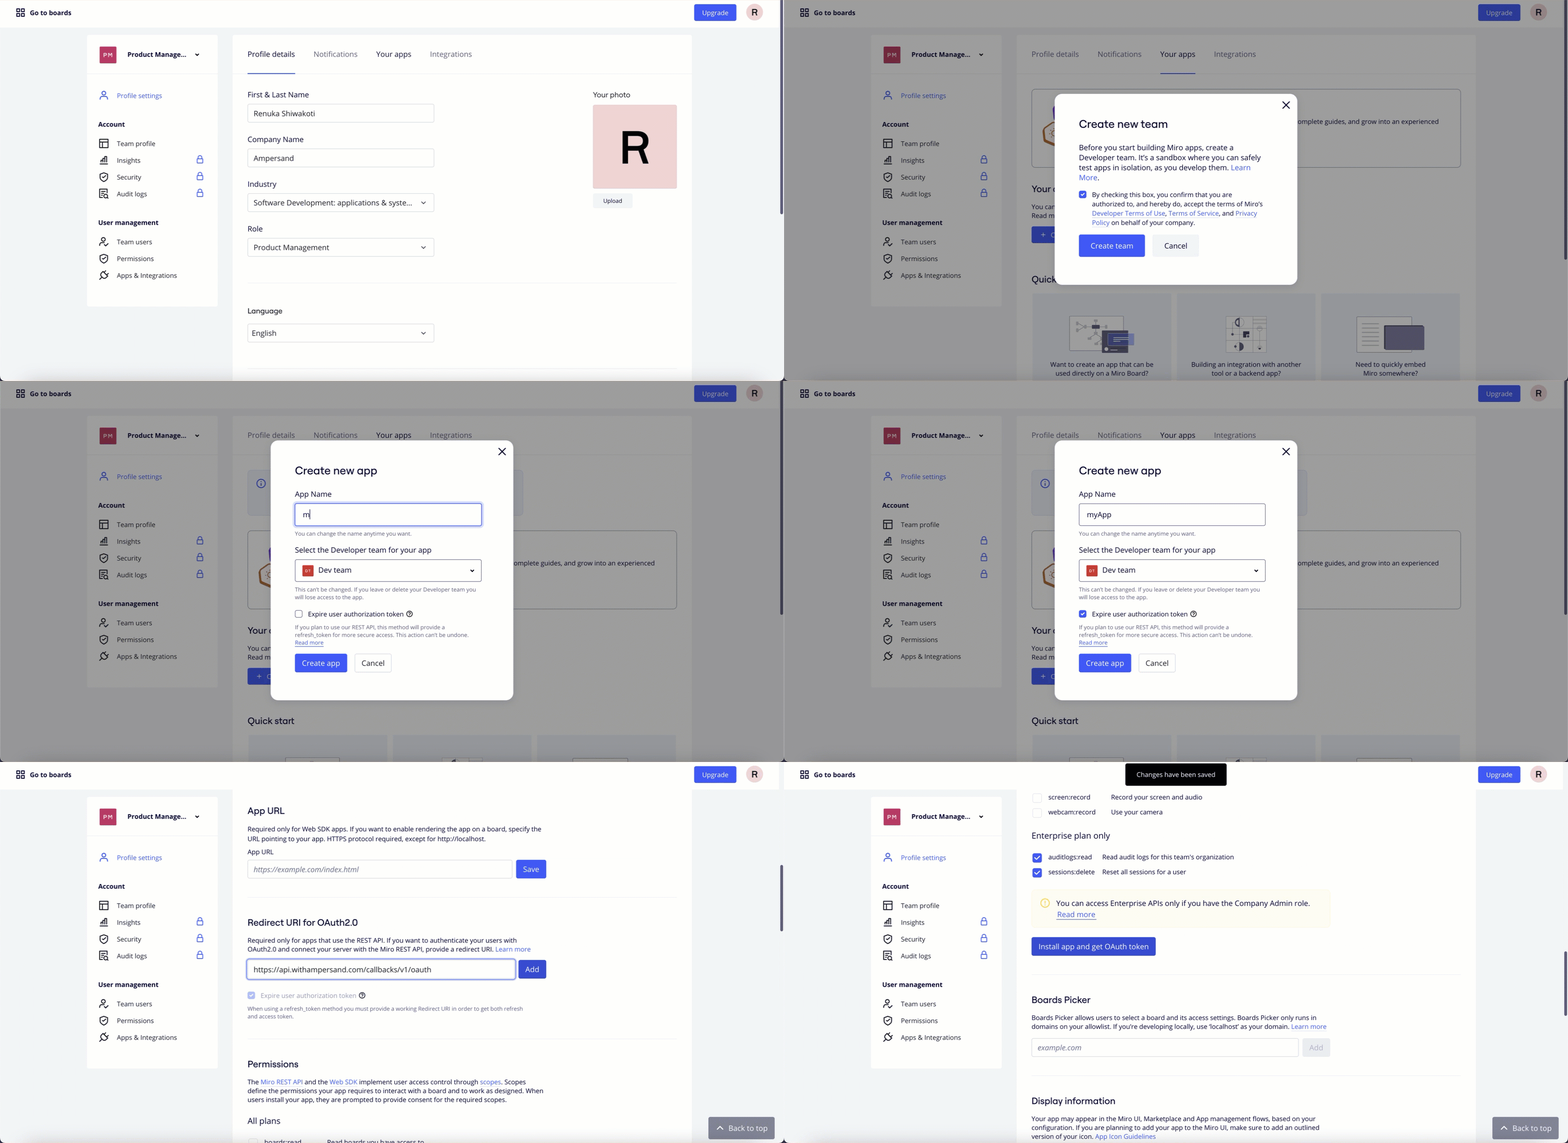
Follow the steps below to create a Miro app and add the Ampersand redirect URL:- Log in to your Miro account.
- In Miro Dashboard, click on your profile icon in the top-right corner and select Settings from the dropdown menu.
- Go to the Your apps tab.
- Click Create new app to create a new app under your account.
-
In the Create new app dialog, provide the following details:
- App Name: Enter a descriptive name for your application.
- Select your development team from the menu.
- Click Create app to proceed.
- In the App Credentials section, the Client ID and Client Secret will be generated automatically.

- In the Redirect URI section, enter the Ampersand redirect URL:
https://api.withampersand.com/callbacks/v1/oauth - Under Permissions, select the appropriate scopes for your app.

Add Your Miro App Info to Ampersand
- Log in to your Ampersand Dashboard.
-
Select the project where you want to create a Miro integration.

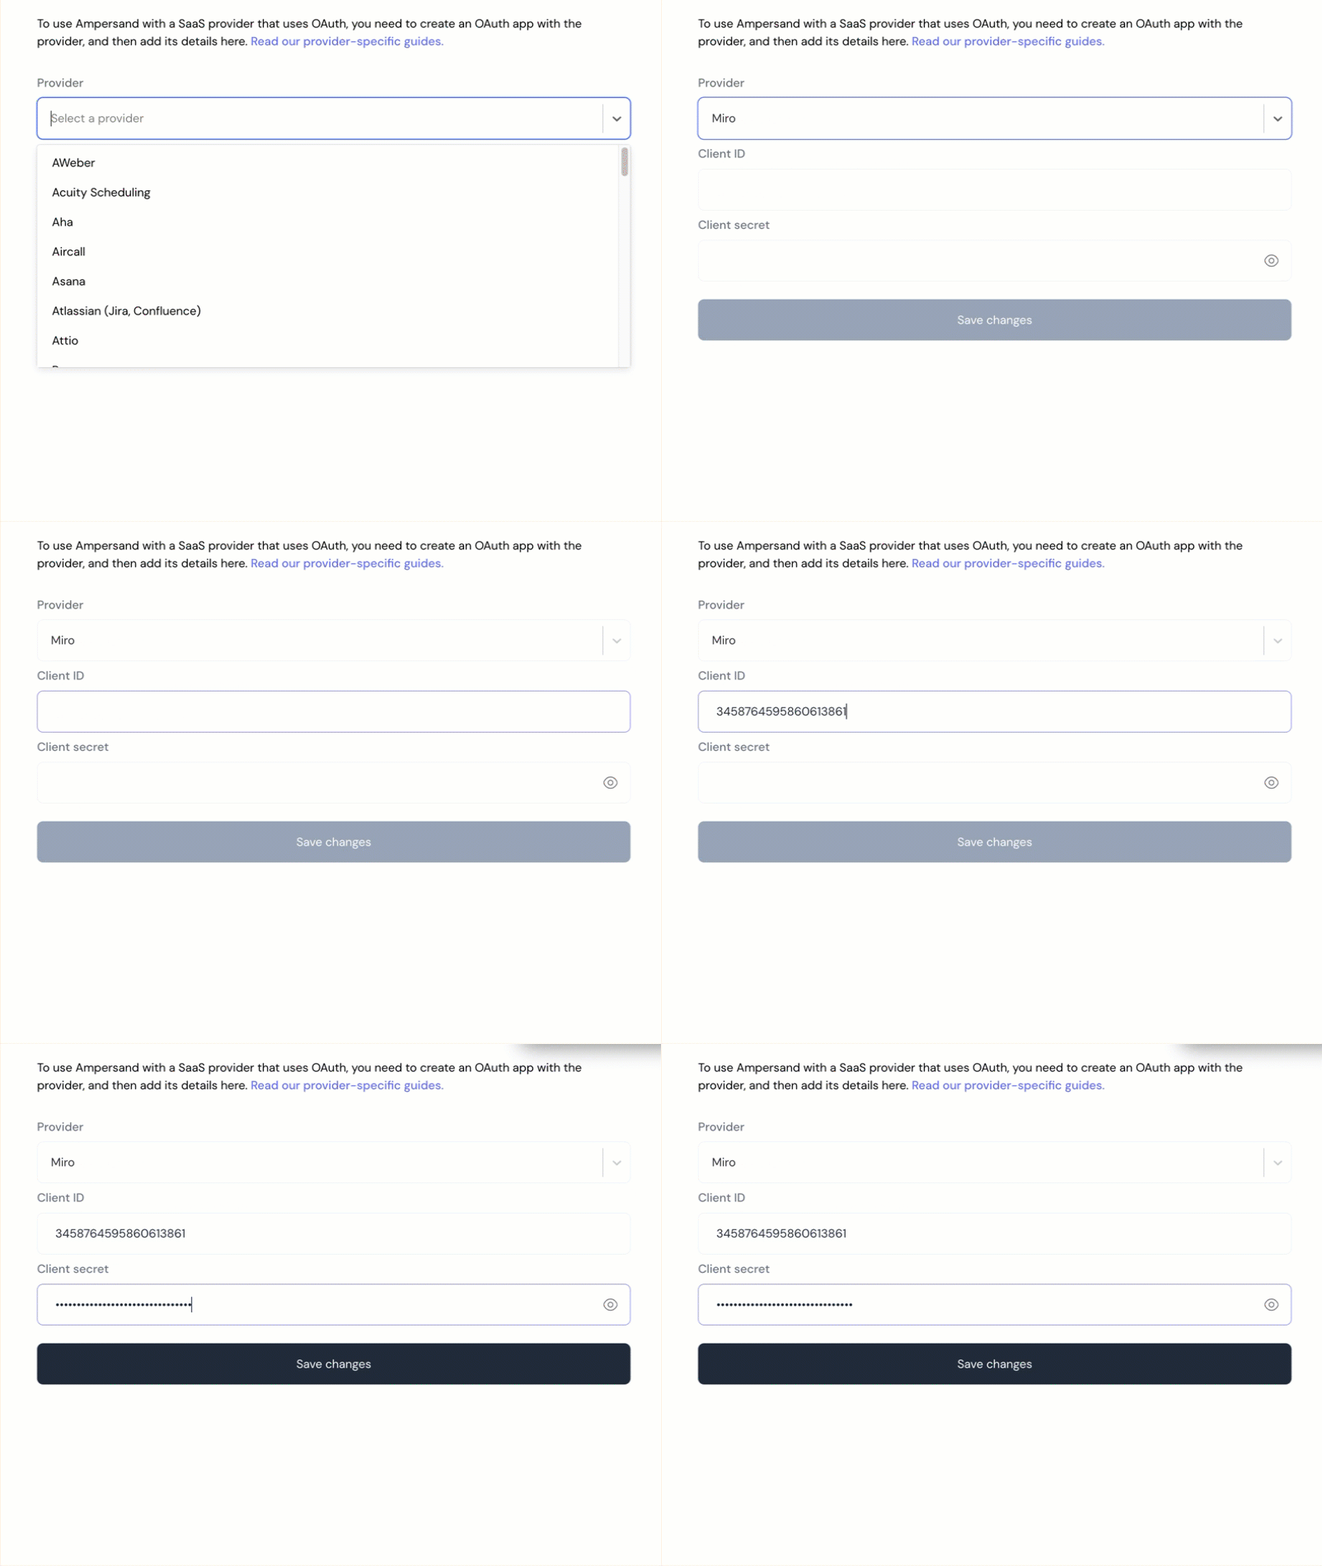
- Select Provider apps.
- Select Miro from the Provider list.
-
Enter the previously obtained Client ID in the Client ID field and Client Secret in the Client Secret field.

- Click Save changes to finalize the integration.

