What’s supported
Supported actions
This connector supports:- Read Actions, including full historic backfill and incremental read.
- Write Actions.
- Proxy Actions, using the base URL
https://api.linear.app/graphql.
Supported Objects
The Linear connector supports reading to the following objects:- attachments
- auditEntries
- comments
- customers
- cycles
- documents
- favorites
- initiatives
- issues
- notifications
- projects
- projectStatuses
- teamMemberships
- teams
- triageResponsibilities
- users
- workflowStates
Example integration
For an example manifest file of an Linear integration, visit our samples repo on Github.Before you get started
To connect Linear with Ampersand, you need a Linear Account. Once your account is created, you’ll need to create an app in Linear and obtain the following credentials from your app:- Client ID
- Client Secret
Creating a Linear App
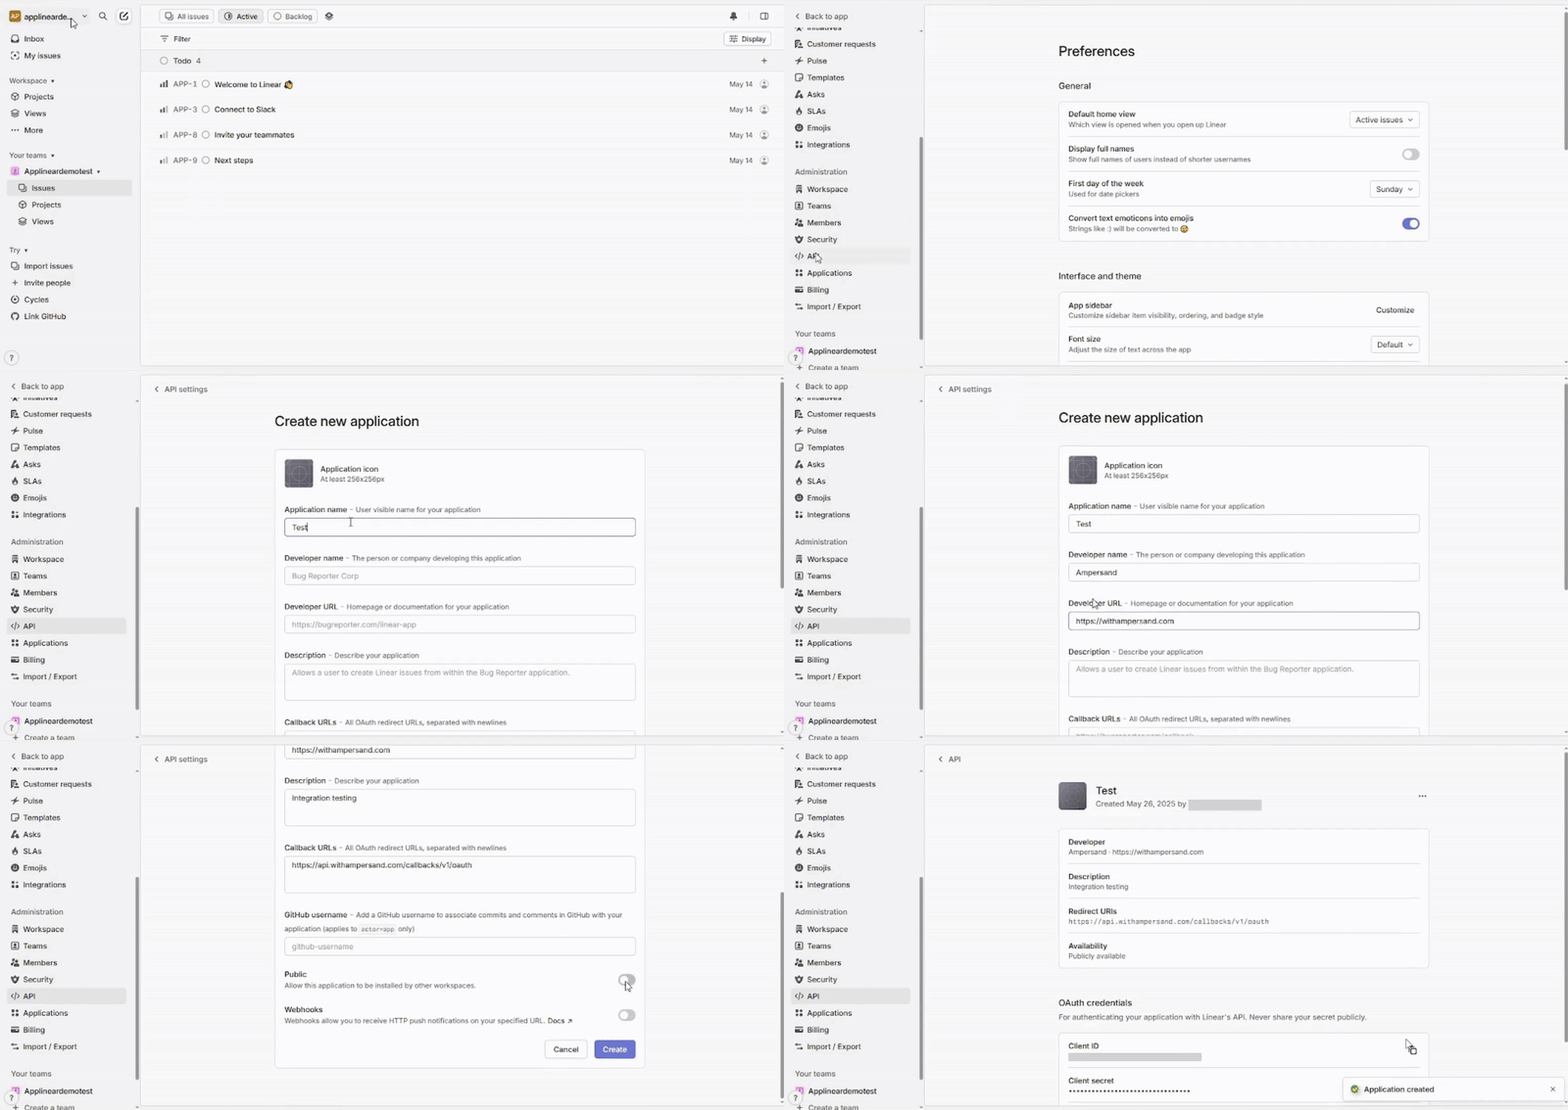
Follow the steps below to create a Linear app.- Log in to your Linear account.
- Once logged in, Click the dropdown next to your workspace name in the top-left corner, then select Settings from the menu.
- Navigate to API menu under Administration section.
- Click New OAuth Application.
- Enter the Application name, Developer name and Developer URL in the respective sections.
-
Enter the Ampersand Callback URLs:
https://api.withampersand.com/callbacks/v1/oauthin the Callback URLs section. -
[Optional] Enable the Public option if you wish to allow this app to be installed by other workspaces.

Add Your Linear App Info to Ampersand
- Log in to your Ampersand Dashboard.
-
Select the project where you want to create a Linear integration.

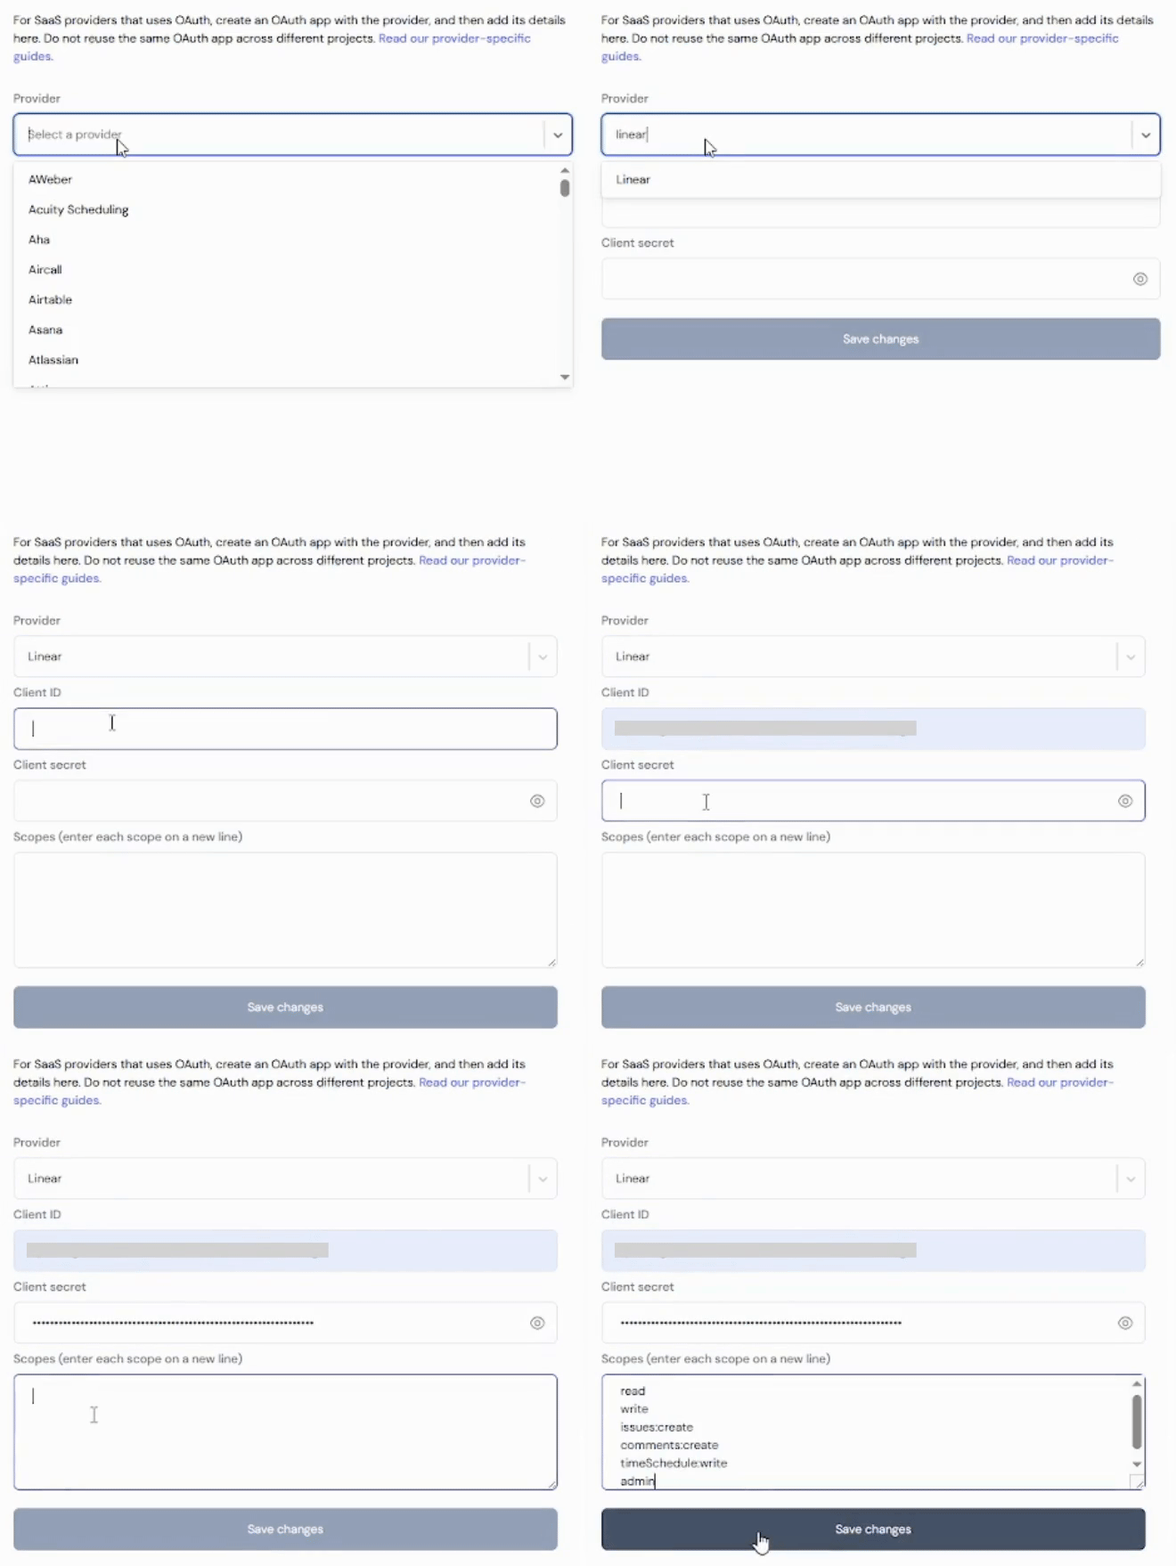
- Select Provider Apps.
- Select Linear from the Provider list.
- Enter the previously obtained Client ID in the Client ID field and the Client Secret in the Client Secret field.
-
For Scopes you can start with
write(which grants the app write access to all objects) or use more targeted scopesissues:createorcomments:create.
Check Linear’s documentation for more details.

- Create a manifest file using the example.
- Deploy it using the amp CLI.
- If you are using Read Actions, create a destination.
- Embed the InstallIntegration UI component.
- Start using the connector!
- If your integration has Read Actions, you’ll start getting webhook messages.
- If your integration has Write Actions, you can start making API calls to our Write API.
- If your integration has Proxy Actions, you can start making Proxy API calls.

