What’s supported
Supported actions
This connector supports:- Read Actions, including full historic backfill. Please note that incremental read is not supported, a full read of the Constant Contact instance will be done for each scheduled read.
- Write Actions.
- Proxy Actions, using the base URL
https://api.cc.email.
- account_emails
- activities (read only)
- contact_lists
- contact_tags
- contacts
- email_campaign_summaries (read only)
- email_campaign_activities (write only)
- email_campaigns
- privileges (read only)
- segments
Before you get started
To integrate Constant Contact with Ampersand, you must have a Constant Contact Developer account and obtain the necessary credentials. Once your account is set up, you’ll need to create an app in Constant Contact to get the following credentials:- Client ID
- Client Secret
Create a Constant Contact account
Here’s how to sign up for a Constant Contact account:- Go to the Constant Contact Sign Up page.
- Sign up using your preferred method and follow the instructions to create your account.
Creating a Constant Contact app
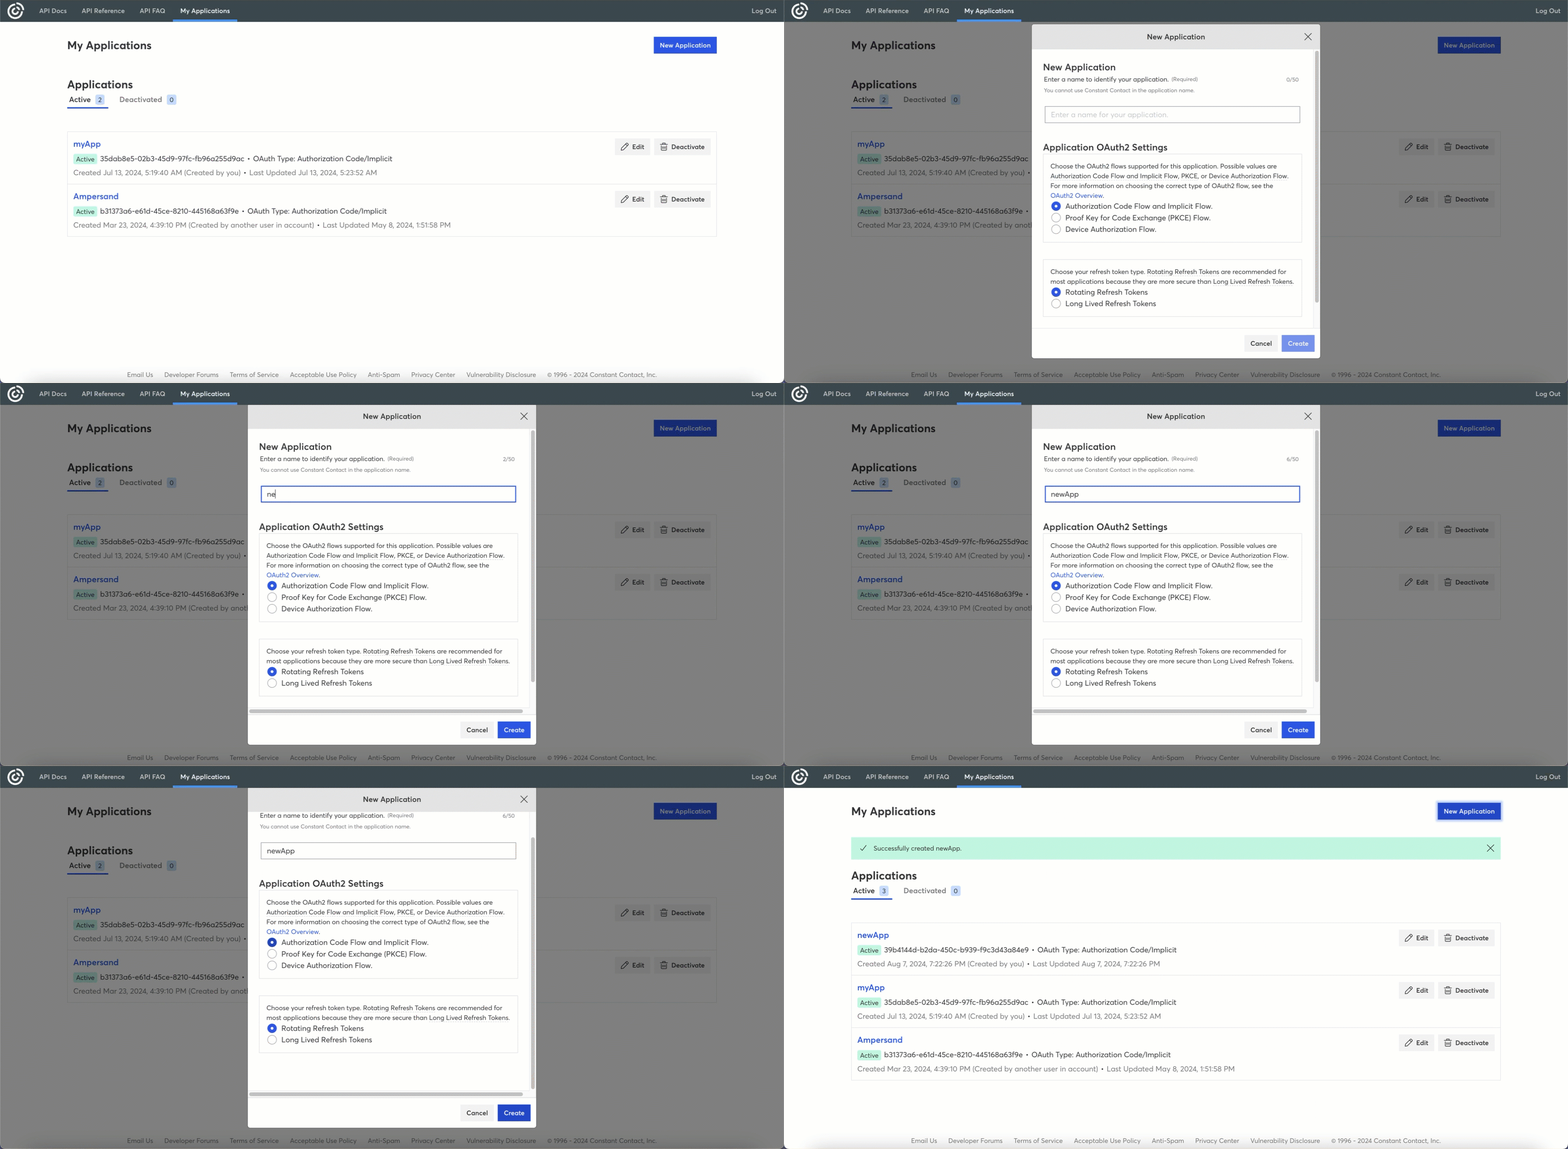
Follow these steps to create an app in Constant Contact and add the Ampersand redirect URL:- Log in to your Constant Contact Developer Account.
- Go to My Applications.
- Click the New Application button.
- In the New Application dialog box, enter an Application Name for your app.
- Select an OAuth2 Flow.
- Choose a Refresh Token type.
- Click Create.

Adding Ampersand redirect URL in your app
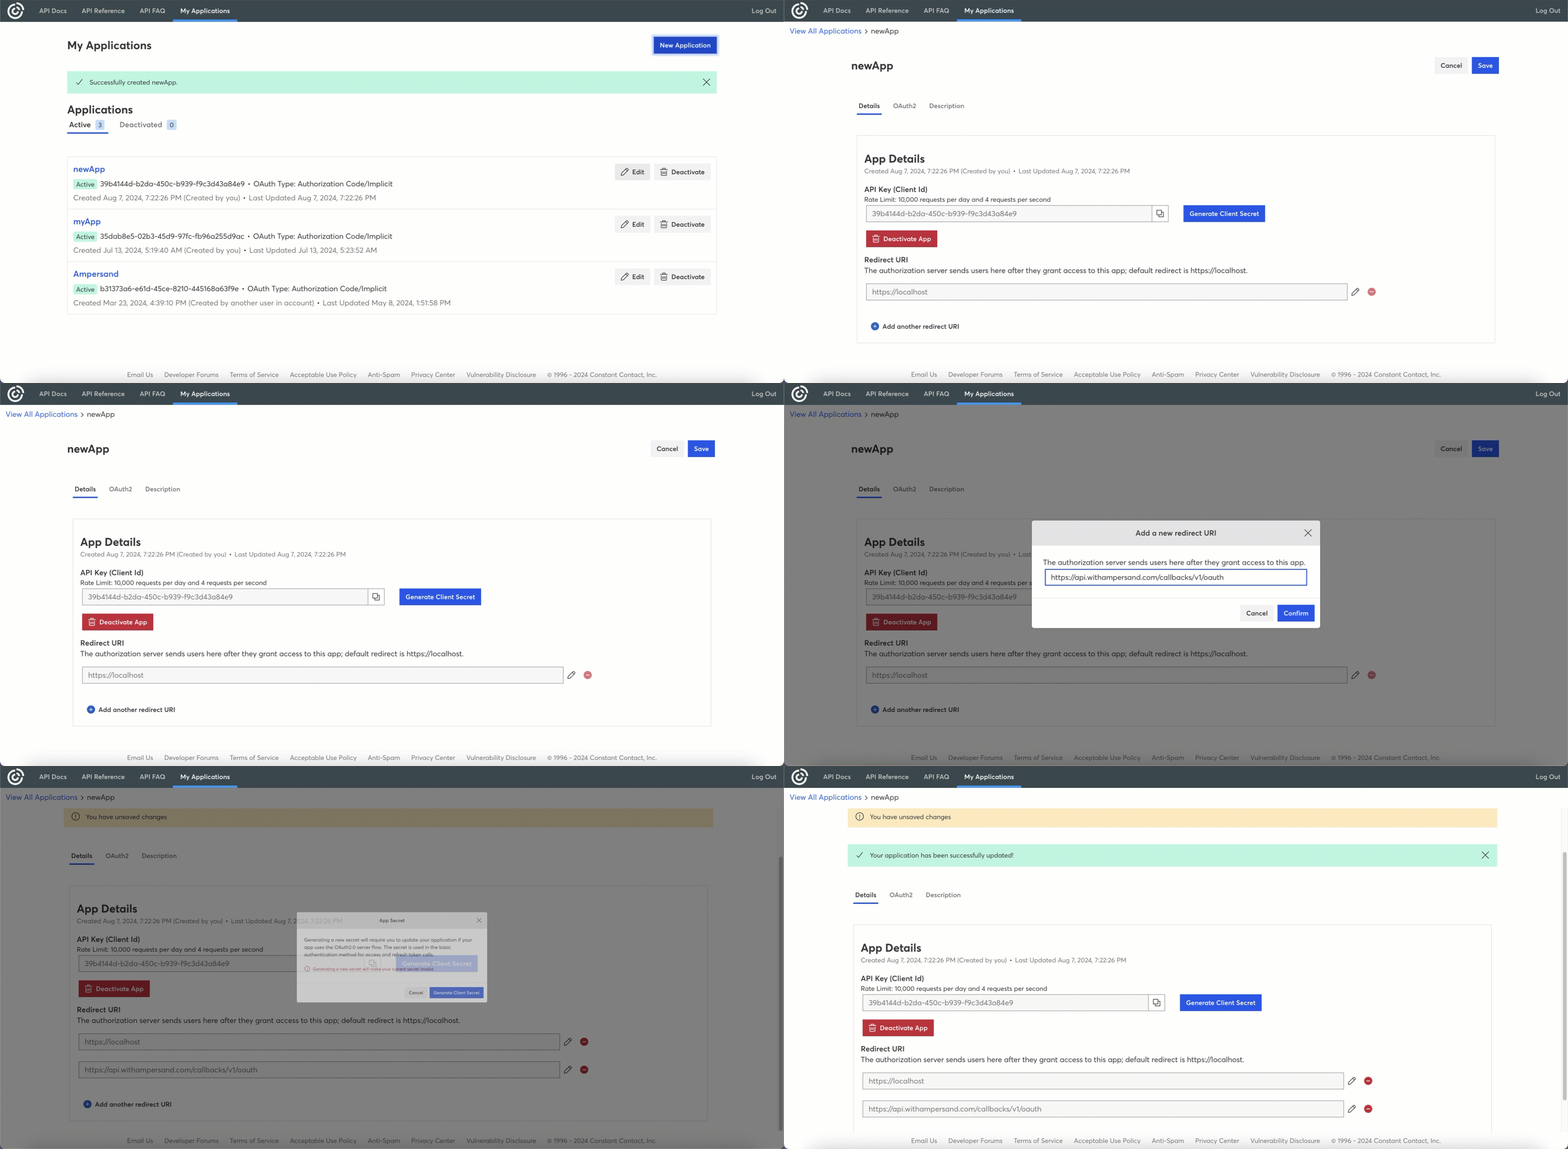
Once your app is created, you will be redirected to the My Applications page. Select your newly created application from the list and add the following details to your application to set up OAuth in your app.- In the Redirect URLs section, click Add another redirect URL.
- Enter the Ampersand redirect URL:
https://api.withampersand.com/callbacks/v1/oauth. - Click Confirm.
- You will find your Client ID in the API Key (Client ID) section. Click Generate Client Secret to create a Client Secret key for your app. Be sure to note both the Client ID and Client Secret, as you will need these to connect your app to Ampersand.

Add your Constant Contact app info to Ampersand
- Log in to your Ampersand Dashboard.
-
Select the project where you want to create a Constant Contact integration.

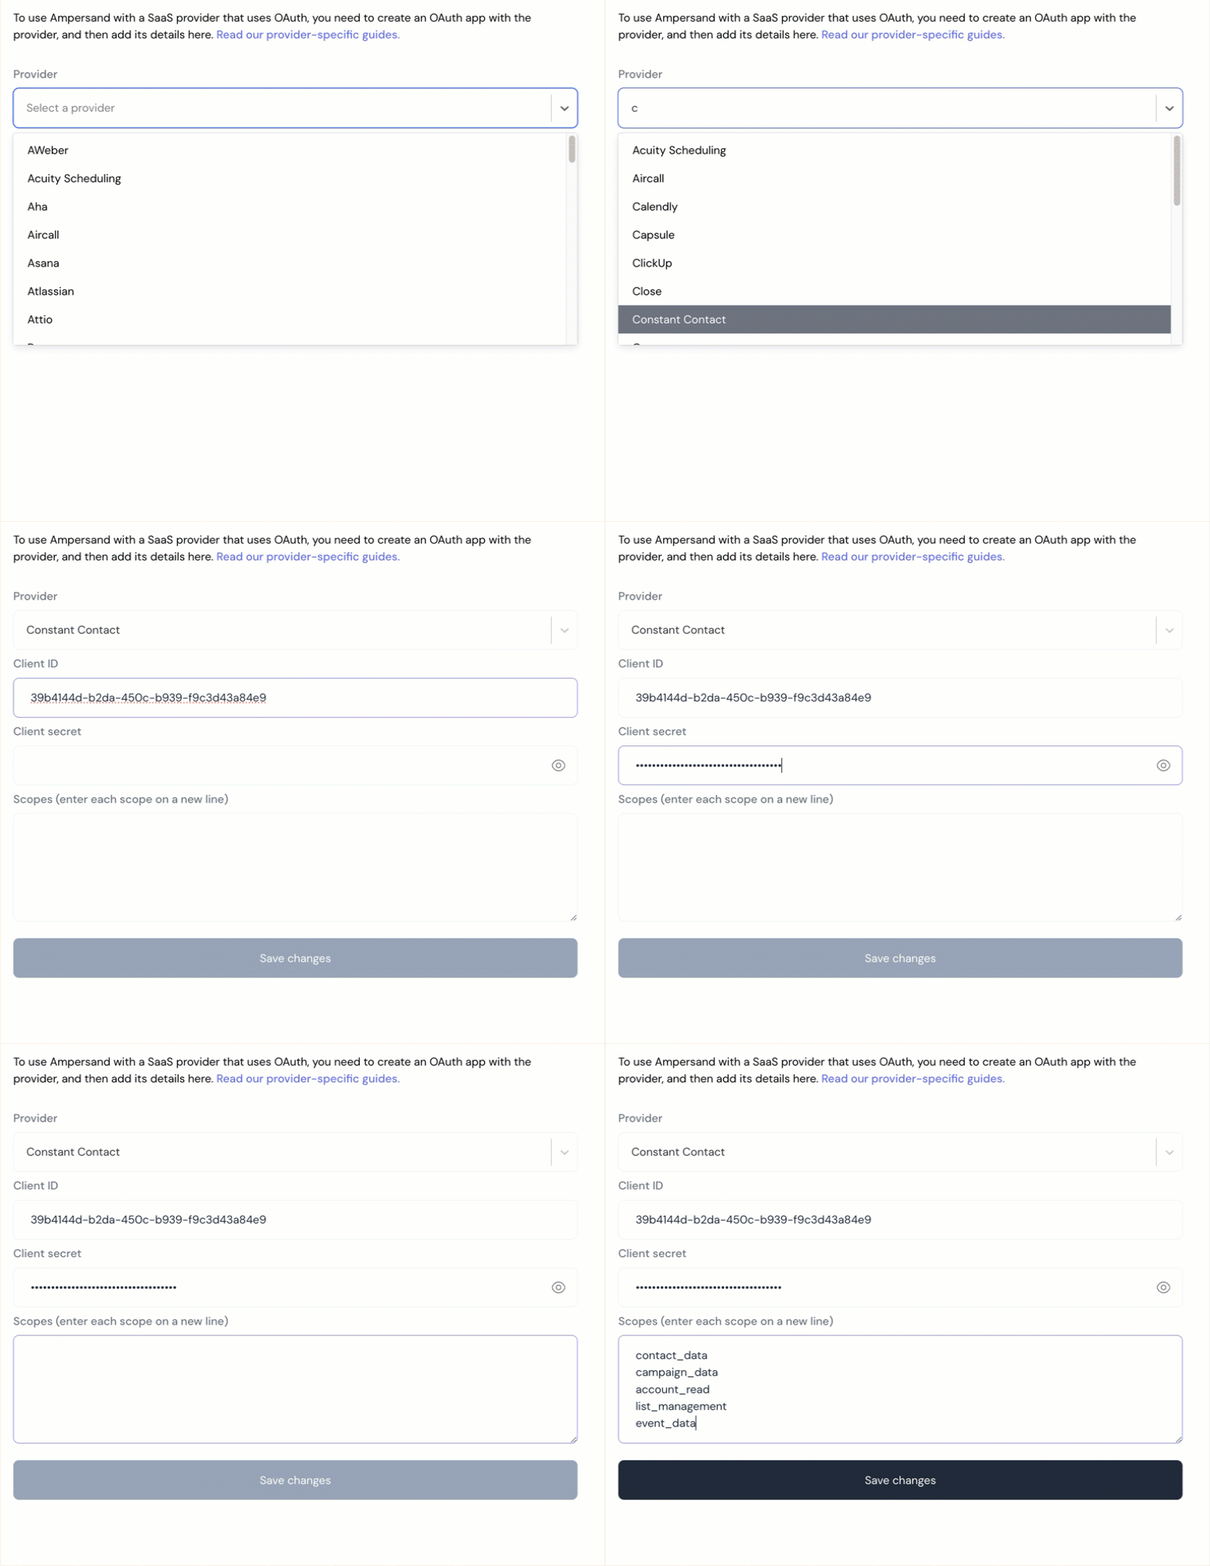
- Select Provider apps.
- Select Constant Contact from the Provider list.
-
Enter the previously obtained Client ID and Client Secret in the respective fields.

- Click Save Changes to finalize the integration.

