What’s Supported
Supported actions
This connector supports:- Read Actions, including full historic backfill. Please note that incremental read is supported only for
email_tracking,person_eventsandsmscurrently. For all other objects, a full read of the Loxo instance will be done per scheduled read. - Write Actions.
- Proxy Actions, using the base URL
https://{{.domain}}/api/{{.agency_slug}}.
Supported Objects
The Loxo connector supports writing and reading from the following objects:- activity_types (read)
- address_types (read)
- bonus_payment_types (read)
- bonus_types (read)
- companies (read, write)
- company_global_statuses (read)
- company_types (read)
- compensation_types (read)
- countries (read)
- currencies (read)
- deal_workflows (read)
- deals (read, write)
- disability_statuses (read)
- diversity_types (read)
- dynamic_fields (read)
- education_types (read)
- email_tracking (read)
- email_types (read)
- equity_types (read)
- ethnicities (read)
- fee_types (read)
- form_templates (read)
- forms (read, write)
- genders (read)
- job_categories (read)
- job_contact_types (read)
- job_owner_types (read)
- job_statuses (read)
- job_types (read)
- jobs (read, write)
- people (read, write)
- person_events (read, write)
- person_global_statuses (read)
- person_lists (read)
- person_share_field_types (read)
- person_types (read)
- phone_types (read)
- placements (read, write)
- pronouns (read)
- question_types (read)
- schedule_items (read)
- scorecards (read, write)
- scorecards/scorecard_recommendation_types (read)
- scorecards/scorecard_types (read)
- scorecards/scorecard_templates (read, write)
- scorecards/scorecard_visibility_types (read)
- seniority_levels (read)
- sms (read, write)
- social_profile_types (read)
- source_types (read, write)
- users (read)
- veteran_statuses (read)
- workflow_stages (read)
- workflows (read)
Example integration
For an example manifest file of an Loxo integration, visit our samples repo on Github.Using the connector
This connector uses API Key authentication, so you do not need to configure a Provider App before getting started. (Provider Apps are only required for providers using the OAuth2 Authorization Code grant type.)Note:
- To get the domain, log in to your Loxo account and check the URL in your browser’s address bar. It usually follows this pattern:
https://[your-domain-here].- To get the agency_slug, go to Settings > General under Workspace. In the Agency Info section, look at the Resume Forwarding Address — the part before the @ symbol is the agency_slug value.
- Create a manifest file similar to the example above.
- Deploy it using the amp CLI.
- Embed the InstallIntegration UI component, which will prompt the customer for an API key.
- Start using the connector!
- If your integration has Read Actions, you’ll start getting webhook messages.
- If your integration has Write Actions, you can start making API calls to our Write API.
- If your integration has Proxy Actions, you can start making Proxy API calls.
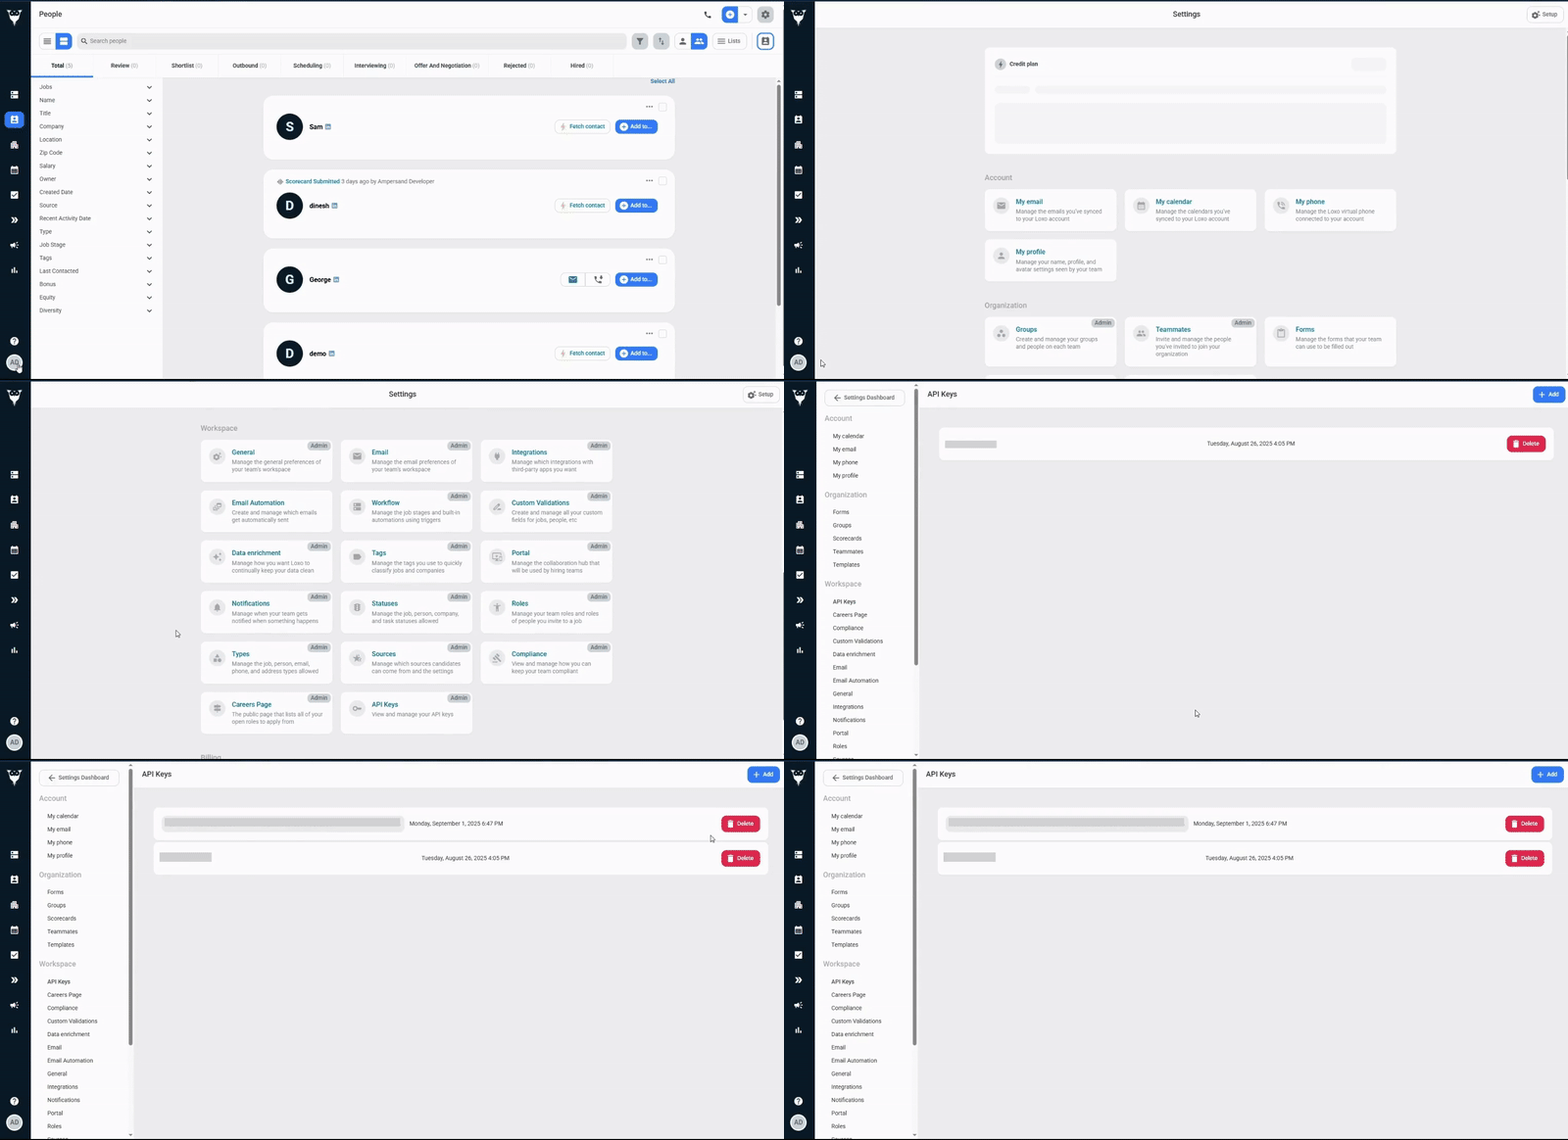
Creating an API key for Loxo
- Log in to your Loxo account.
- Navigate to settings and click API Keys under Workspace.
- Click Add Button.


