What’s Supported
Supported Actions
This connector supports:- Proxy Actions, using the base URL
https://{{.workspace}}.bynder.com/api.
Before You Get Started
To connect Bynder with Ampersand, you will need a Bynder Account. Once your account is created, you’ll need to create an app in your Bynder portal, configure the app, and obtain the following credentials from your app:- Client ID
- Client Secret
- Scopes
Create a Bynder Account
To create an account for your organization, you need to contact the Bynder Support team. An active account is required to log into your portal.Creating a Bynder App
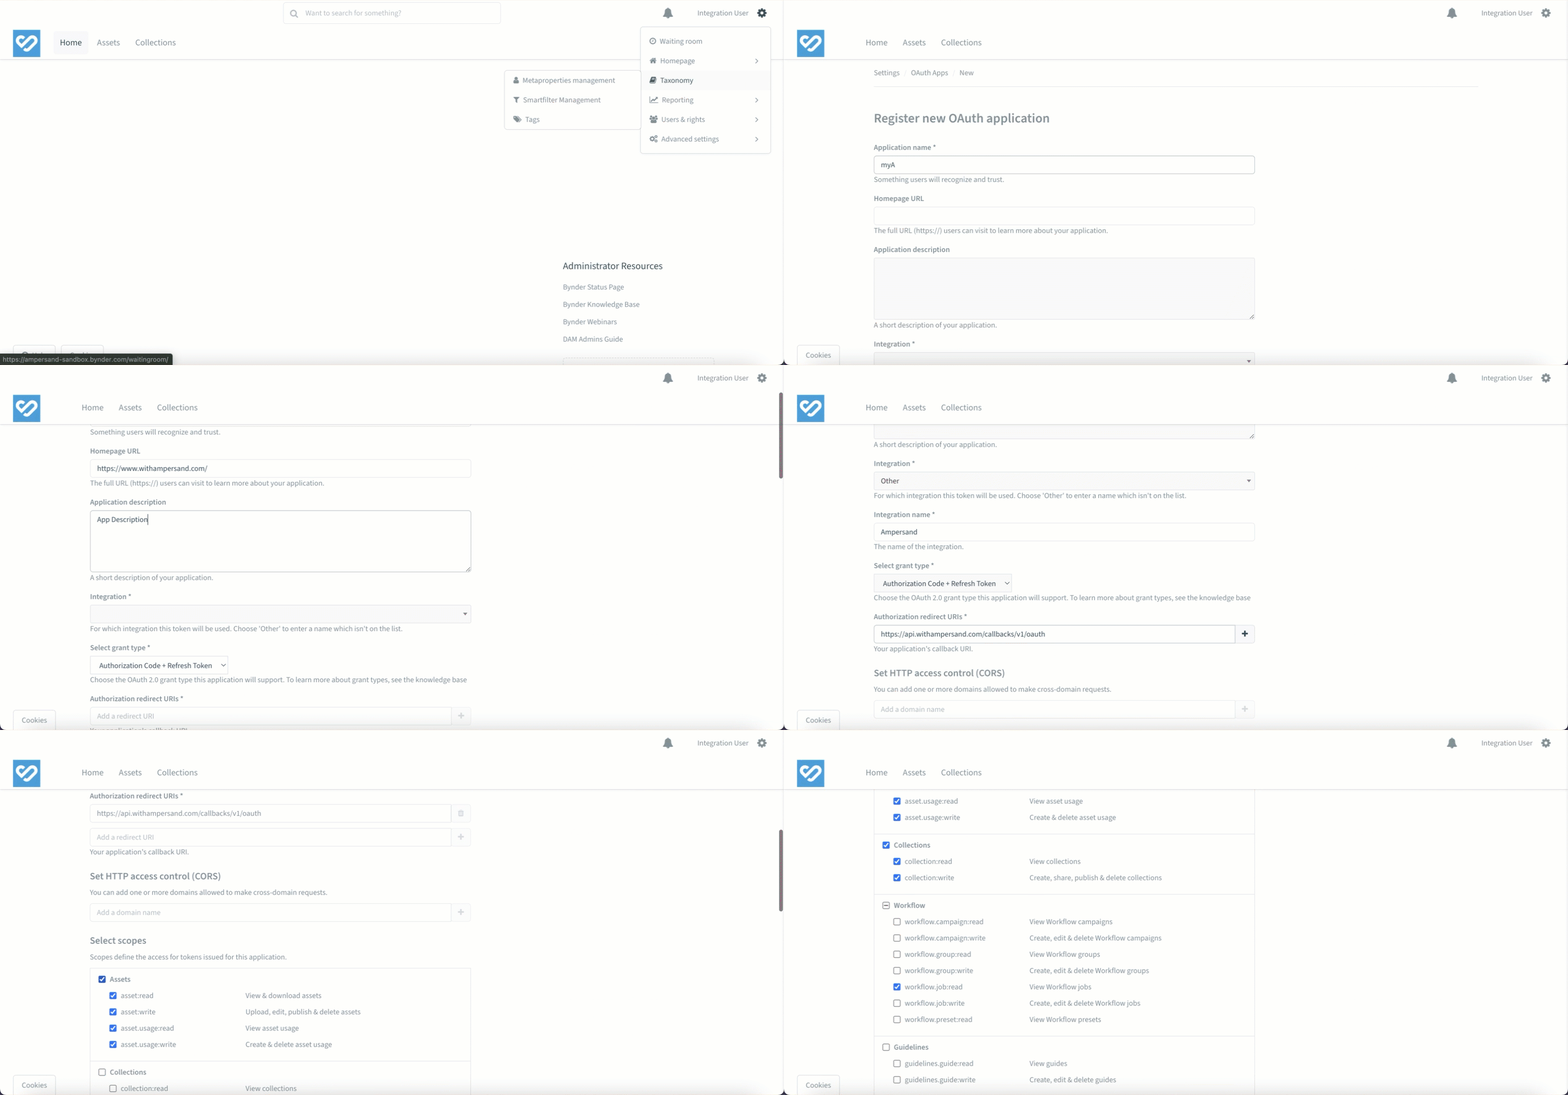
Once your Bynder account is setup, you can follow the steps below to create a Bynder app:- Log in to your Bynder Portal.
-
Navigate to
Settings >> Advanced Settings >> Portal Settings. - Go to Oauth Apps.
- Click the Add new app button.
-
Enter the following details to register your Oauth app:
- Application Name: The name of your app.
- Homepage URL: The URL of your app’s homepage.
- Application Description: A brief description of your app.
- Integration: Type of integration (e.g., API, SDK).
- Integration Name: Specific name for your integration.
- Grant Type: Choose between Authorization Code or Client Credentials.
- Authorization Redirect URIs: URL(s) for Bynder to redirect after authorization. Enter the Ampersand redirect URL:
https://api.withampersand.com/callbacks/v1/oauth.
- Select the scopes for your application. Bynder will authorize access to the selected scopes for your application.
- Click Register Application.

Add Your Bynder App Info to Ampersand
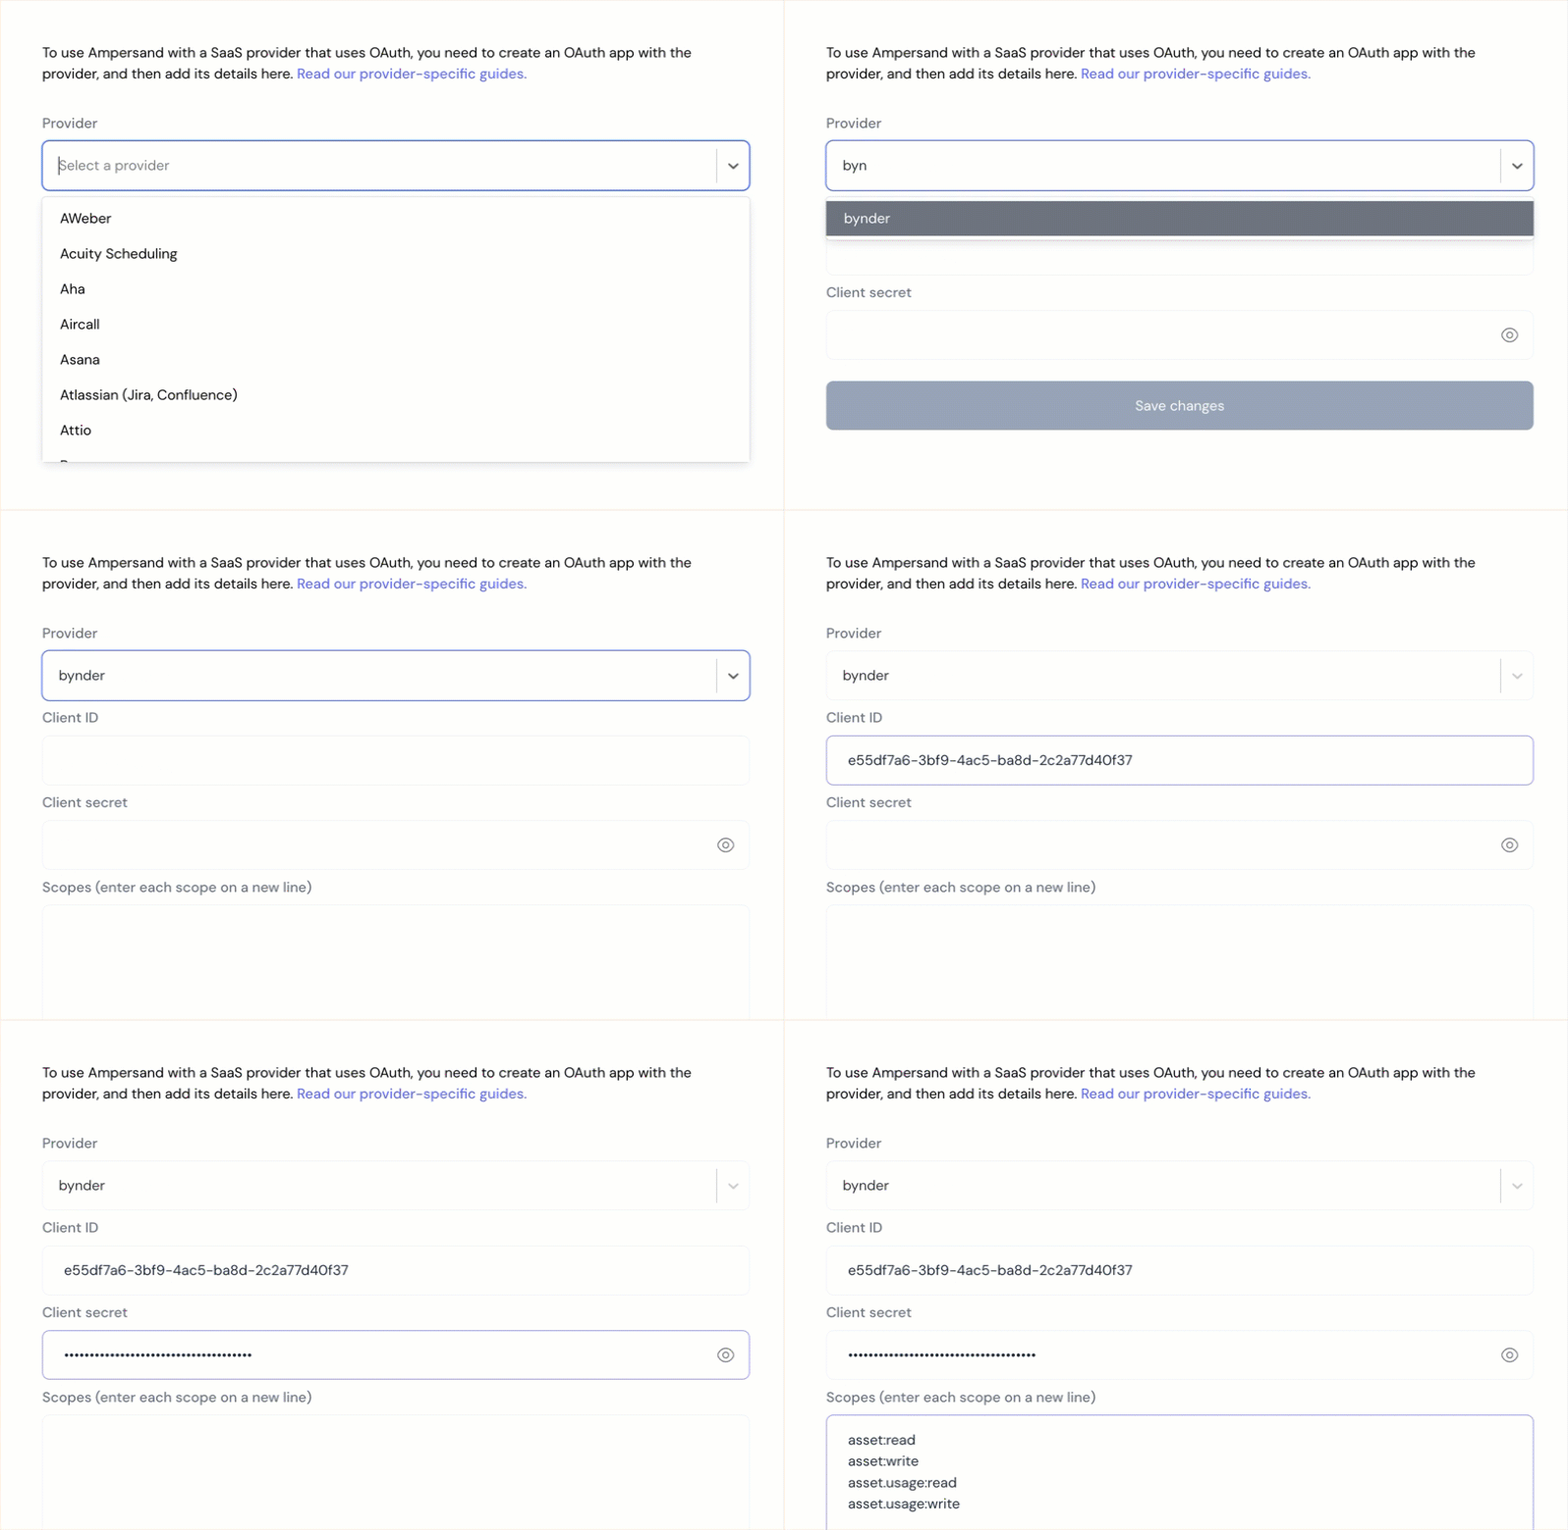
- Log in to your Ampersand Dashboard.
-
Select the project where you want to create a Bynder integration.

- Select Provider Apps.
- Select Bynder from the Provider list.
- Enter the previously obtained Client ID in the Client ID field and the Client Secret in the Client Secret field.
-
Enter the scopes set for your application in Bynder.

- Click Save Changes.

