What’s Supported
Supported Actions
This connector supports:- Read Actions, including full historic backfill. Please note that incremental read is not supported, a full read of the ClickUp instance will be done for each scheduled read.
- Proxy Actions, using the base URL
https://api.clickup.com.
Supported Objects
The CickUp connector supports reading from the following objects:- team (Read only)
Before you get started
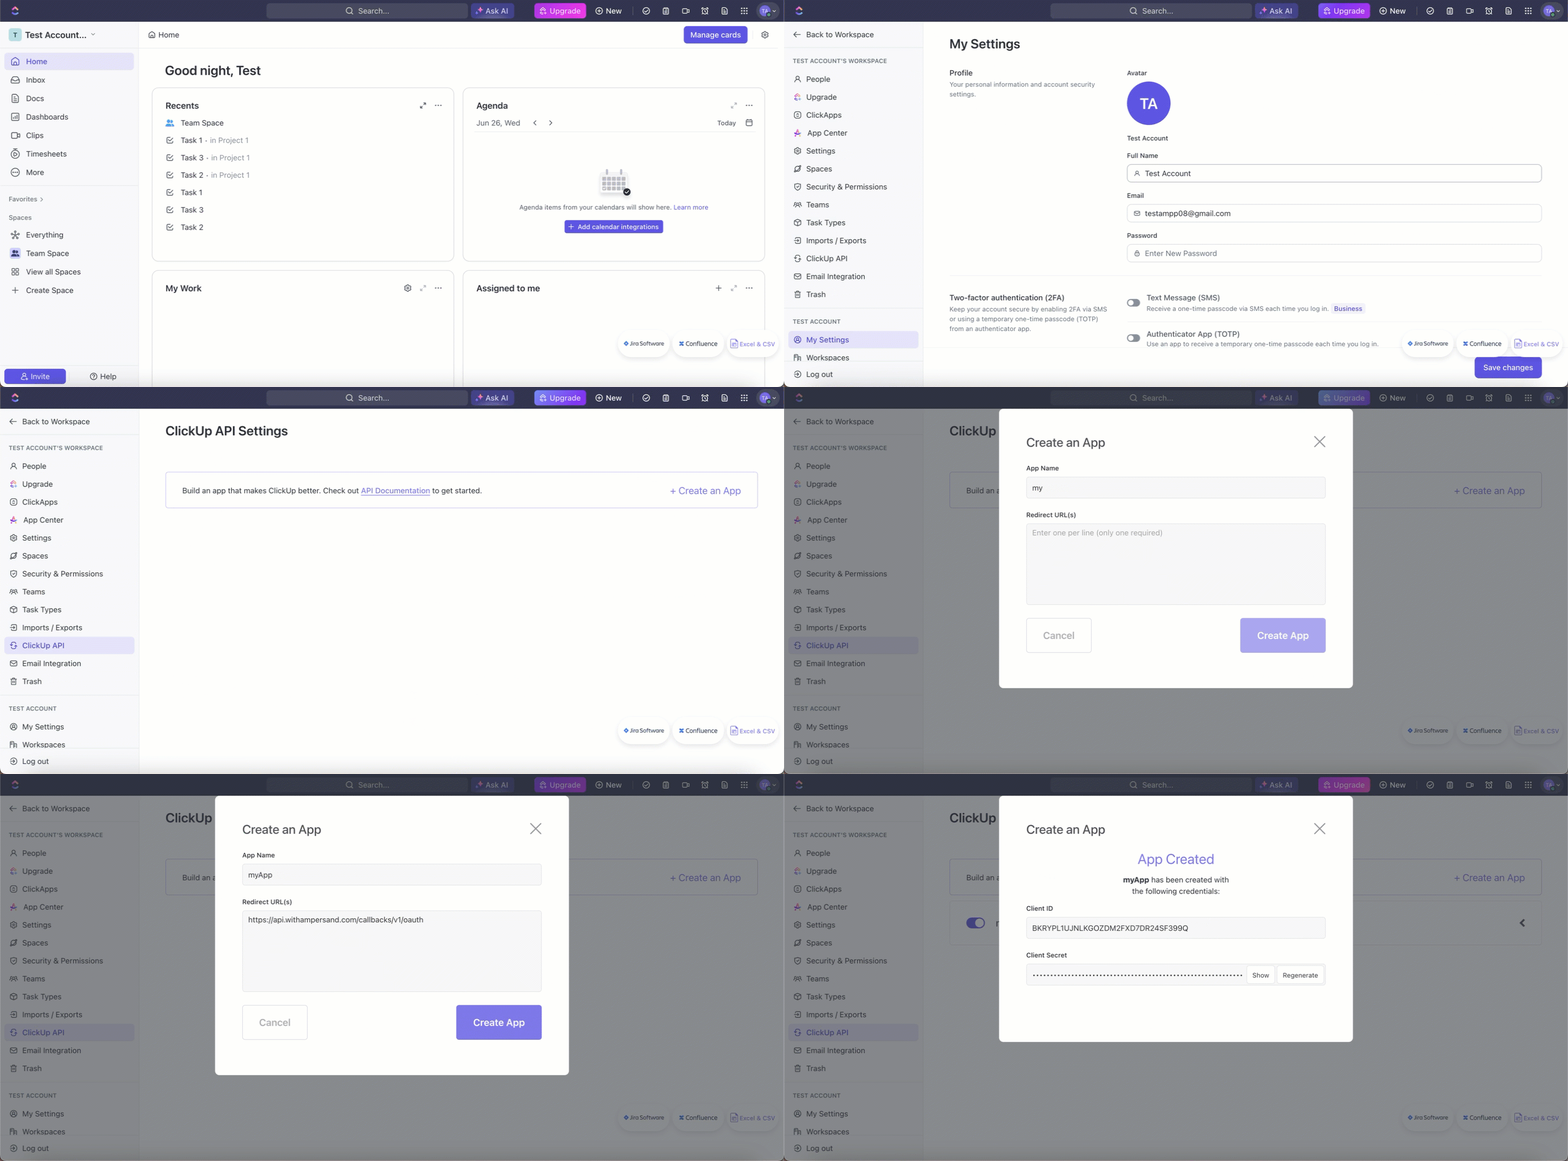
To integrate ClickUp with Ampersand, you will need a ClickUp Account. Once your account is created, you’ll need to create an app in ClickUp and obtain the following credentials from your app:- Client ID
- Client Secret
Create a ClickUp Account
Here’s how you can sign up for a ClickUp account:- Go to the ClickUp Sign Up page and create an account.
- Sign up using your preferred method.
Creating a ClickUp App
Follow the steps below to create a ClickUp app and add the Ampersand redirect URL in the app:- Log in to your ClickUp account.
- Click +Create an App.
- Enter your App Name.
-
Enter the Ampersand’s Redirect URL:
https://api.withampersand.com/callbacks/v1/oauth. -
Click Create App.

Add Your ClickUp App Info to Ampersand
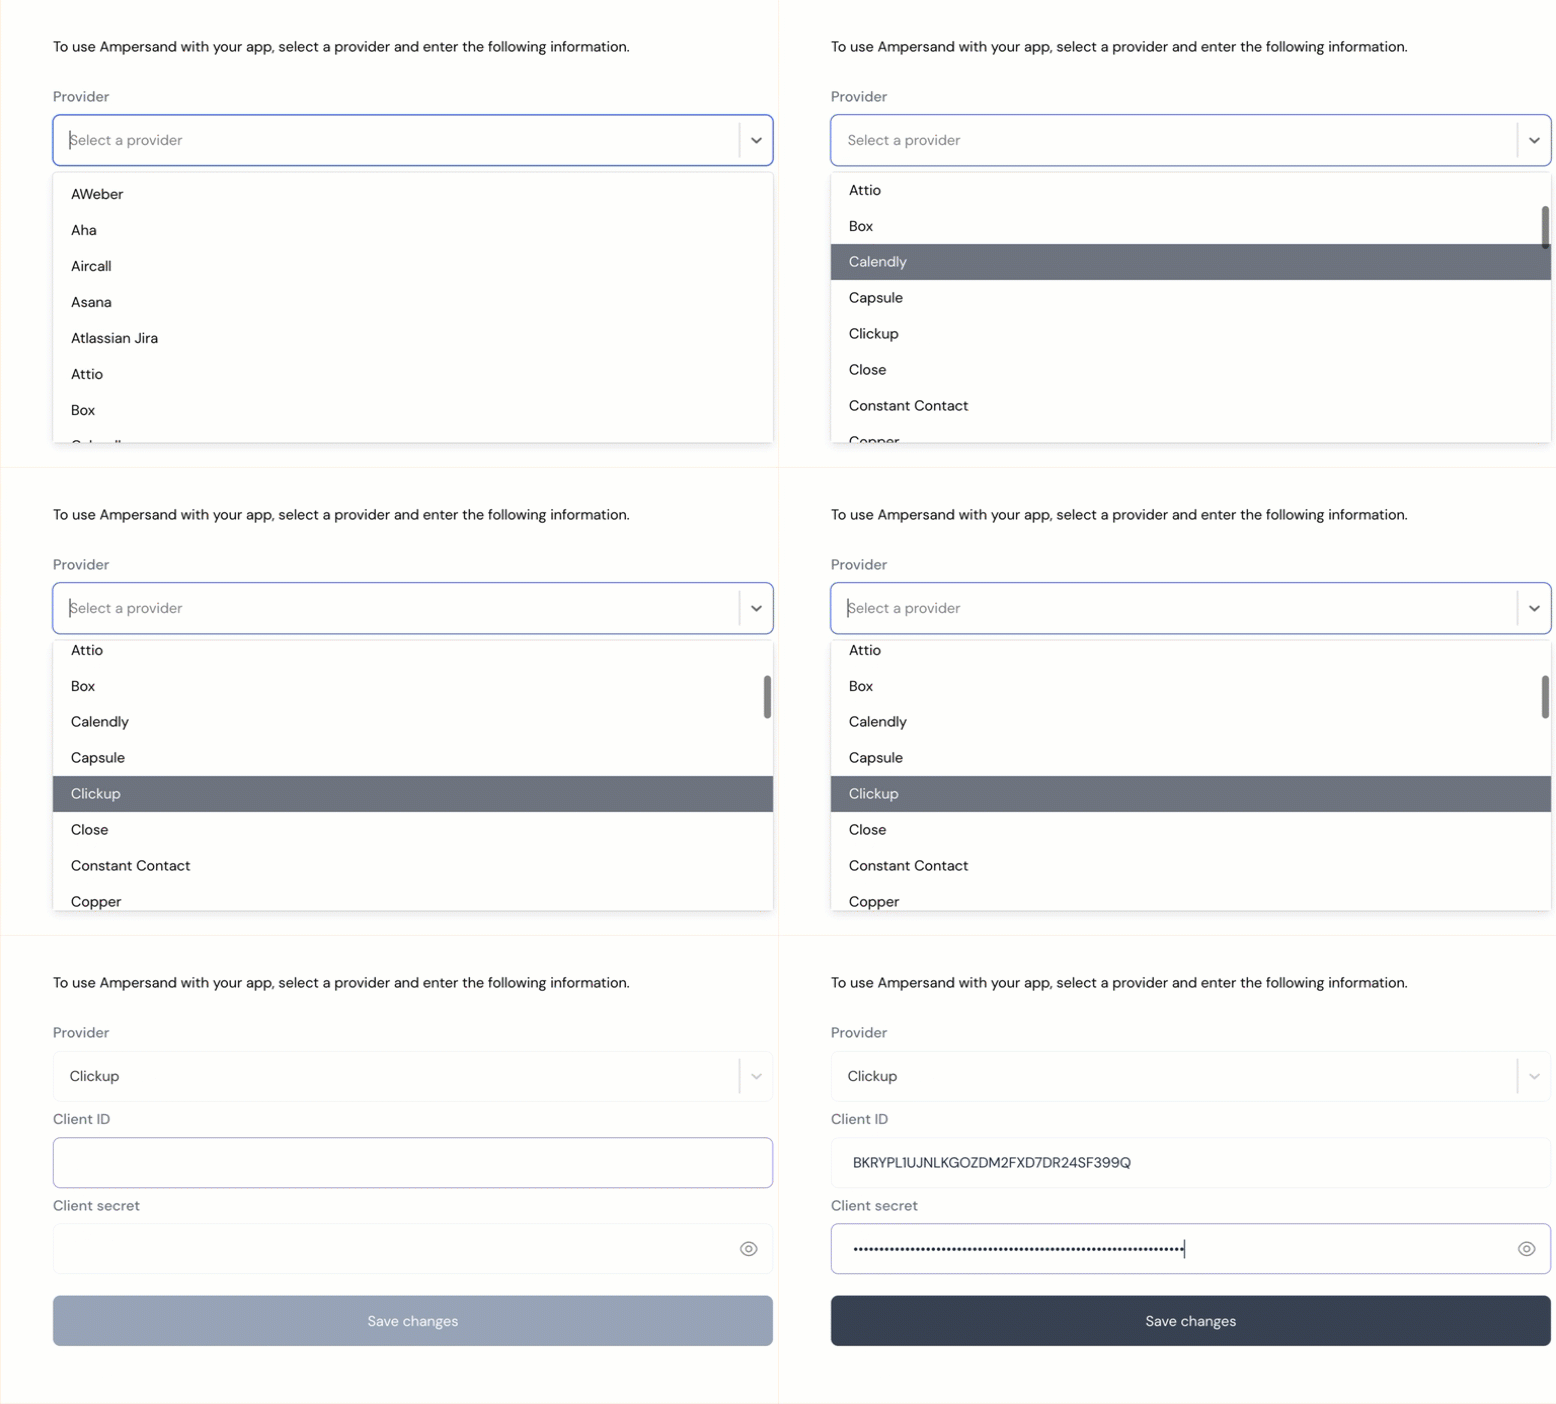
- Log in to your Ampersand Dashboard.
-
Select the project where you want to create a ClickUp integration.

- Select Provider apps.
- Select ClickUp from the Provider list.
-
Enter the previously obtained Client ID in the Client ID field and the Client Secret in the Client Secret field.

- Click Save changes.
Using the connector
To start integrating with ClickUp:- Create a manifest file using the example.
- Deploy it using the amp CLI.
- If you are using Read Actions, create a destination.
- Embed the InstallIntegration UI component. The UI component will prompt the customer for OAuth authorization.
- Start using the connector!
- If your integration has Read Actions, you’ll start getting webhook messages.
- If your integration has Proxy Actions, you can start making Proxy API calls.

