What’s supported
Supported actions
This connector supports:- Read Actions, including full historic backfill. Please note that incremental read is not supported, a full read of the Chilipiper instance will be done for each scheduled read.
- Write Actions.
- Proxy Actions, using the base URL
https://fire.chilipiper.com.
Supported Objects
The Chilipiper connector supports reading from the following objects: The Chilipiper connector supports writing to the following objects:- distribution
- user/invite
- user/licenses
- team/users/add
- team/users/remove
- workspace/users/add
- workspace/users/remove
- workspace/users/remove-from-all
Example integration
For an example manifest file of a ChiliPiper integration, visit our samples repo on Github.Before You Get Started
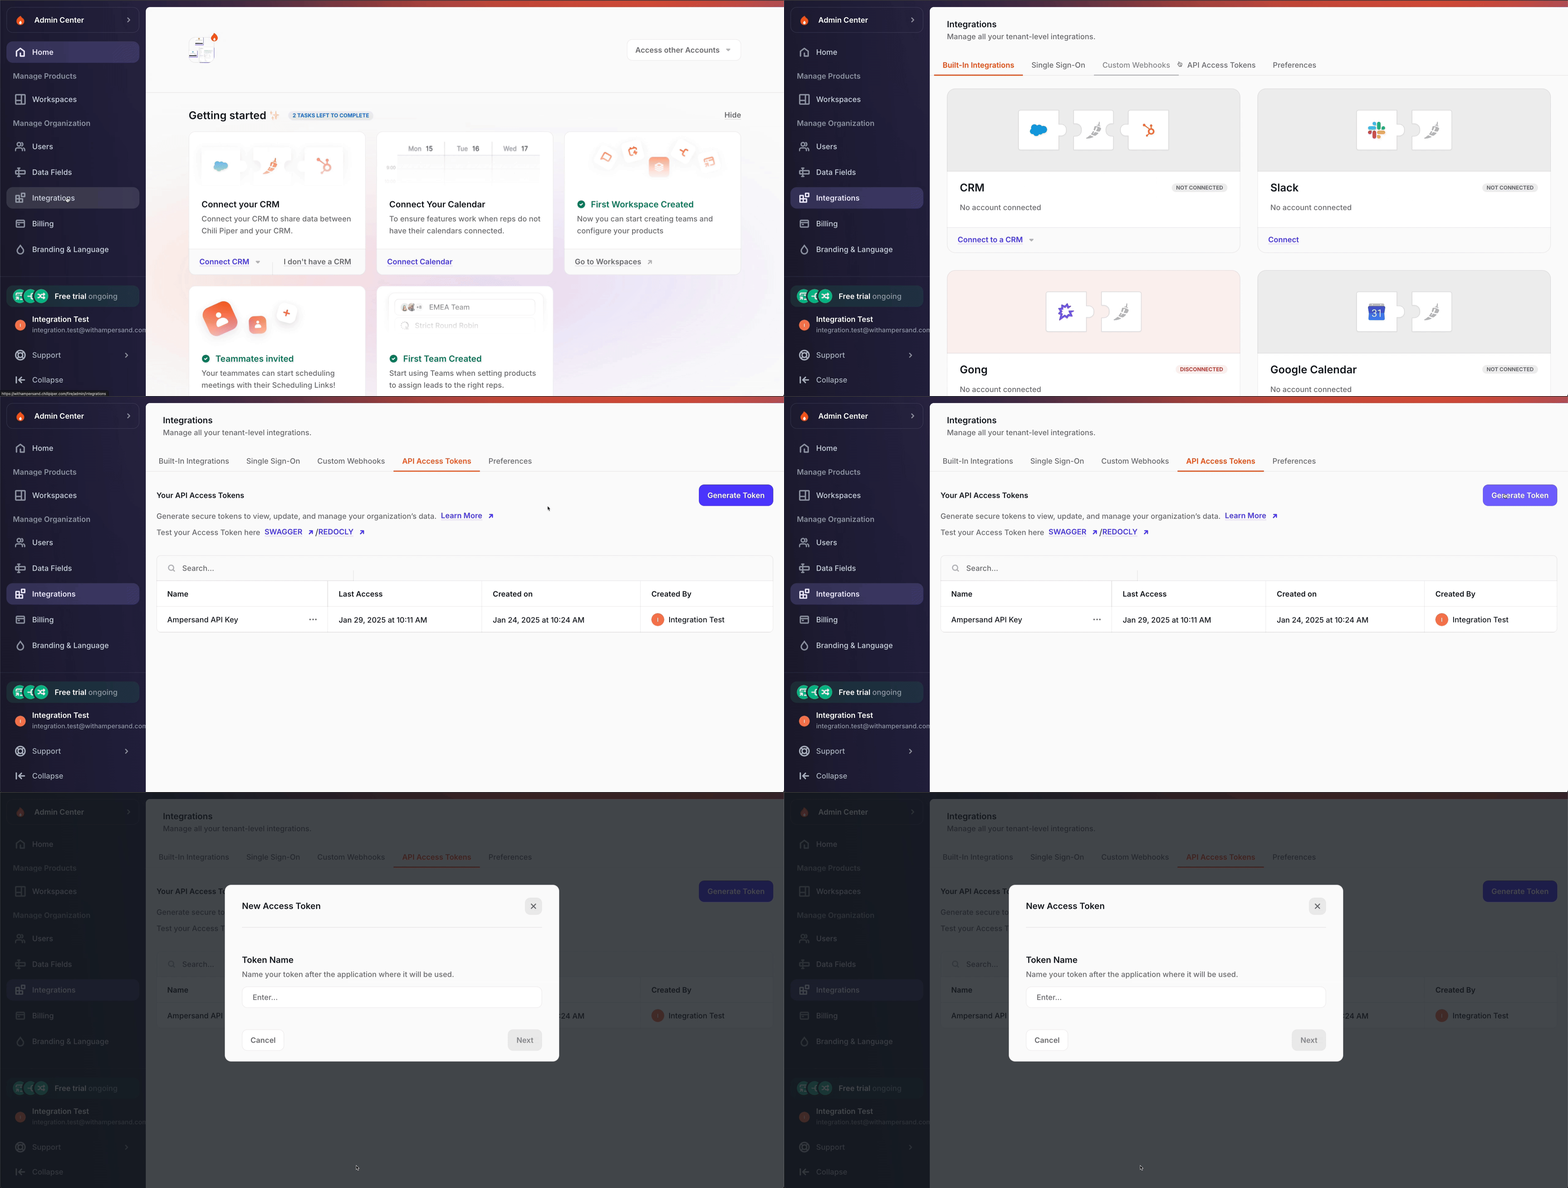
Creating an API key for ChiliPiper
- Log in to your chilipiper instance
- Go to Integrations
- Click on the API Access Tokens
- Click On Generate Token

Using the connector
This connector uses API Key auth, which means that you do not need to set up a Provider App before getting started. (Provider Apps are only required for providers that use OAuth2 Authorization Code grant type.) To start integrating with ChiliPiper:- Create a manifest file like the example.
- Deploy it using the amp CLI.
- If you are using Read Actions, create a destination.
- Embed the InstallIntegration UI component. The UI component will prompt the customer for an API key.
- Start using the connector!
- If your integration has Read Actions, you’ll start getting webhook messages.
- If your integration has Write Actions, you can start making API calls to our Write API.
- If your integration has Proxy Actions, you can start making Proxy API calls.

