

What’s supported
Supported actions
This connector supports:- Read Actions, including full historic backfill. Please note that incremental read is only supported for
jobs,jobs/history,jobs/custom-fields,contacts/custom-fields,estimates/sections, andcompany-settings/custom-fields. - Write Actions.
- Subscribe Actions. Ampersand creates and updates the AccuLynx webhook subscription on your behalf when the customer installs your integration — no manual webhook setup is required in the AccuLynx UI.
- Proxy Actions, using the base URL
https://api.acculynx.com.
Supported objects
The AccuLynx connector supports the following objects:| Object | Read | Write | Subscribe |
|---|
jobs/financials, the connector will first list all jobs, and then read the financials for all jobs.)
Writes are limited by AccuLynx’s API:
- Create-only:
jobs,contacts, and their nested write endpoints (except custom-fields) — AccuLynx has no update endpoints for these records. - Update-only:
contacts/custom-fieldsandjobs/custom-fields— you can change a custom field’s value, but cannot create, update, or delete the field definitions themselves.
contacts and jobs records.
Subscribe events: create and update are supported directly on contacts and jobs. The other 6 subscribe-enabled objects in the table above are subscribed via otherEvents under their parent contacts or jobs object in your amp.yaml. AccuLynx emits additional jobs change topics too — financial, appointment, category, trade/work-type, and more — which you subscribe to the same way. See AccuLynx’s webhook topics reference for the full list.
Example integration
For an example manifest file of an AccuLynx integration, visit our samples repo on Github.Before you get started
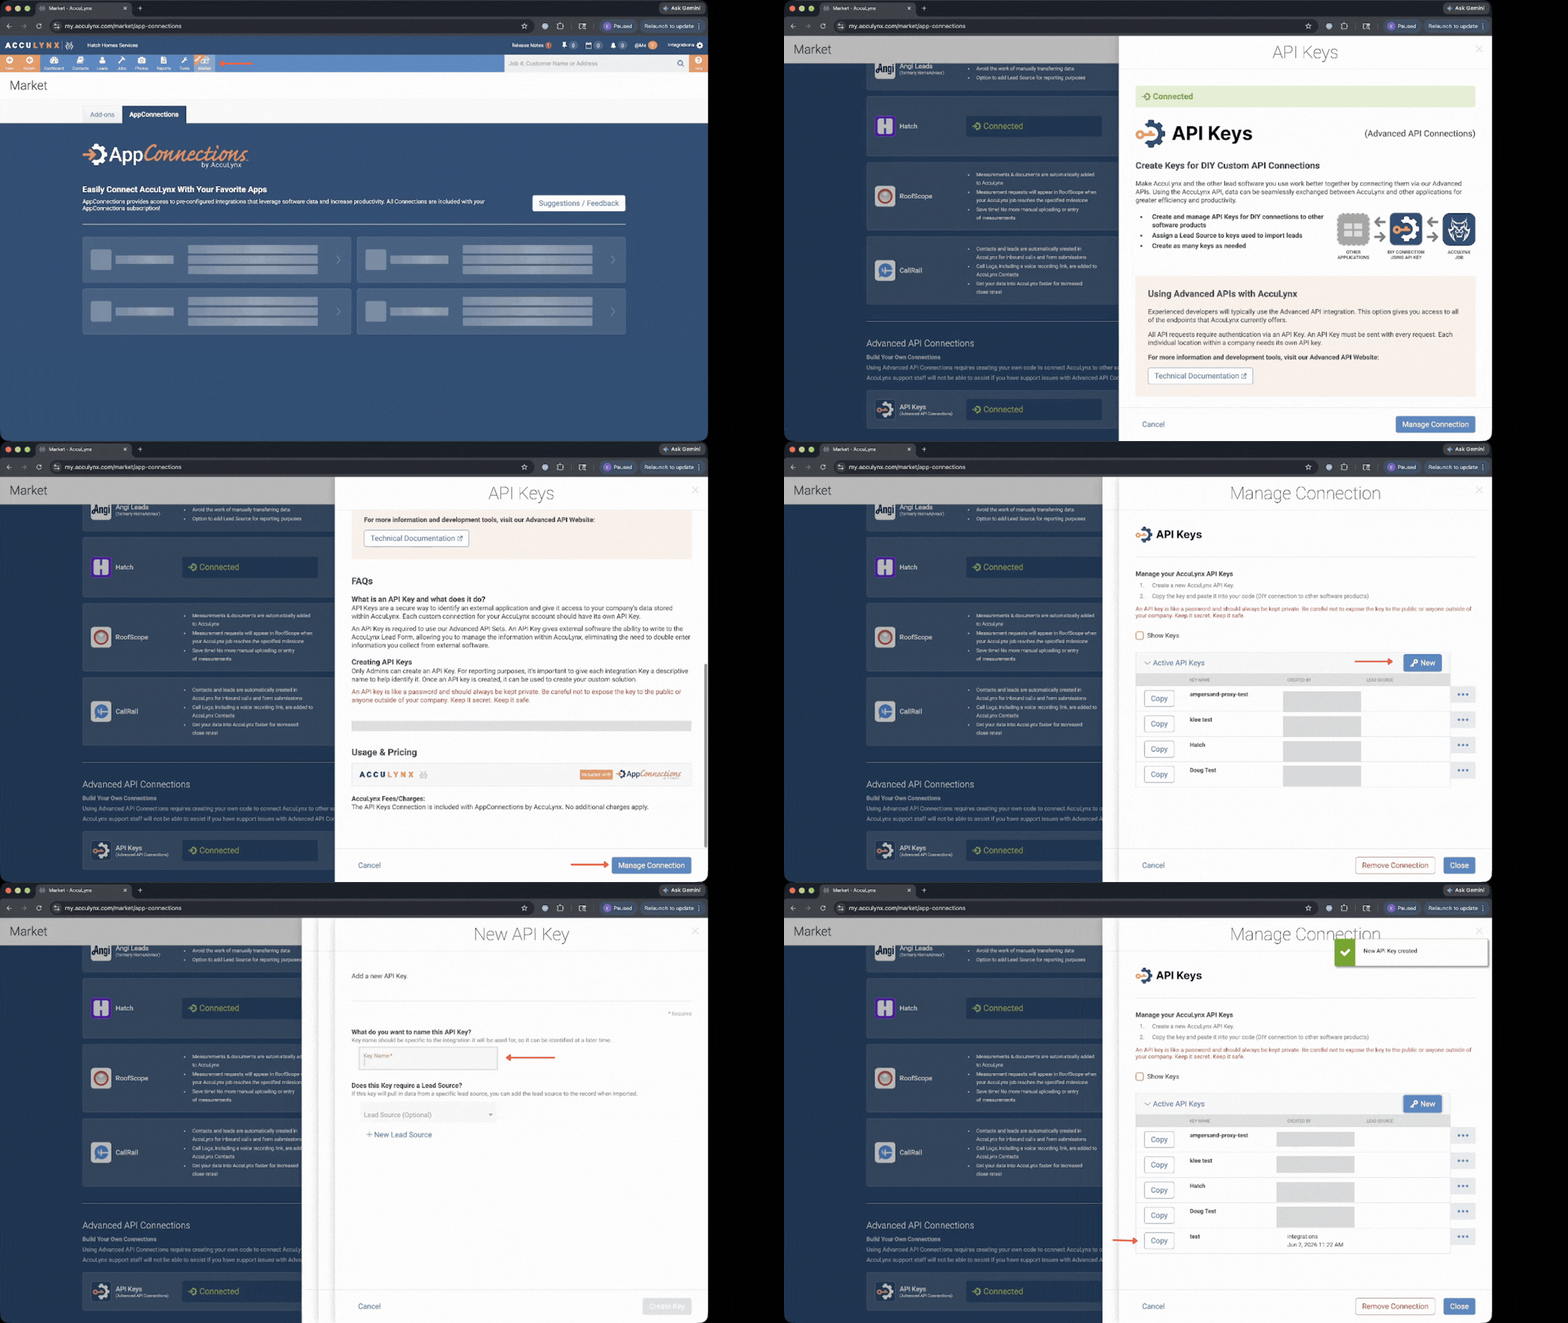
To use the AccuLynx connector, you’ll need an API key from your AccuLynx account. Here’s how to get it:- Sign in to your AccuLynx account as a Location or Company Administrator.
- Click your name in the upper-right corner and select Account Settings.
- In the left sidebar, expand Add-On Features and Integrations and click API Keys (or go directly to the API Keys page).
- Click Create Key, enter a descriptive name, and select a Lead Source.
- Click Create Key in the modal, then Copy Key to copy the token.
Using the connector
This connector uses API Key authentication, so you do not need to configure a Provider App before getting started. (Provider Apps are only required for providers using the OAuth2 Authorization Code grant type.) To integrate with AccuLynx:- Create a manifest file like the example above.
- Deploy it using the amp CLI.
- If you are using Read Actions or Subscribe Actions, create a destination.
- Embed the InstallIntegration UI component, which will prompt the customer for their API key.
- Start using the connector!
- If your integration has Read Actions or Subscribe Actions, you’ll start getting webhook messages.
- If your integration has Write Actions, you can start making API calls to our Write API.
- If your integration has Proxy Actions, you can start making Proxy API calls.