What’s supported
Supported actions
This connector supports:- Proxy Actions, using the base URL
https://{{.domain}}.chargeover.com.
Example integration
To define an integration for ChargeOver, create a manifest file that looks like this:Using the connector
This connector uses Basic Auth, which means that you do not need to set up a Provider App before getting started. (Provider apps are only required for providers that use OAuth2 Authorization Code grant type.) To start integrating with ChargeOver:- Create a manifest file like the example above.
- Deploy it using the amp CLI.
- Embed the InstallIntegration UI component. The UI component will prompt the customer for their domain, username and password.
- Start making Proxy Calls, and Ampersand will automatically attach the correct header required by Basic Auth. Please note that this connector’s base URL is
https://{{.domain}}.chargeover.com.
Creating Basic Auth credentials
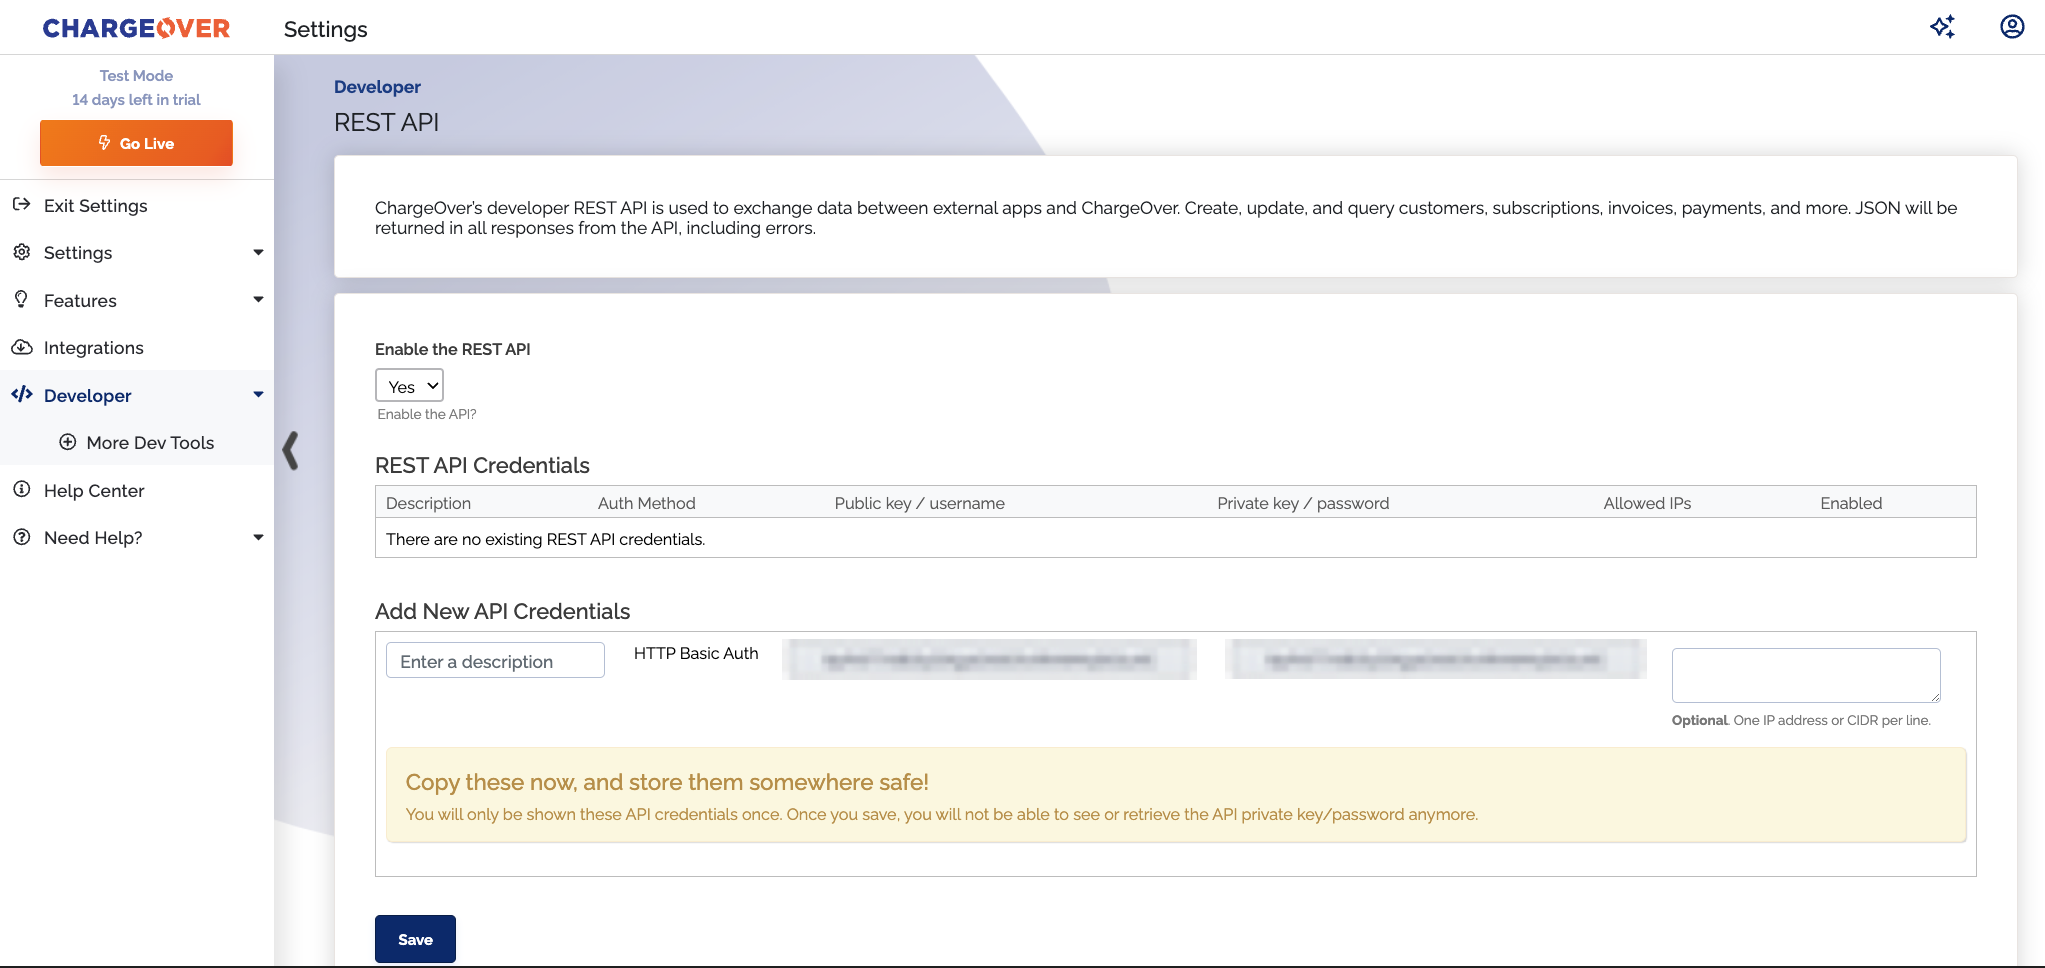
To begin using the API in your ChargeOver account, you need to enable REST API support:- Navigate to Settings.
- Click on Developers > More Dev Tools.
- Click the Get Started button under REST API.
- Enable the REST API. Once enabled, your username and password for Basic Authentication will be displayed.


