googleapis.com, these include:
- Calendar
- Gmail
- Google Drive
What’s supported
Supported actions
This connector supports:- Proxy Actions, using the base URL
https://www.googleapis.com.
- Read Actions, including historical backfill. Please note that incremental
read is only supported for the Calendar
Eventsobject; otherwise, a full read of the Google instance will be performed for each scheduled run. - Write Actions.
Important Note on Events Backfill: The events object has a 28-day cap for historic backfill and does not support full history, due to limitations in the Google API. When syncing events data, ensure your backfill period does not exceed 28 days.
The Gmail module supports:
- Read Actions, including historical backfill. Please note that incremental read and pagination
are only supported for
Drafts,Messages, andThreadsobjects; otherwise, a full read of the Gmail instance will be performed for each scheduled run. - Subscribe Actions for the
messagesobject. Please note that special set up is needed for Gmail. - Write Actions.
Supported Calendar objects
| Object | Read | Write |
|---|---|---|
| acl | ||
| calendarList | ||
| events | ||
| settings |
Supported Gmail objects
| Object | Read | Write | Subscribe |
|---|---|---|---|
| delegates | |||
| drafts | |||
| filters | |||
| forwardingAddresses | |||
| identities | |||
| keypairs | |||
| labels | |||
| messages | (Setup required) | ||
| sendAs | |||
| threads |
drafts supports nested fields, e.g. "$['message']['payload']['body']".
[2] messages supports nested fields, e.g. "$['payload']['body']".
Example integration
Example manifest files can be found in our samples repository on GitHub:Before you get started
To integrate Google with Ampersand, you will need a Google Cloud account. Once your account is created, you’ll need to create a Google app, configure the Ampersand redirect URI within the app, and obtain the following credentials from your app:- Client ID
- Client Secret
- Scopes
Create a Google Cloud account
You can sign up for a free Google Cloud account here.Enable the appropriate APIs
Go to the API Library page of Google Cloud Console and search for the APIs your integration will need. For example, if you are building a Google Drive integration, type “Google Drive”, select the right API and click the “Enable” button.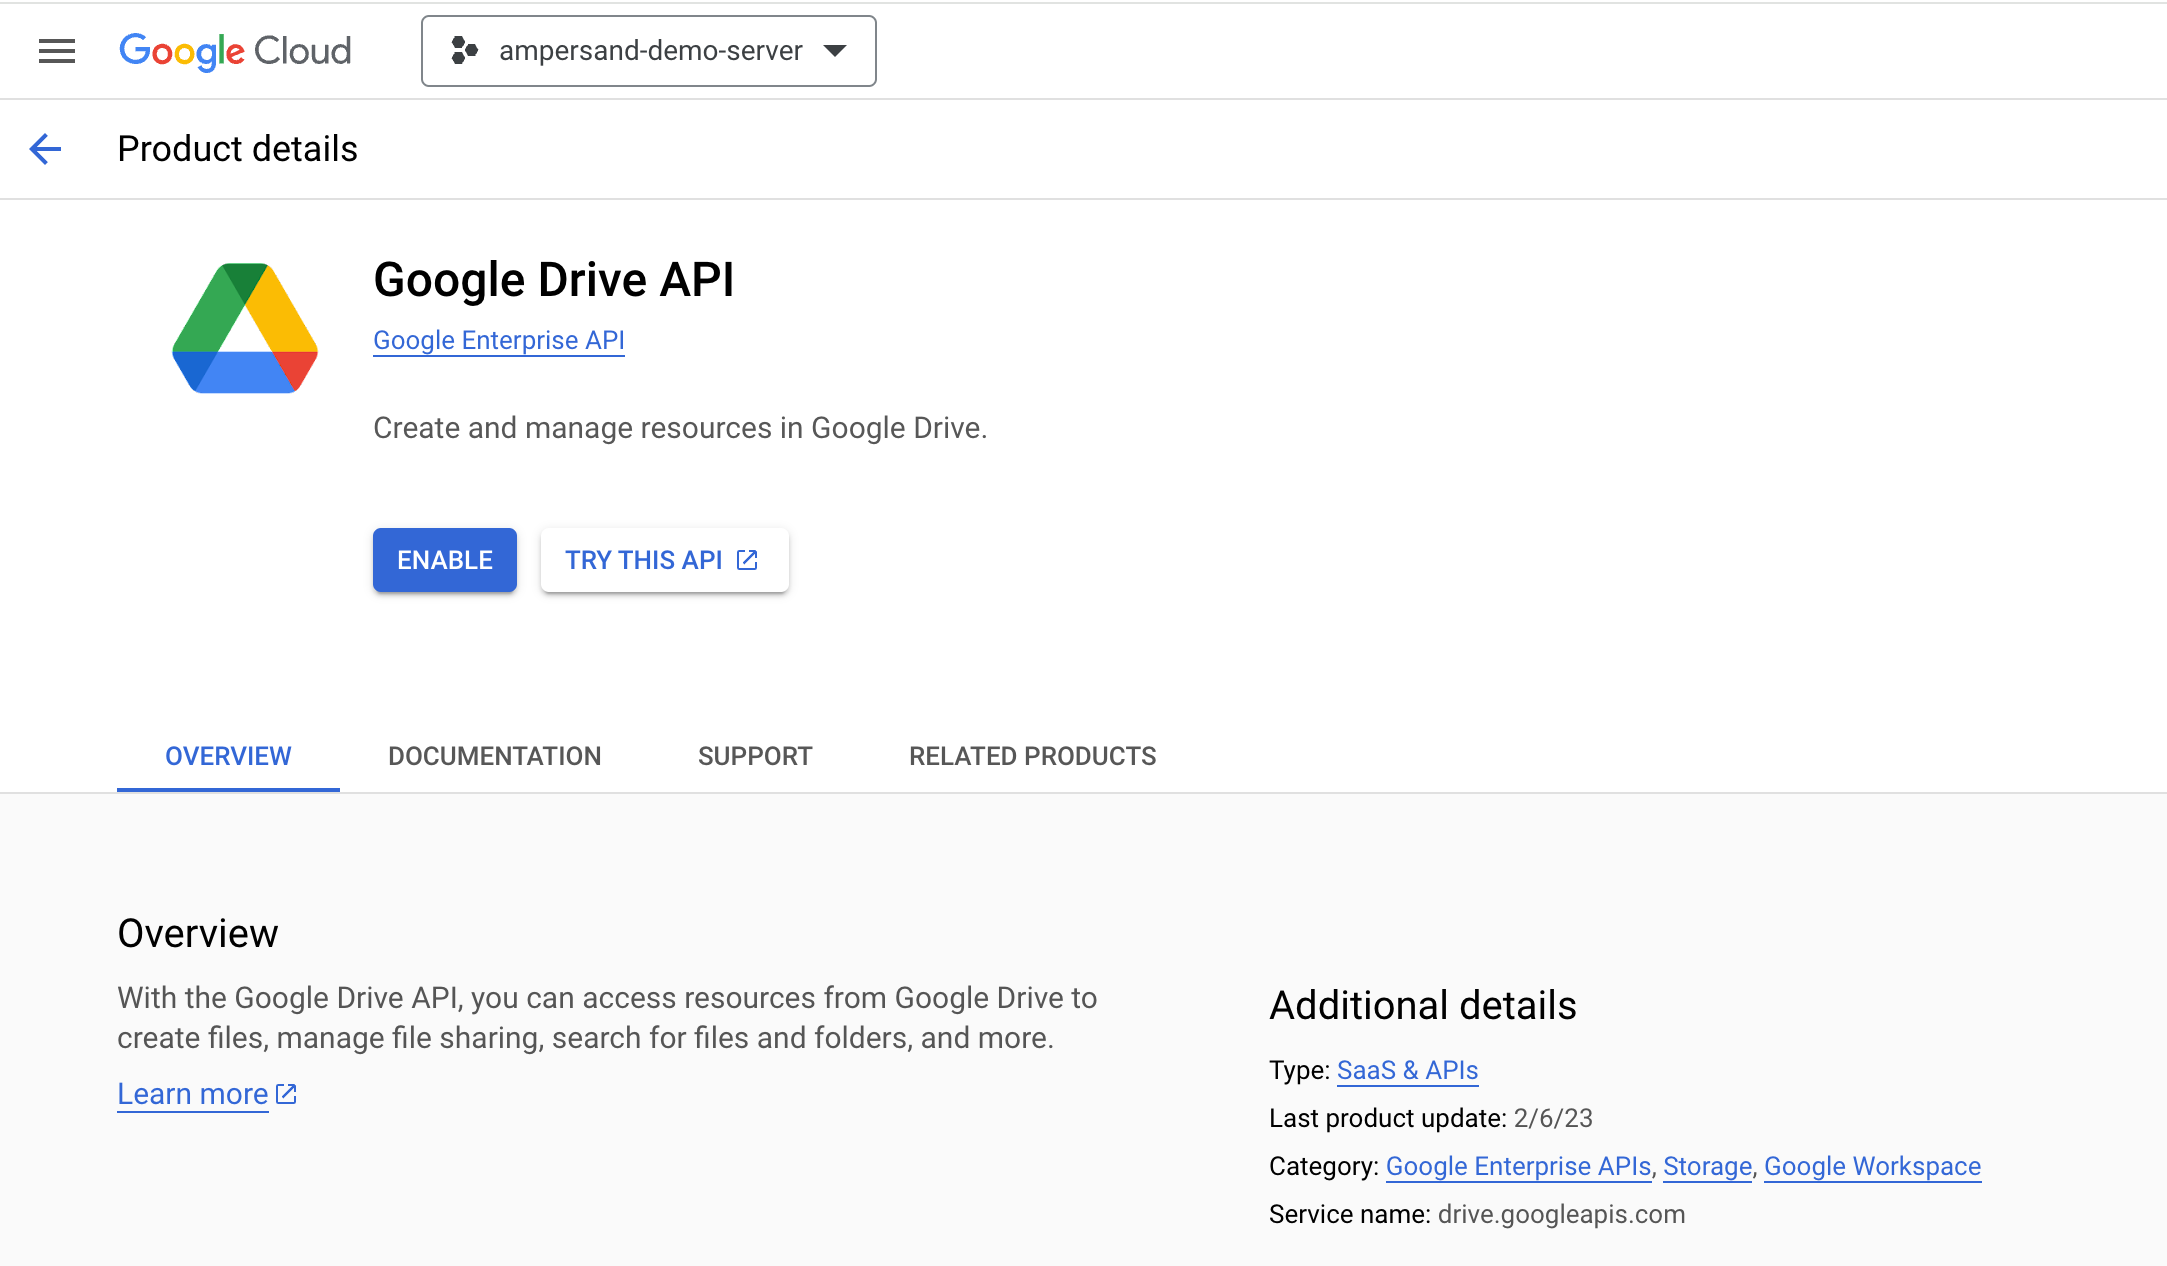
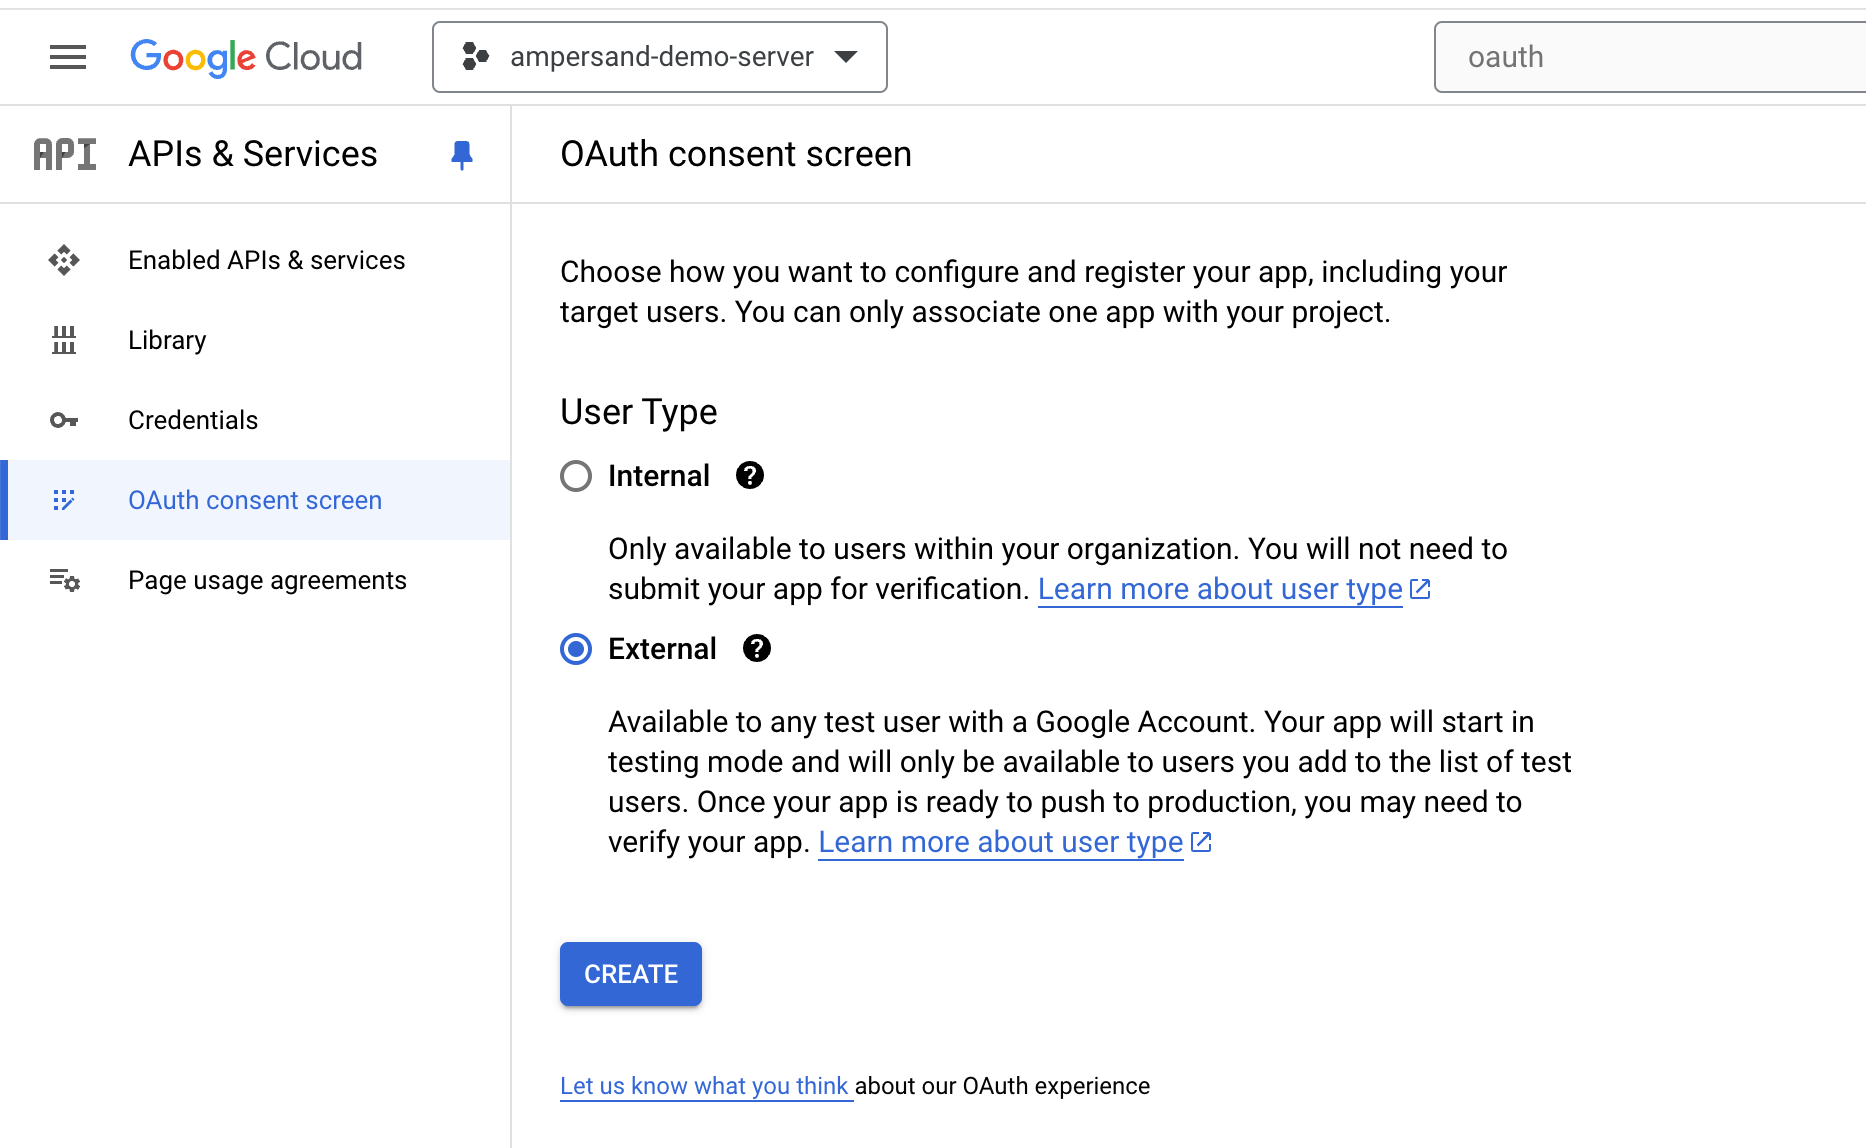
Creating a Google App
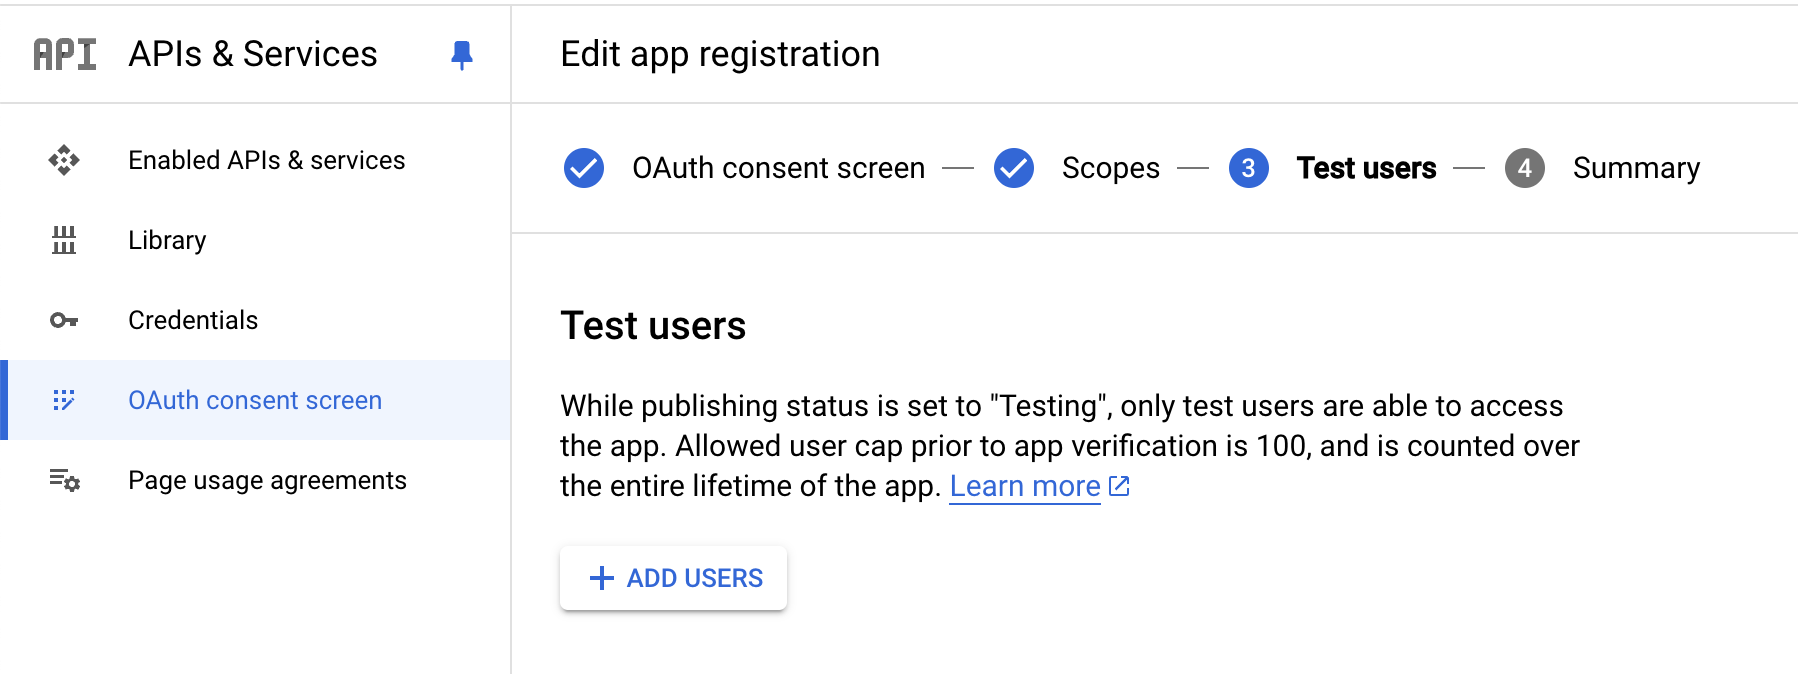
Follow the steps below to create a Google App:- Go to the OAuth consent screen page, pick “External” as the User Type.
- Enter the information required on the next page, click “Save and Continue”.
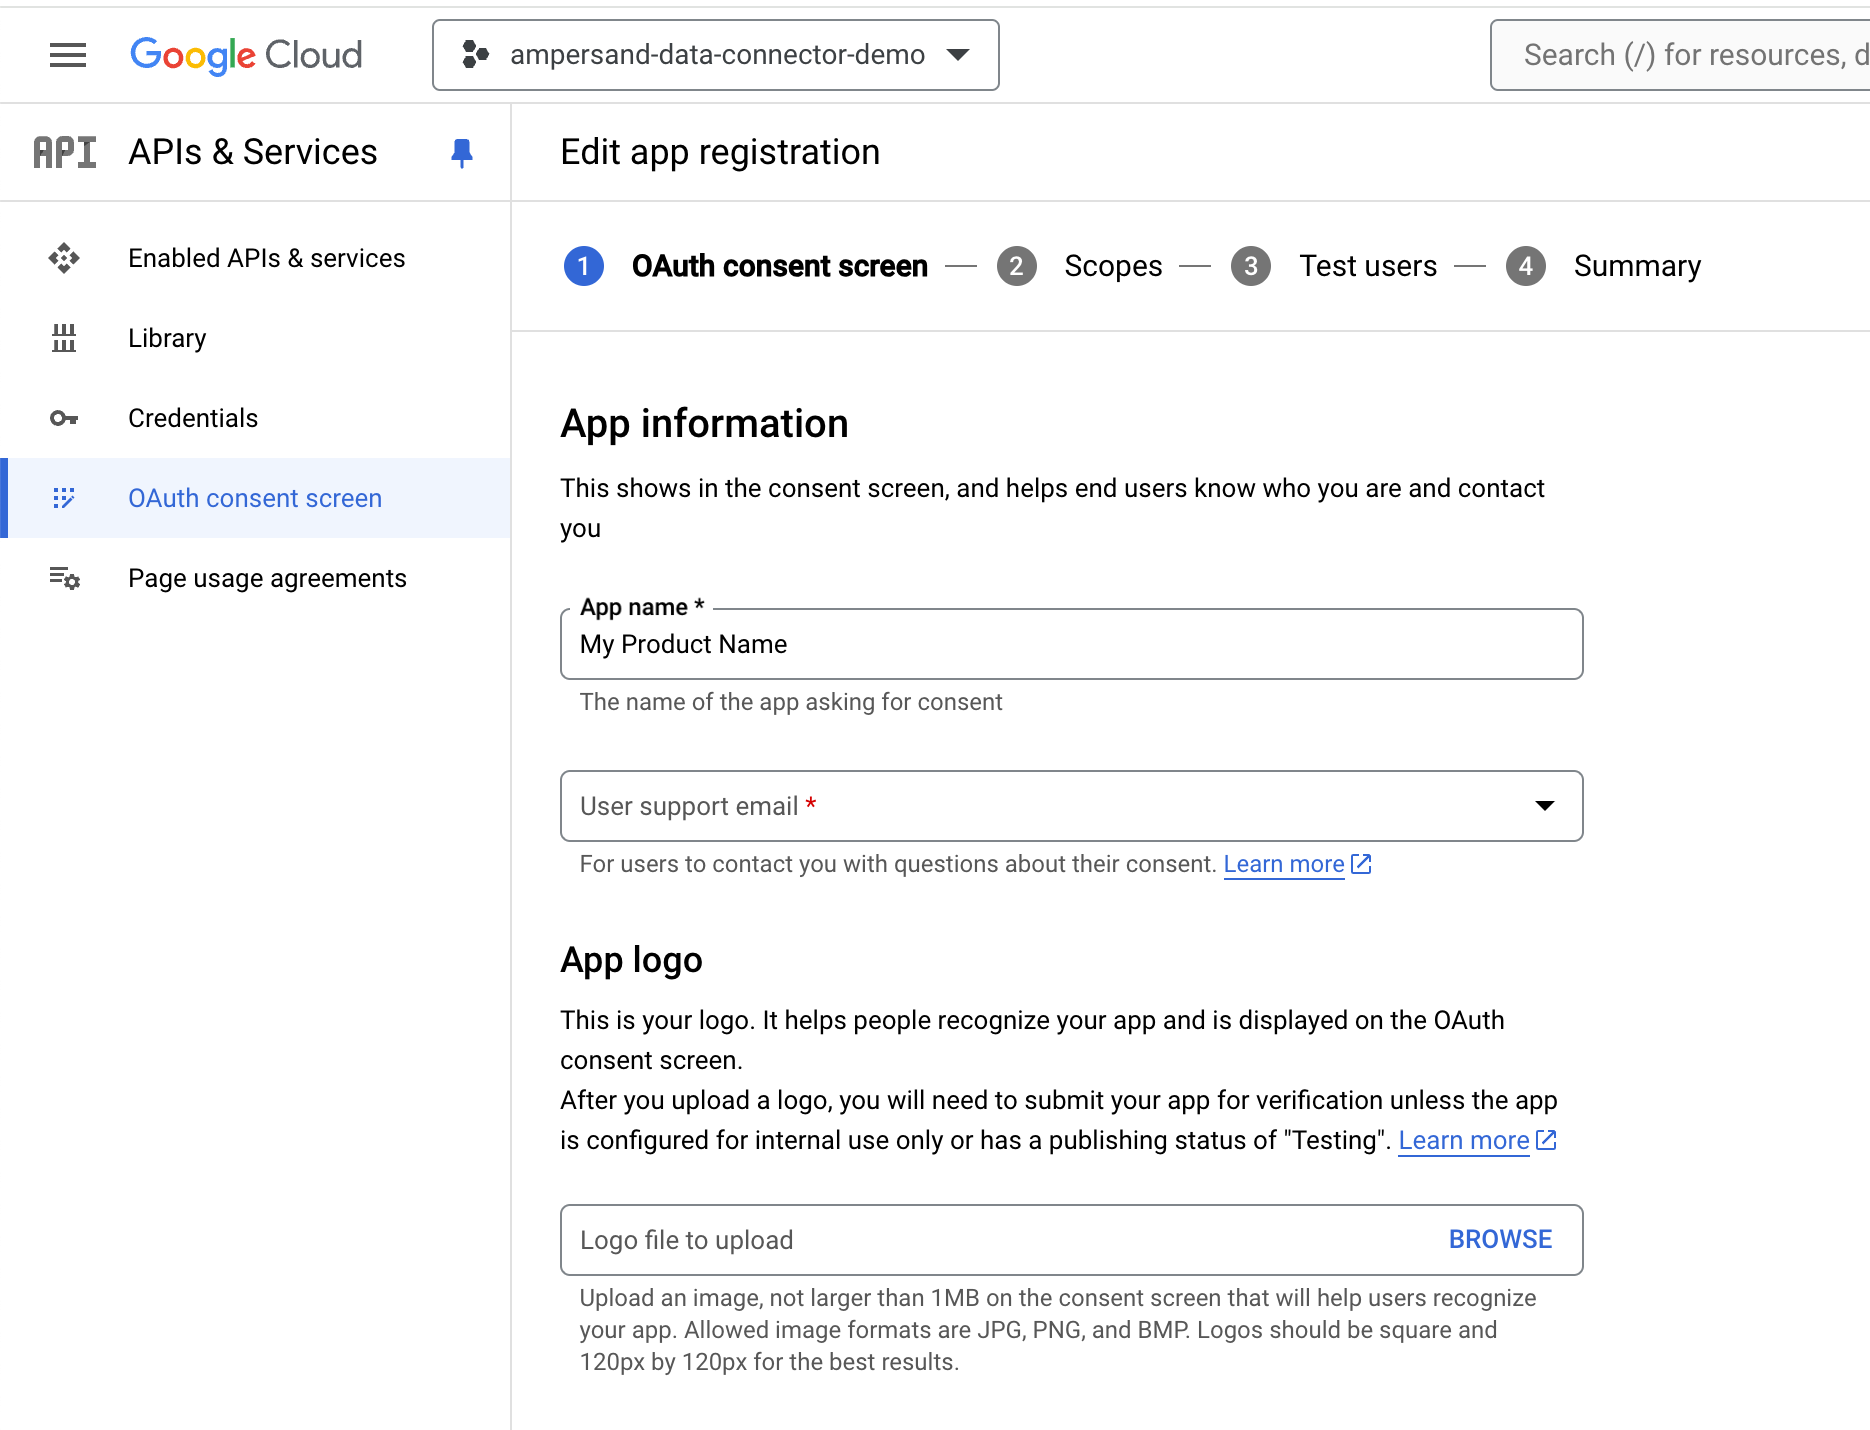
- On the Scopes page, click “Add or Remove Scopes”, and then select the scopes that your integration will need. For example, if you are integrating with Google Drive, type “Google Drive” into the search box and select the scopes you will need. If the scopes you require are not popping up, ensure that you’ve enabled the appropriate APIs (previous step), and then refresh the page.

- On the Test Users page, click ”+ Add Users” to add up to 100 email addresses, and then click “Save and Continue”.
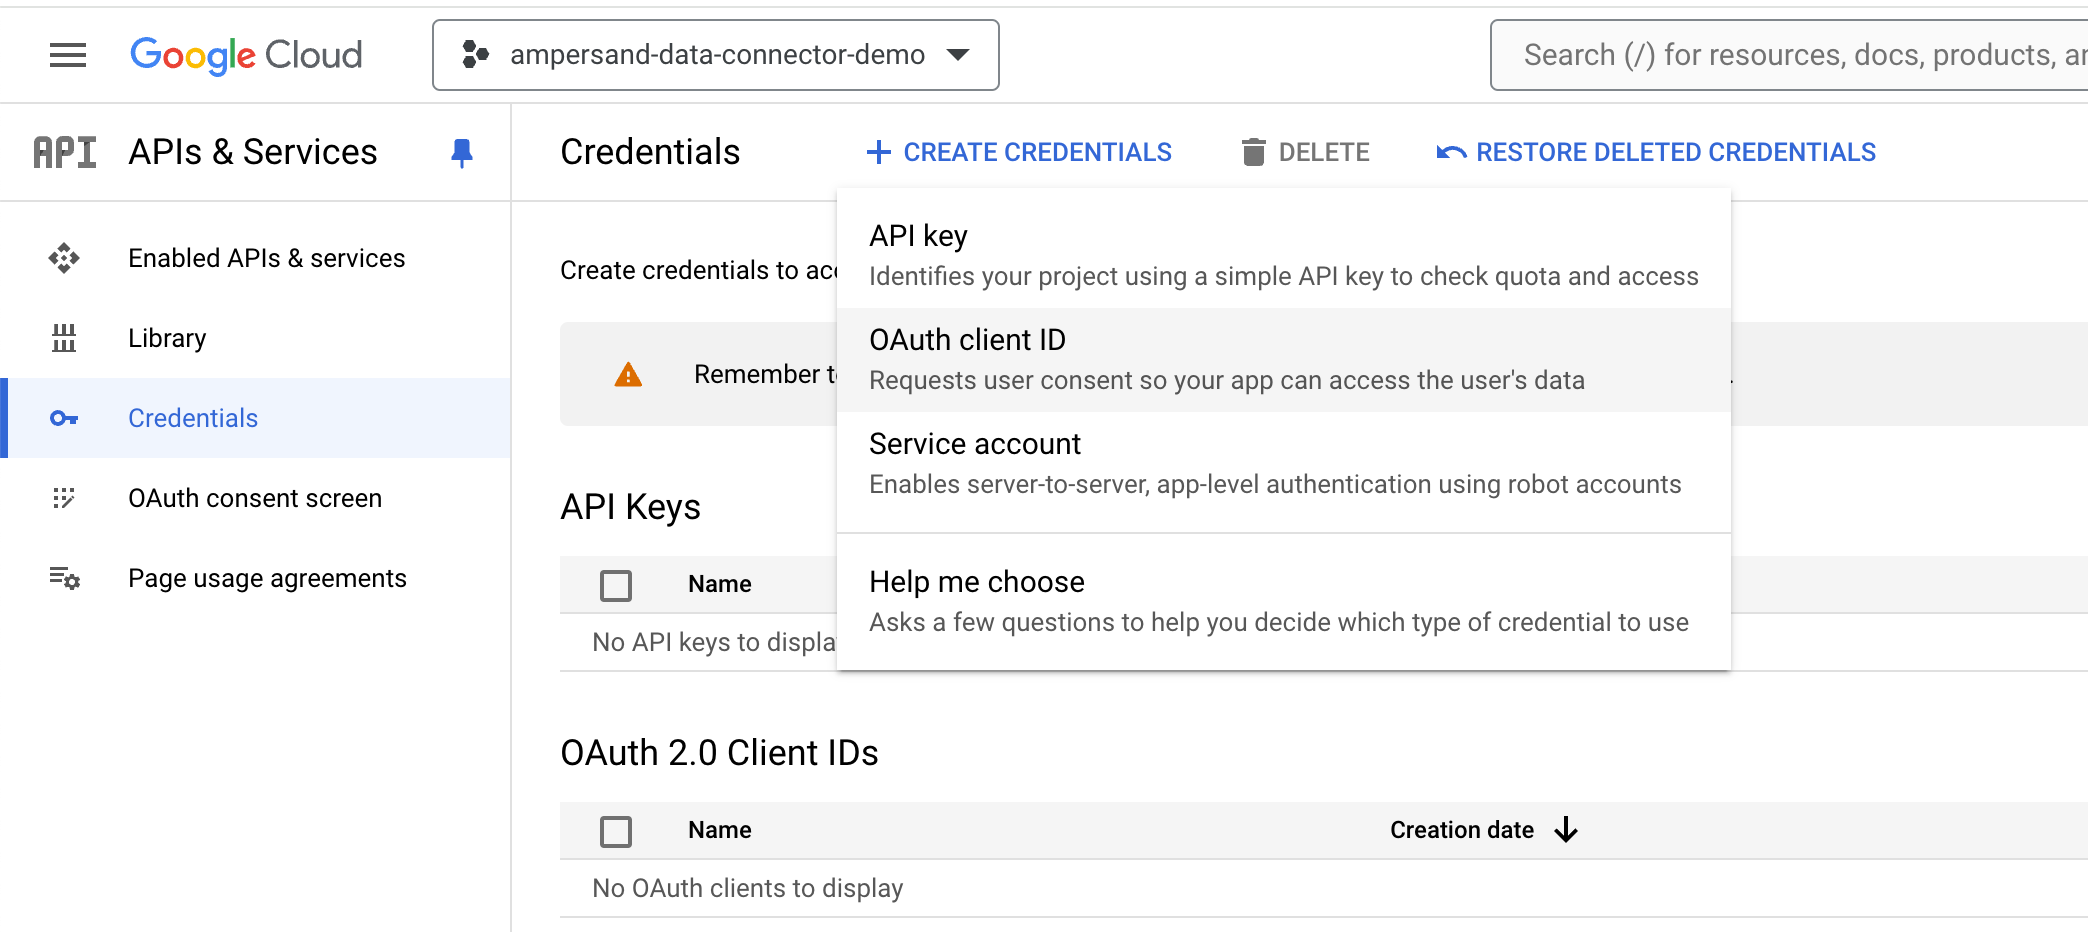
Creating Client ID and Client Secret
- Once your Google App has been created, go to the Credentials page of Google Cloud Console. Click on “Create Credentials” and then select “OAuth Client ID”.
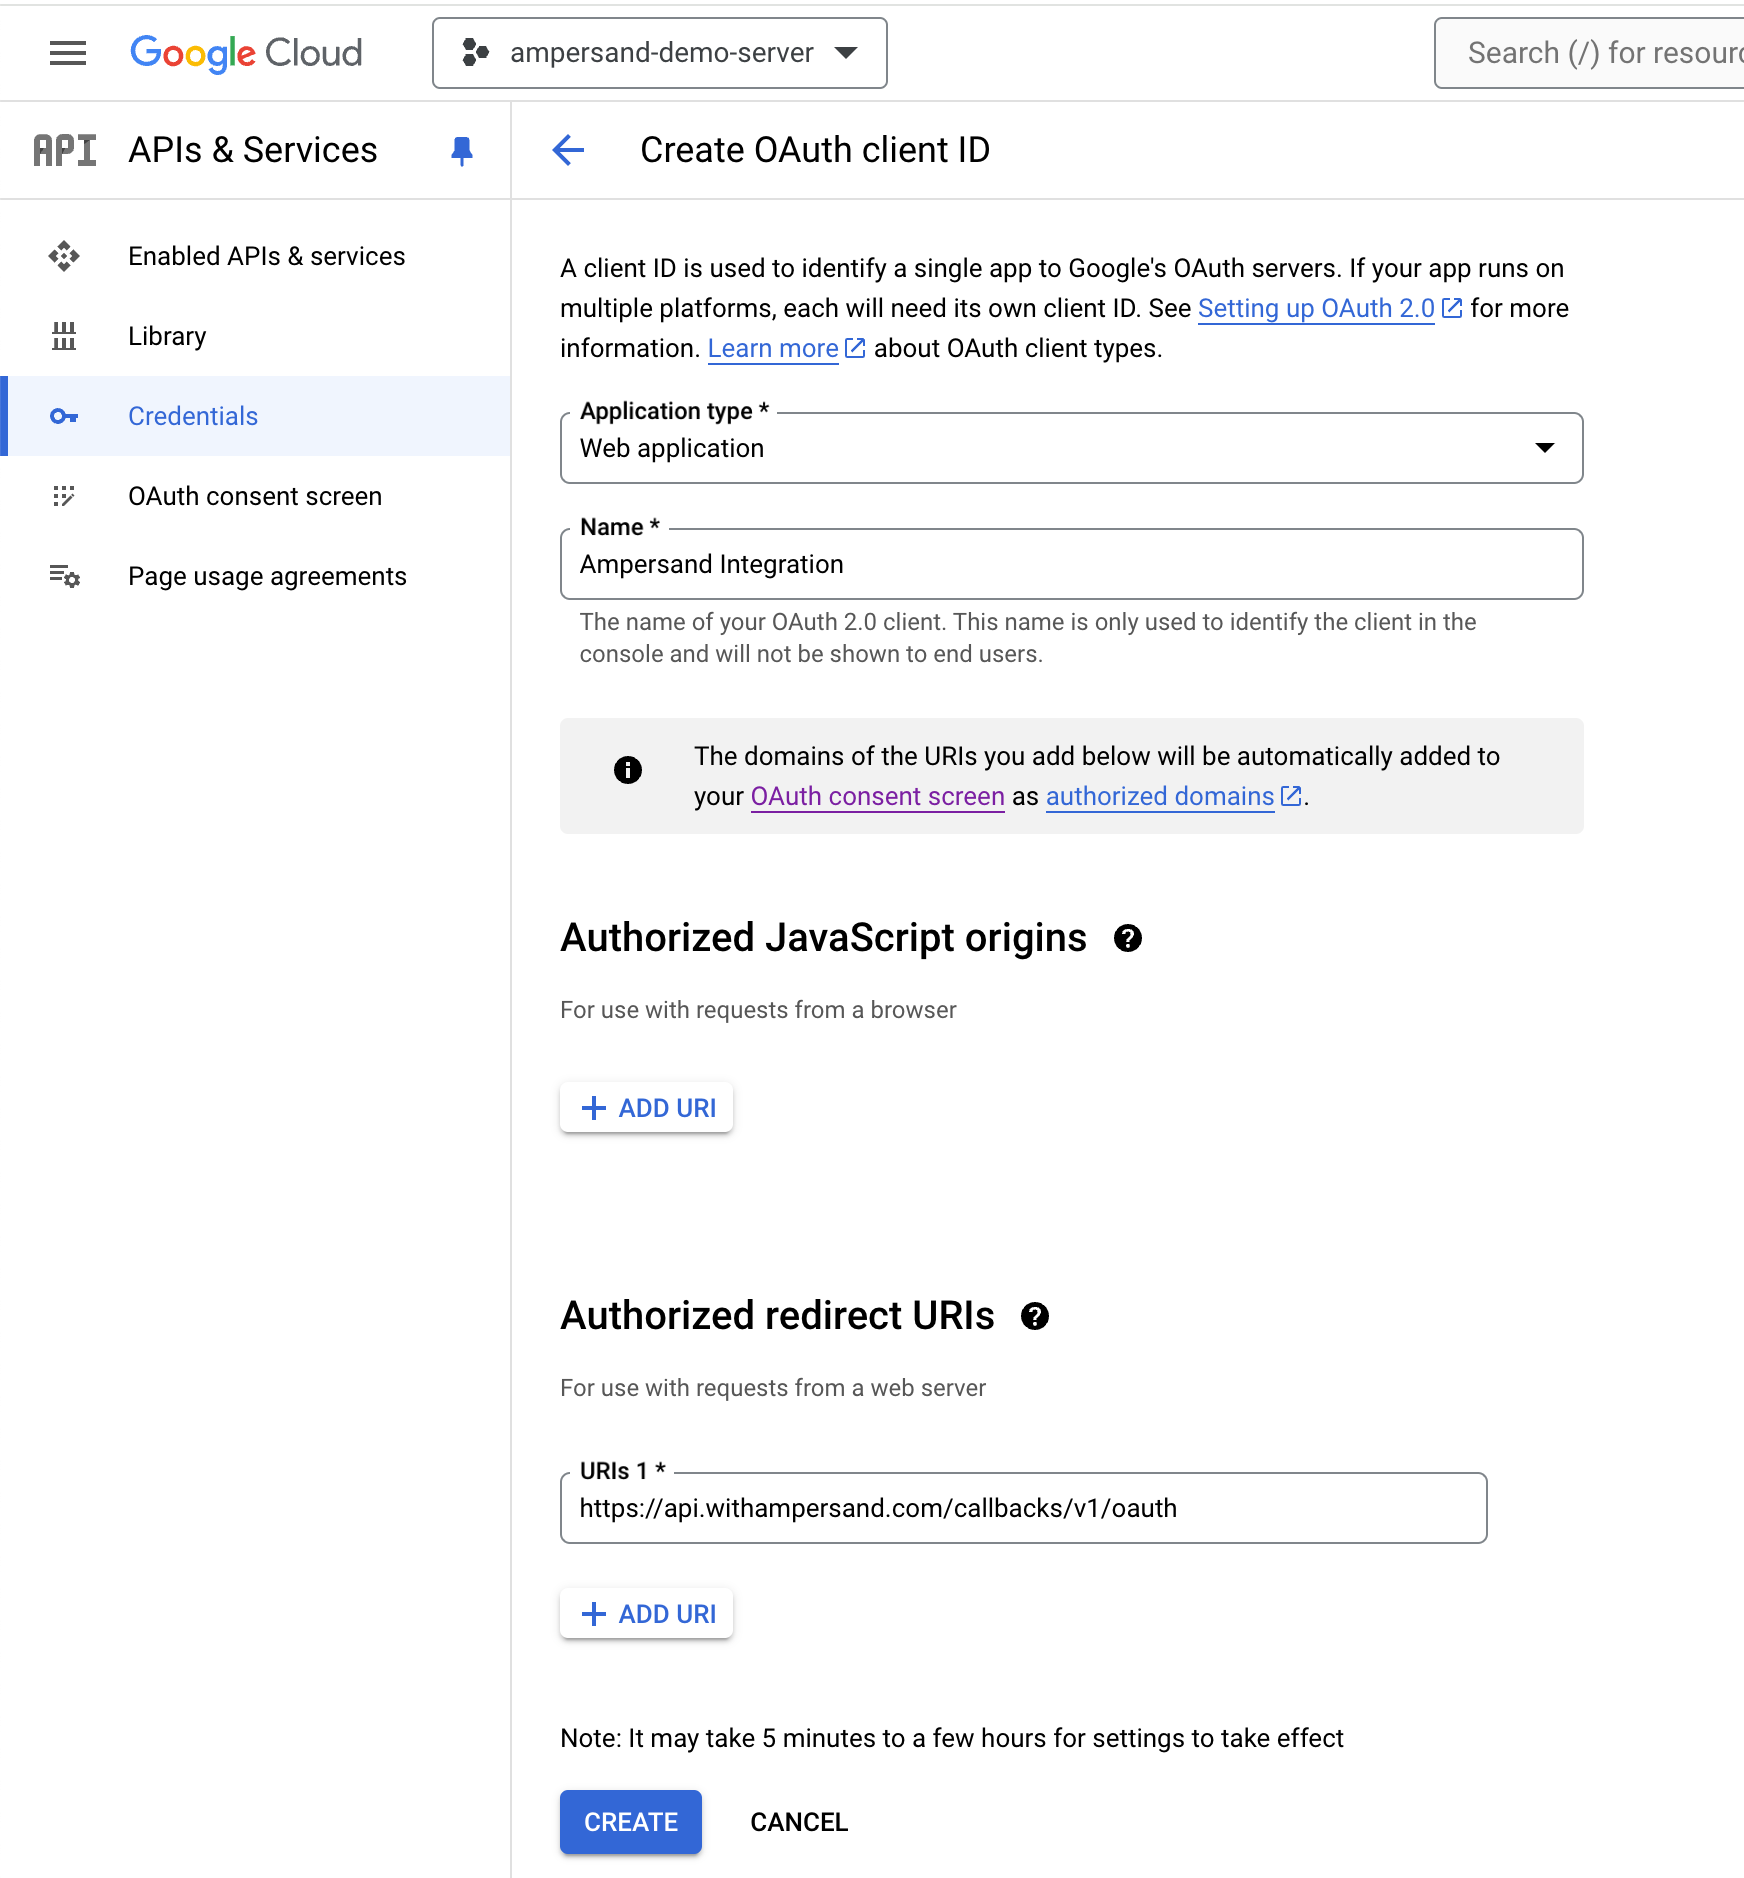
- Click “Web Application” from the Application Type dropdown menu.

- In the name box, write down a descriptive name like “Ampersand Integration”. Under “Authorized redirect URIs”, add
https://api.withampersand.com/callbacks/v1/oauth. Click “Create”.
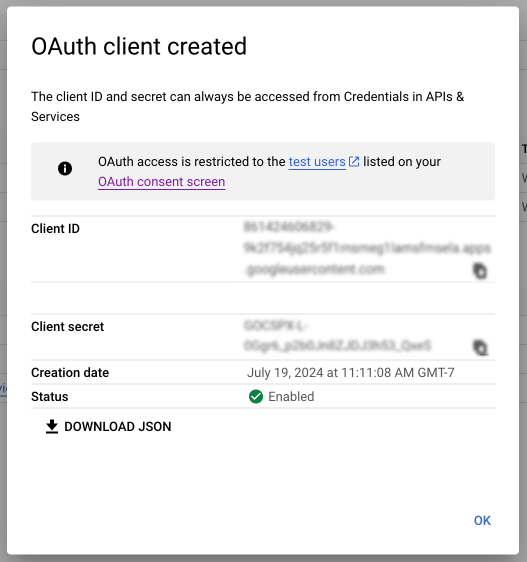
- There will be a popup which displays the Client ID and Client Secret, you’ll need to add these to the Ampersand Dashboard in the next step. You can either copy and paste these values, or click “Download JSON”.
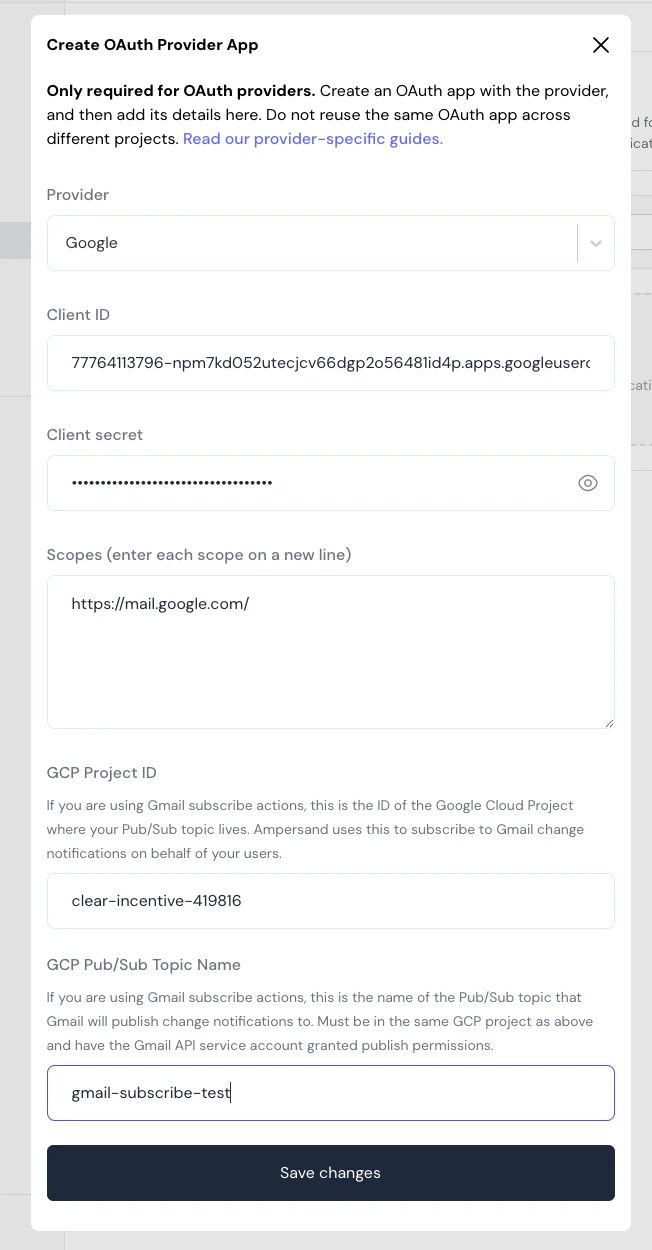
Add Your Google App info to Ampersand
- Log in to your Ampersand Dashboard.
-
Select the project where you want to create a Google integration.

- Select Provider apps.
- Select Google from the Provider list.
- Enter the previously obtained Client ID in the Client ID field and the Client Secret in the Client Secret field. In the Scopes field, enter each of your scopes on a separate line.
- For Google Calendar, add
https://www.googleapis.com/auth/calendar - For Gmail, add
https://mail.google.com

- Click Save changes.
Set up Gmail push notifications for Subscribe Actions
To receive real-time Subscribe events from Gmail, you need to own a Google Cloud Pub/Sub topic that Gmail can publish to, and a push subscription that forwards those messages to Ampersand.Gmail requires the Pub/Sub topic to live in the same Google Cloud project as the OAuth app you created in Creating a Google App.
Prerequisites
- A Google Cloud project with billing enabled (the same project that owns your Google OAuth app).
- The
gcloudCLI installed. - Your user account needs the following IAM roles on the project (or equivalent permissions via a custom role):
roles/pubsub.admin— required to create the topic, create the push subscription, and add the IAM binding that grants Gmail publish access (theadd-iam-policy-bindingstep requirespubsub.topics.setIamPolicy, whichroles/pubsub.editoralone does not cover).roles/serviceusage.serviceUsageAdmin— required to enable the Pub/Sub API if it is not already enabled. You can skip this role if the API is already on.- Project
roles/ownercovers all of the above if you’d rather not manage individual roles.
Org-level access does not automatically grant resource-creation permission on individual projects. If you have access to the organization but not the project, you’ll see
User not authorized to perform this action when running the commands below.1. Log into gcloud CLI
ReplacePROJECT_ID with your Google Cloud project ID.
2. Enable the Pub/Sub API
3. Create a Pub/Sub topic
ReplaceTOPIC_NAME with a name of your choice (e.g. gmail-push).
4. Grant Gmail permission to publish to the topic
Gmail publishes push notifications using a Google-managed service account. Grant it thePub/Sub Publisher role on your topic. Without this grant Gmail will reject the watch call with a permission error.
5. Create a push subscription to Ampersand
Create a push subscription that forwards every notification to Ampersand’s receiver endpoint. ReplaceSUBSCRIPTION_NAME with a name of your choice (e.g. gmail-push-to-ampersand).
6. Pre-authorize Ampersand’s service account
Grant Ampersand’s Gmail Subscribe service account a resource-scoped role on your topic:7. Update your Google provider app in Ampersand
Ampersand needs to know which topic to wire new installations to. Go back to your Ampersand Dashboard, open Provider apps → Google (the same provider app where you entered your Client ID and Client Secret in Add Your Google App info to Ampersand), and set the following fields:- GCP Project ID:
PROJECT_ID - GCP Pub/Sub Topic Name:
TOPIC_NAME
amp.yaml will automatically register a Gmail watch for that mailbox, pointing at your topic. Events then flow:
- A new message arrives in the Gmail mailbox.
- Gmail publishes a notification to your Pub/Sub topic.
- Your push subscription forwards the notification to Ampersand.
- Ampersand hydrates the message and processes the event.
- The event is delivered to your destination.
Caveats
- 7-day history horizon. Gmail only retains mailbox history for about 7 days. If a mailbox has not received or sent emails for 7 days, Ampersand will miss events from before the gap and resume from the next incoming notification.
- Delete events carry only
messageId. When a message is deleted, Gmail’s history API does not return the message body — only its ID. Your destination will receive adeletesubscribe event withoutfieldsormappedFieldspopulated. messagesis the only supported object. Changes to Gmail labels, drafts, filters, threads, and other objects are not delivered as Subscribe events.- Inbox only by default. Ampersand currently watches the
INBOXlabel only, so you’ll only receive events for messages entering, leaving, or being relabeled within the inbox. If you need notifications for other labels (e.g.SENT,TRASH, or custom labels), contact support@withampersand.com and we can configure additional labels on our end. - No historical backfill via Subscribe. Subscribe events start from the moment the
watchis created. To sync existing mailbox contents, combine your Subscribe action with a Read action that hasbackfillconfigured. - One installation per mailbox per project. Connecting the same Gmail account to multiple installations in the same Ampersand project is not supported for Subscribe. When a second OAuth connection is created for a mailbox that already has one, Google can invalidate the earlier connection’s refresh token, which breaks token refresh on the older installation and stops its events from flowing.
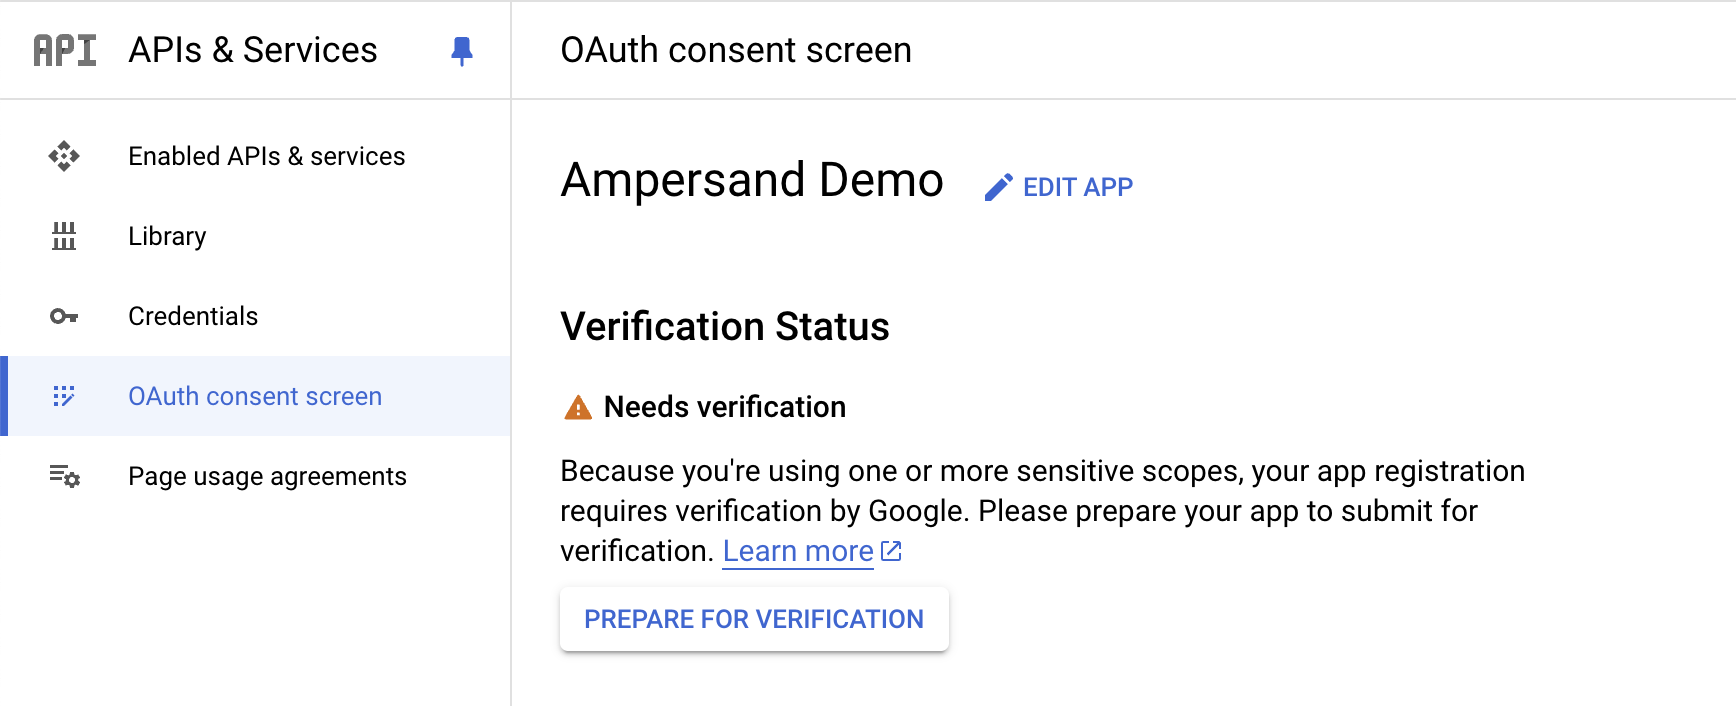
Ship your integration to production
When you are ready to use your integration with external customers, you’ll need to go through the Google App verification process.- Go back to the OAuth consent screen page, click on “Edit App” to upload a logo and fill out all the form fields (such as Privacy Page, Terms of Service).
- After saving your changes, click on the “Publish App” button under “Publishing Status”.

- Then click on the “Prepare for Verification” button that should now be visible, follow the instructions on the screen.