https://graph.facebook.com, these include:
What’s Supported
Supported Actions
This connector supports:- Proxy Actions, using the base URL
https://graph.facebook.com.
Before You Get Started
To connect Meta with Ampersand, you will need a Meta Developer Account. Once your account is created, you’ll need to create an app in Meta, configure the Ampersand redirect URI within the app, and obtain the following credentials from your app:- App ID
- App Secret
Create a Meta Developer Account
Here’s how you can sign up for a Meta Developer account:- Go to the Meta for Developers Sign Up page.
- Sign up using your Facebook account.
Creating a Meta App
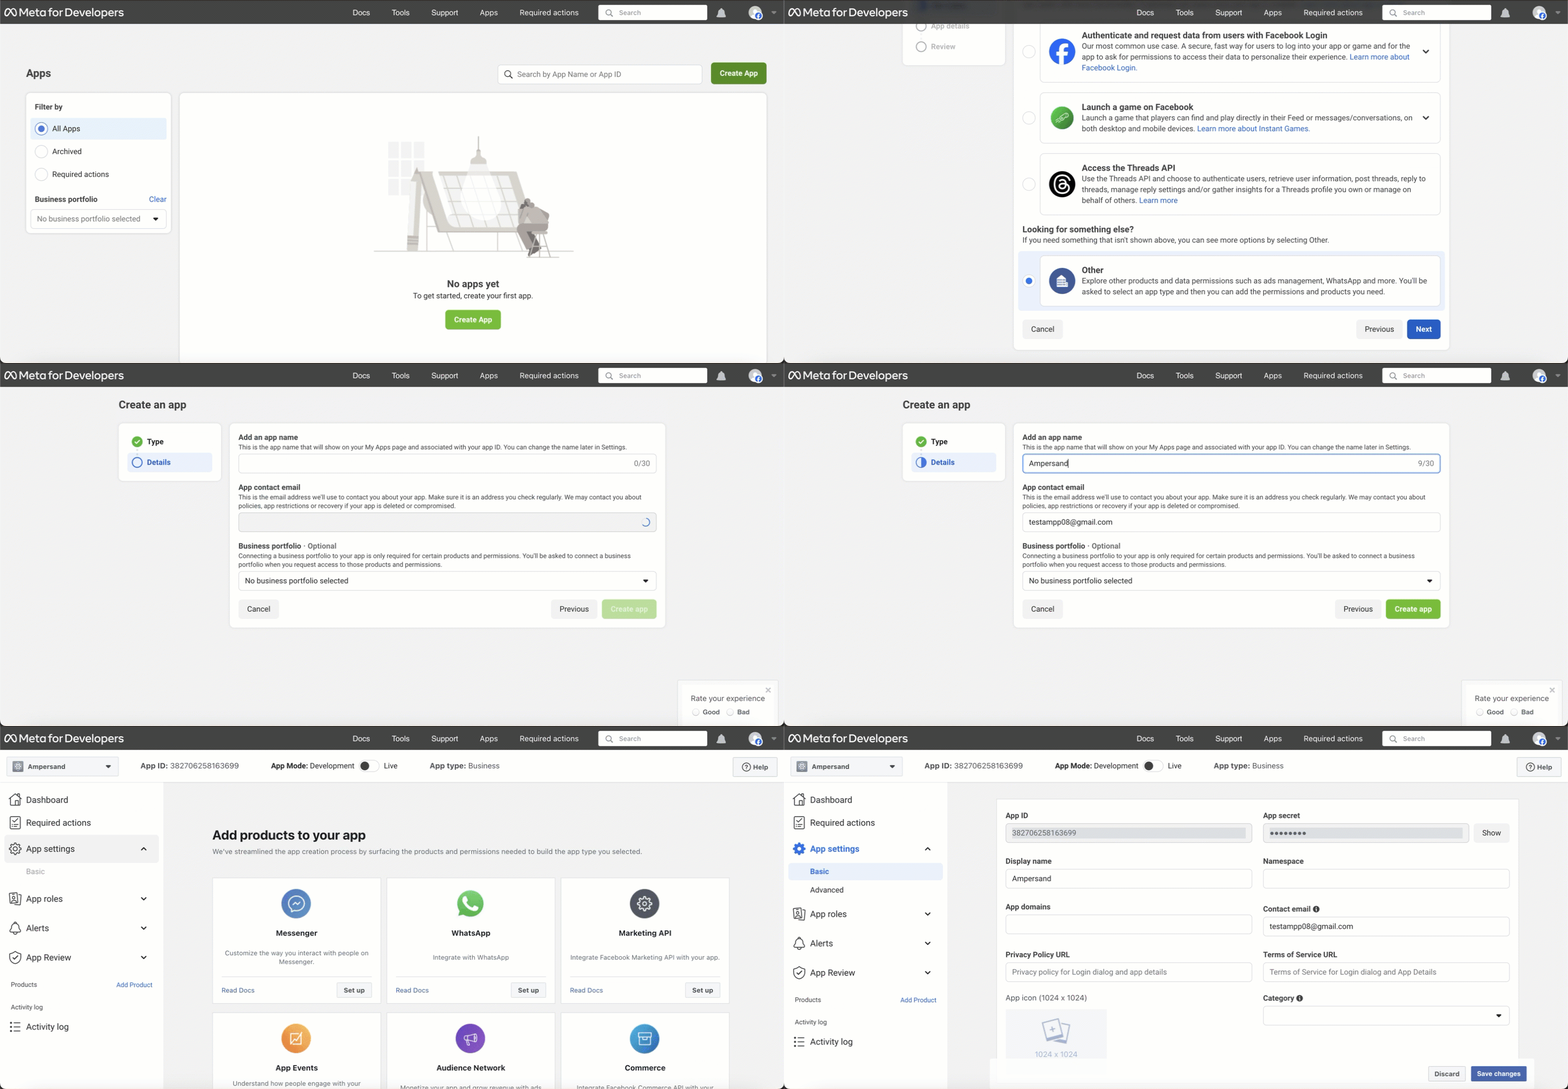
Follow the steps below to create a Meta app and add the Ampersand redirect URL.- Log in to your Meta Developer Account.
- Click My Apps.
- Click the Create App button.
- Select a business portfolio if you have one and click Next.
- Select a use case. For OAuth application it’s best to use the Other option.
- Click Next.
- Select an app type.
- Click Next.
-
Enter the following app details:
- App Name: The name of your app.
- Contact Email: Select a contact email for the app.
- Click Create app.

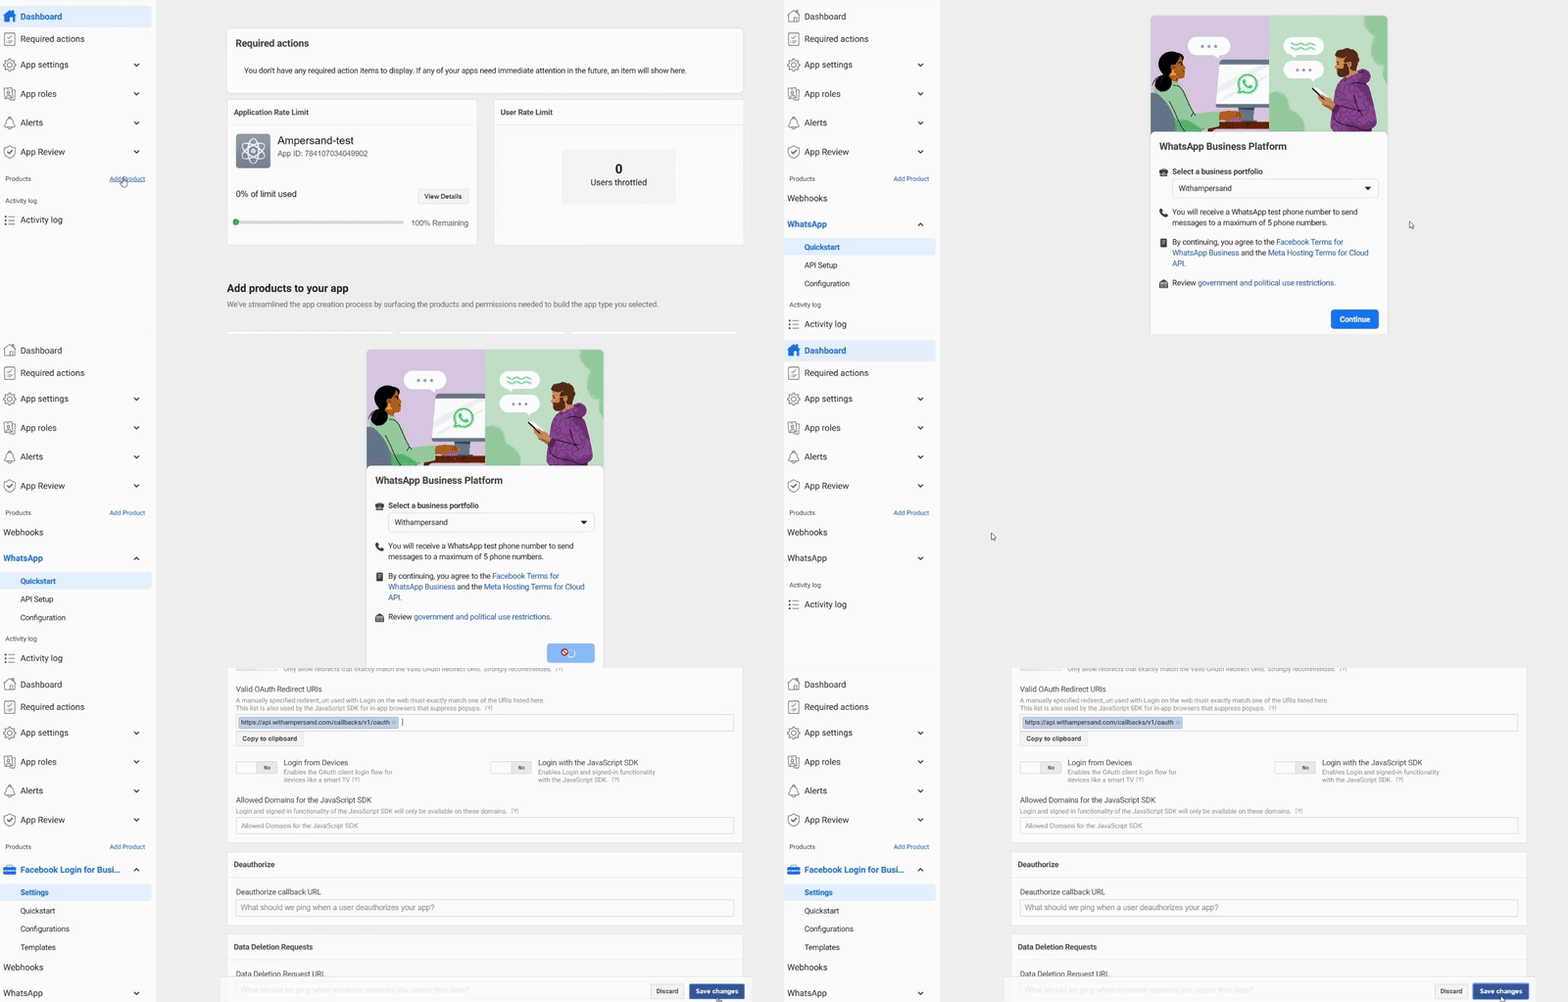
- Move to the Add Product under Products and choose the whatsApp product then configure it.
- Scroll to the Client OAuth Settings section.
- In the Valid OAuth Redirect URIs field, enter the exact Callback URI: https://api.withampersand.com/callbacks/v1/oauth.

Add Your Meta App Info to Ampersand
- Log in to your Ampersand Dashboard.
-
Select the project where you want to create a Meta integration.

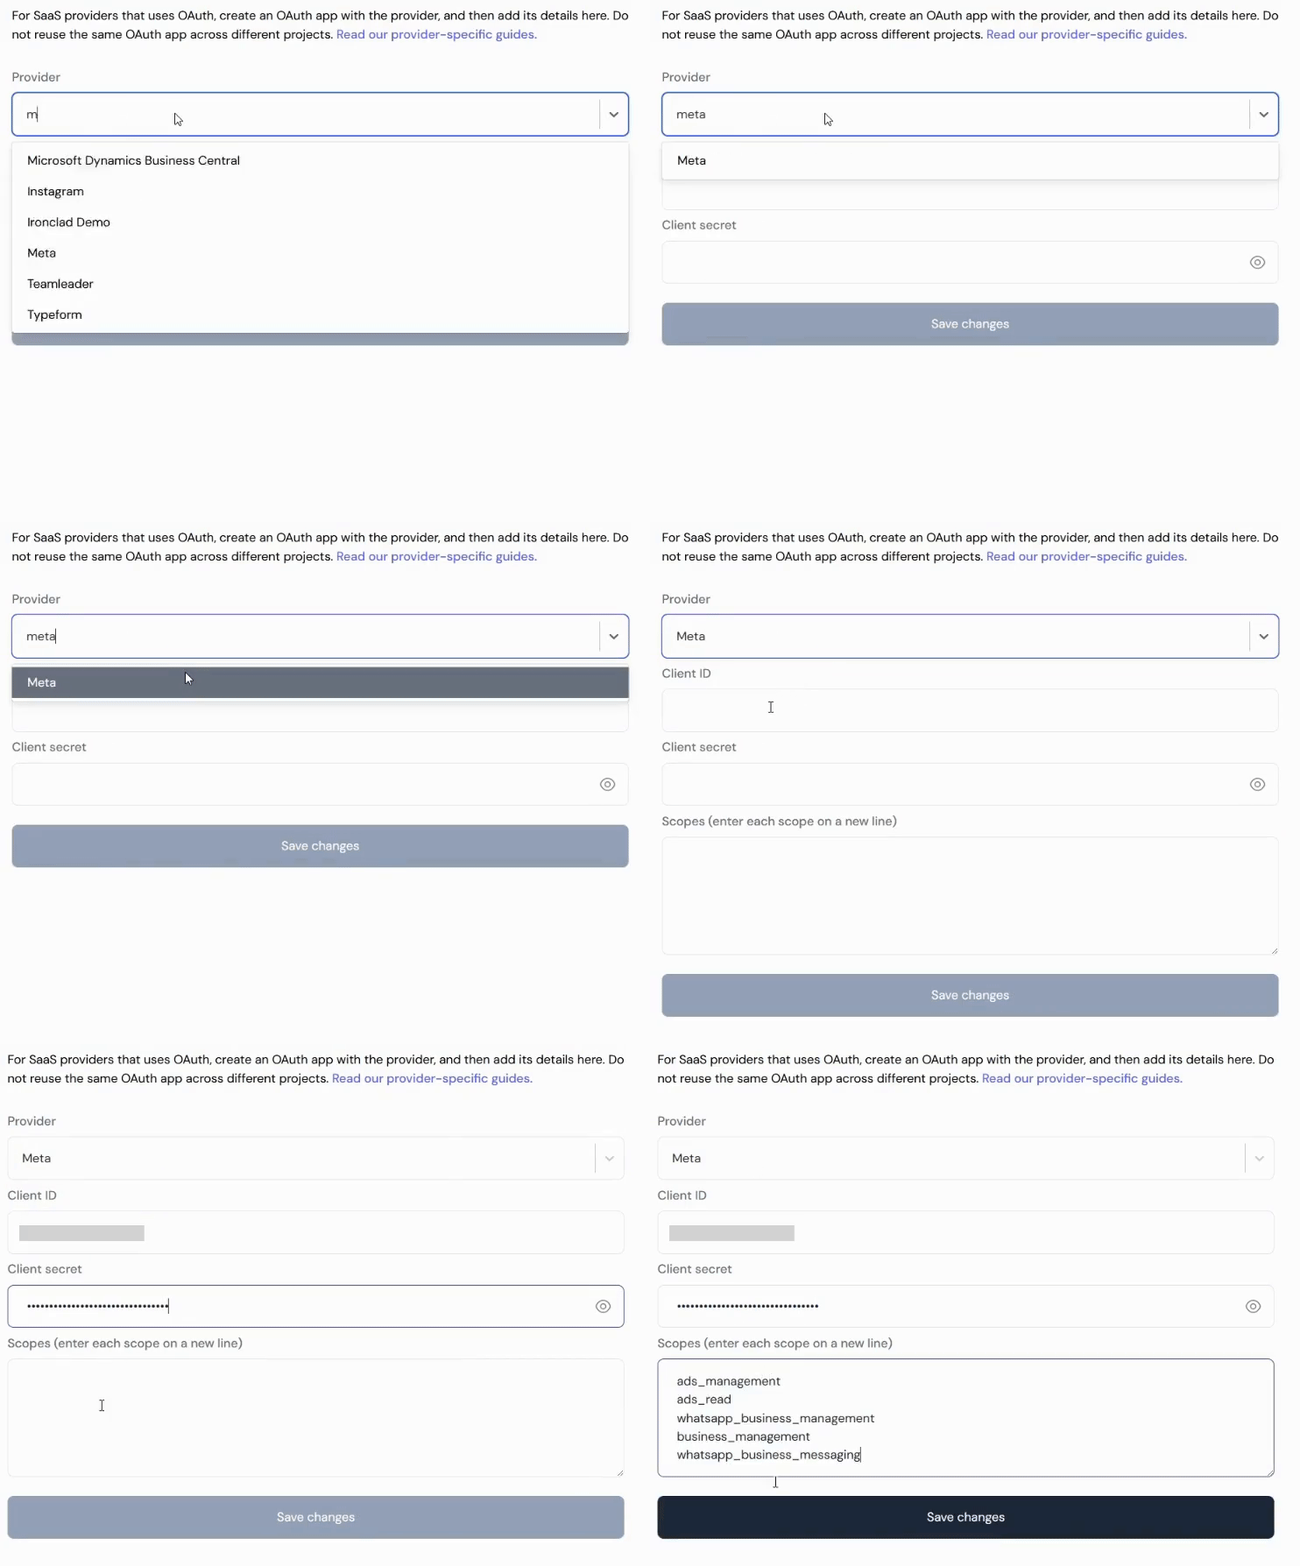
- Select Provider Apps.
- Select Facebook from the Provider list.
- Enter the previously obtained App ID in the Client ID field and App Secret in the Client Secret field.
-
Enter the permissions (scopes) required for your application in Permissions. For details on permissions, refer to the Meta Permissions guide.

- Click Save Changes.

