

Before installing a Salesforce (JWT) integration
You will need Administrator access to your Salesforce org.1. Generate a certificate and RSA private key
The JWT Bearer flow requires an RSA key pair. You’ll upload the public certificate to your Salesforce External Client App and share the private key (base64-encoded) with the integration. Open a terminal in the folder where you want to create the files. You need OpenSSL available in that environment (macOS and most Linux distributions include it by default). On Windows, use Git Bash (bundled with Git for Windows, which includes OpenSSL), WSL, or install OpenSSL and ensure it is on yourPATH.
Run the following command to generate a 2048-bit RSA private key and a matching self-signed X.509 certificate in a single step:
private-key.pem— Your RSA private key. You will base64-encode this and share it when installing the integration.cert.pem— Your public certificate. You will upload this to Salesforce in a later step.
Salesforce requires an RSA key. ECDSA (
ecparam) keys are not accepted for the JWT Bearer flow. Use a key length of at least 2048 bits.private-key.pem:
LS0tLS1CRUdJTiBSU0EgUFJJVkFURSBLRVktLS0tL...). It will be required during the installation process.
2. Create the External Client App
The External Client App identifies the integration to Salesforce and holds the certificate used to verify JWT signatures.- Log in to Salesforce as an Administrator.
-
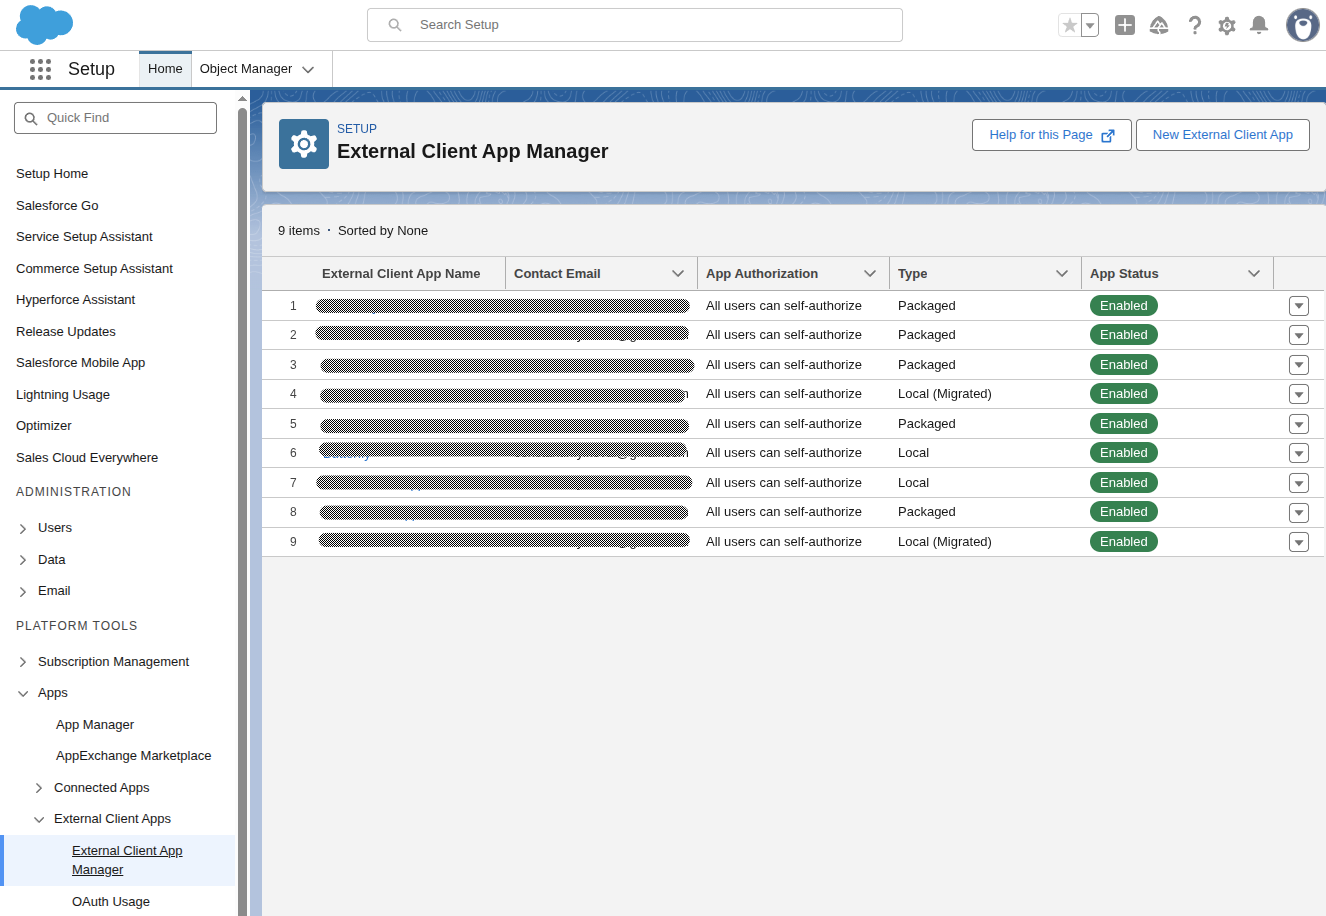
Navigate to the gear icon in the top right corner and select Setup.
- Search for External Client App Manager.
- Click New External Client App.
- Fill in the basic information:
- External Client App Name: e.g.
My Integration - API Name: auto-filled from the name
- Contact Email: your administrator email
- Distribution State: Local
- External Client App Name: e.g.
- Under API (Enable OAuth Settings):
- Check Enable OAuth.
- For Callback URL, enter
https://api.withampersand.com/callbacks/v1/oauth. The JWT Bearer flow does not use the callback, but Salesforce requires a value. - Under Selected OAuth Scopes, add:
- Manage user data via APIs (
api) - Perform requests at any time (
refresh_token,offline_access) — this is required for Salesforce to accept JWT Bearer exchanges even though no refresh token is issued.
- Manage user data via APIs (
- Under Flow Enablement, check Enable JWT Bearer Flow and upload the
cert.pemfile you generated in the previous step. - Under Security, ensure Require Proof Key for Code Exchange (PKCE) extension for Supported Authorization Flows is unchecked. (It’s unchecked by default, but worth verifying.)
Leave Issue JSON Web Token (JWT)-based access tokens for named users unchecked. Despite the similar name, this is a different feature that changes the format of access tokens Salesforce returns — and those JWT-format tokens only work with the REST API, not with the Bulk API or Metadata API that this integration also uses. Enabling it will break bulk writes and subscribe-action registration.
3. Copy the Consumer Key
- In Setup, open External Client App Manager again.
- Select your External Client App from the list.
- Go to the Settings tab and expand OAuth Settings.
- Under App Settings, click Consumer Key and Secret. This opens a new page — you may be prompted to verify your identity before the values are shown.
- Copy the Consumer Key. Store it securely — you will need it during the installation step. (The Consumer Secret is not needed for JWT Bearer flow.)
4. Configure OAuth policies
- In Setup, open External Client App Manager and select your External Client App.
- Go to the Policies tab, click Edit.
- Expand OAuth Policies.
- Scroll down to App Authorization section:
- Set Refresh Token Policy to Refresh token is valid until revoked.
- Set IP Relaxation to Relax IP restrictions.
- Click Save.
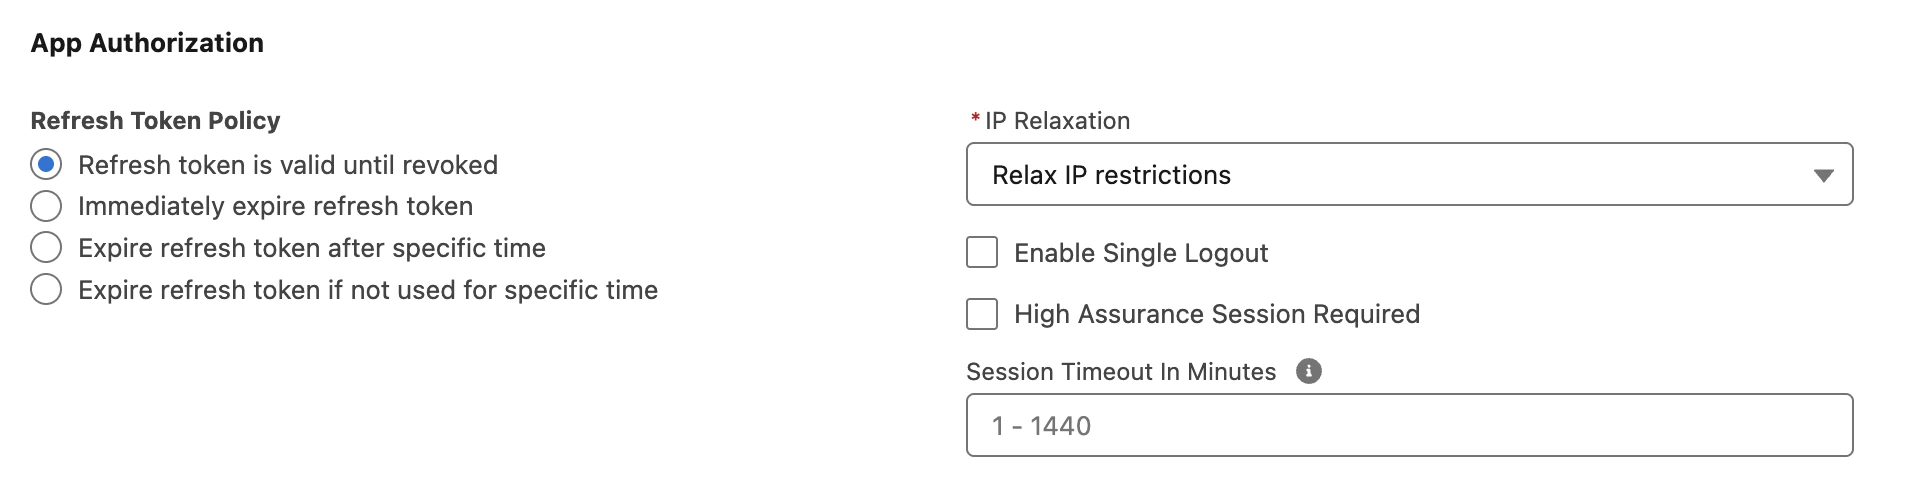
Setting Refresh Token Policy to Refresh token is valid until revoked is also required, even though the JWT Bearer flow never actually issues a refresh token. Salesforce internally checks for a non-expired approval record for the user before issuing an access token, and any other setting causes that approval to age out — which silently breaks the integration later. The other options (
Immediately expire, Expire after specific time, etc.) will cause invalid_grant errors.5. Create an integration user
The JWT Bearer flow runs as a specific Salesforce user. Every API call made by the integration is attributed to this user, and its Profile and permission sets determine what data the integration can read and write.1. Create a new user
- Click the gear icon in the top-right corner and select Setup.
- In the left-hand search bar, type Users and open it.
- Create a new user:
- For User License, select
Salesforce Integration. - For Profile, select
Minimum Access - API Only Integrations.

2. Create a Permission Set
- Click the gear icon in the top-right corner and select Setup.
- In the left-hand search bar, type Permission Sets and open it.
- Click on “New” to create a new permission set.
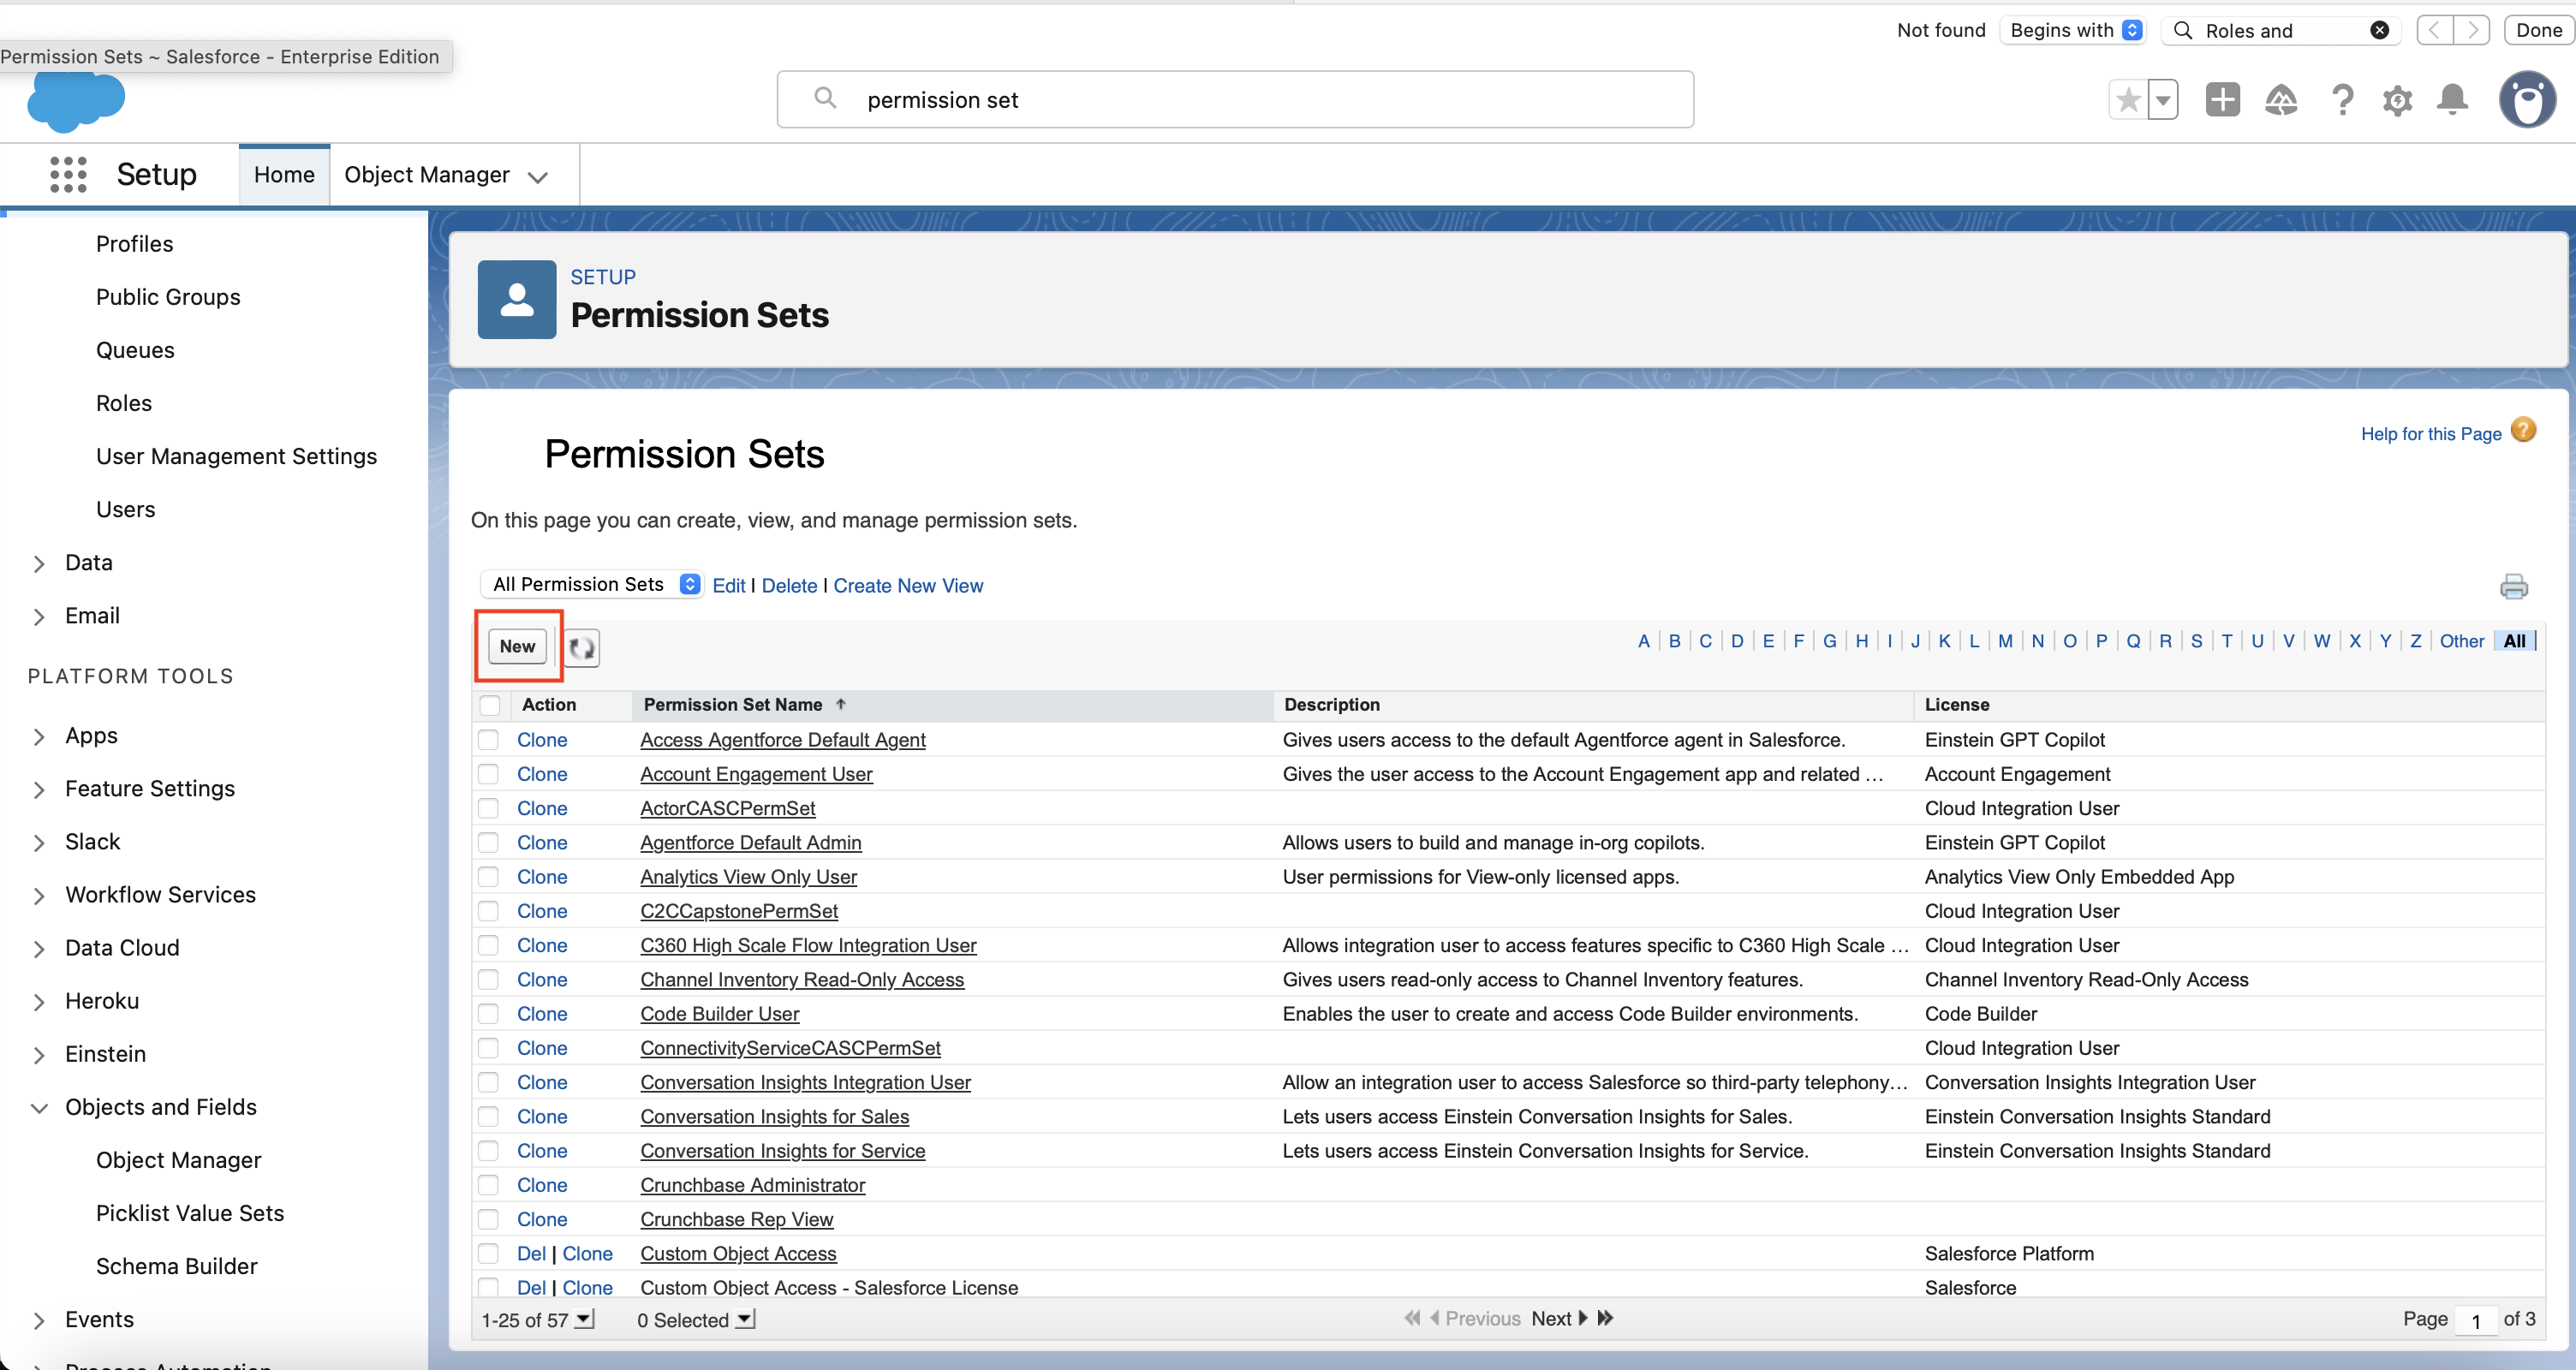
- Follow the prompts to create the permission set:
- For the name, you can call it something general like
Integration User Permission Setor something that describes the level of access it has - such asAccount and Contact Access. - In the License dropdown, you must select
Salesforce API Integration.

3. Configure object permissions
- Click on Object Settings
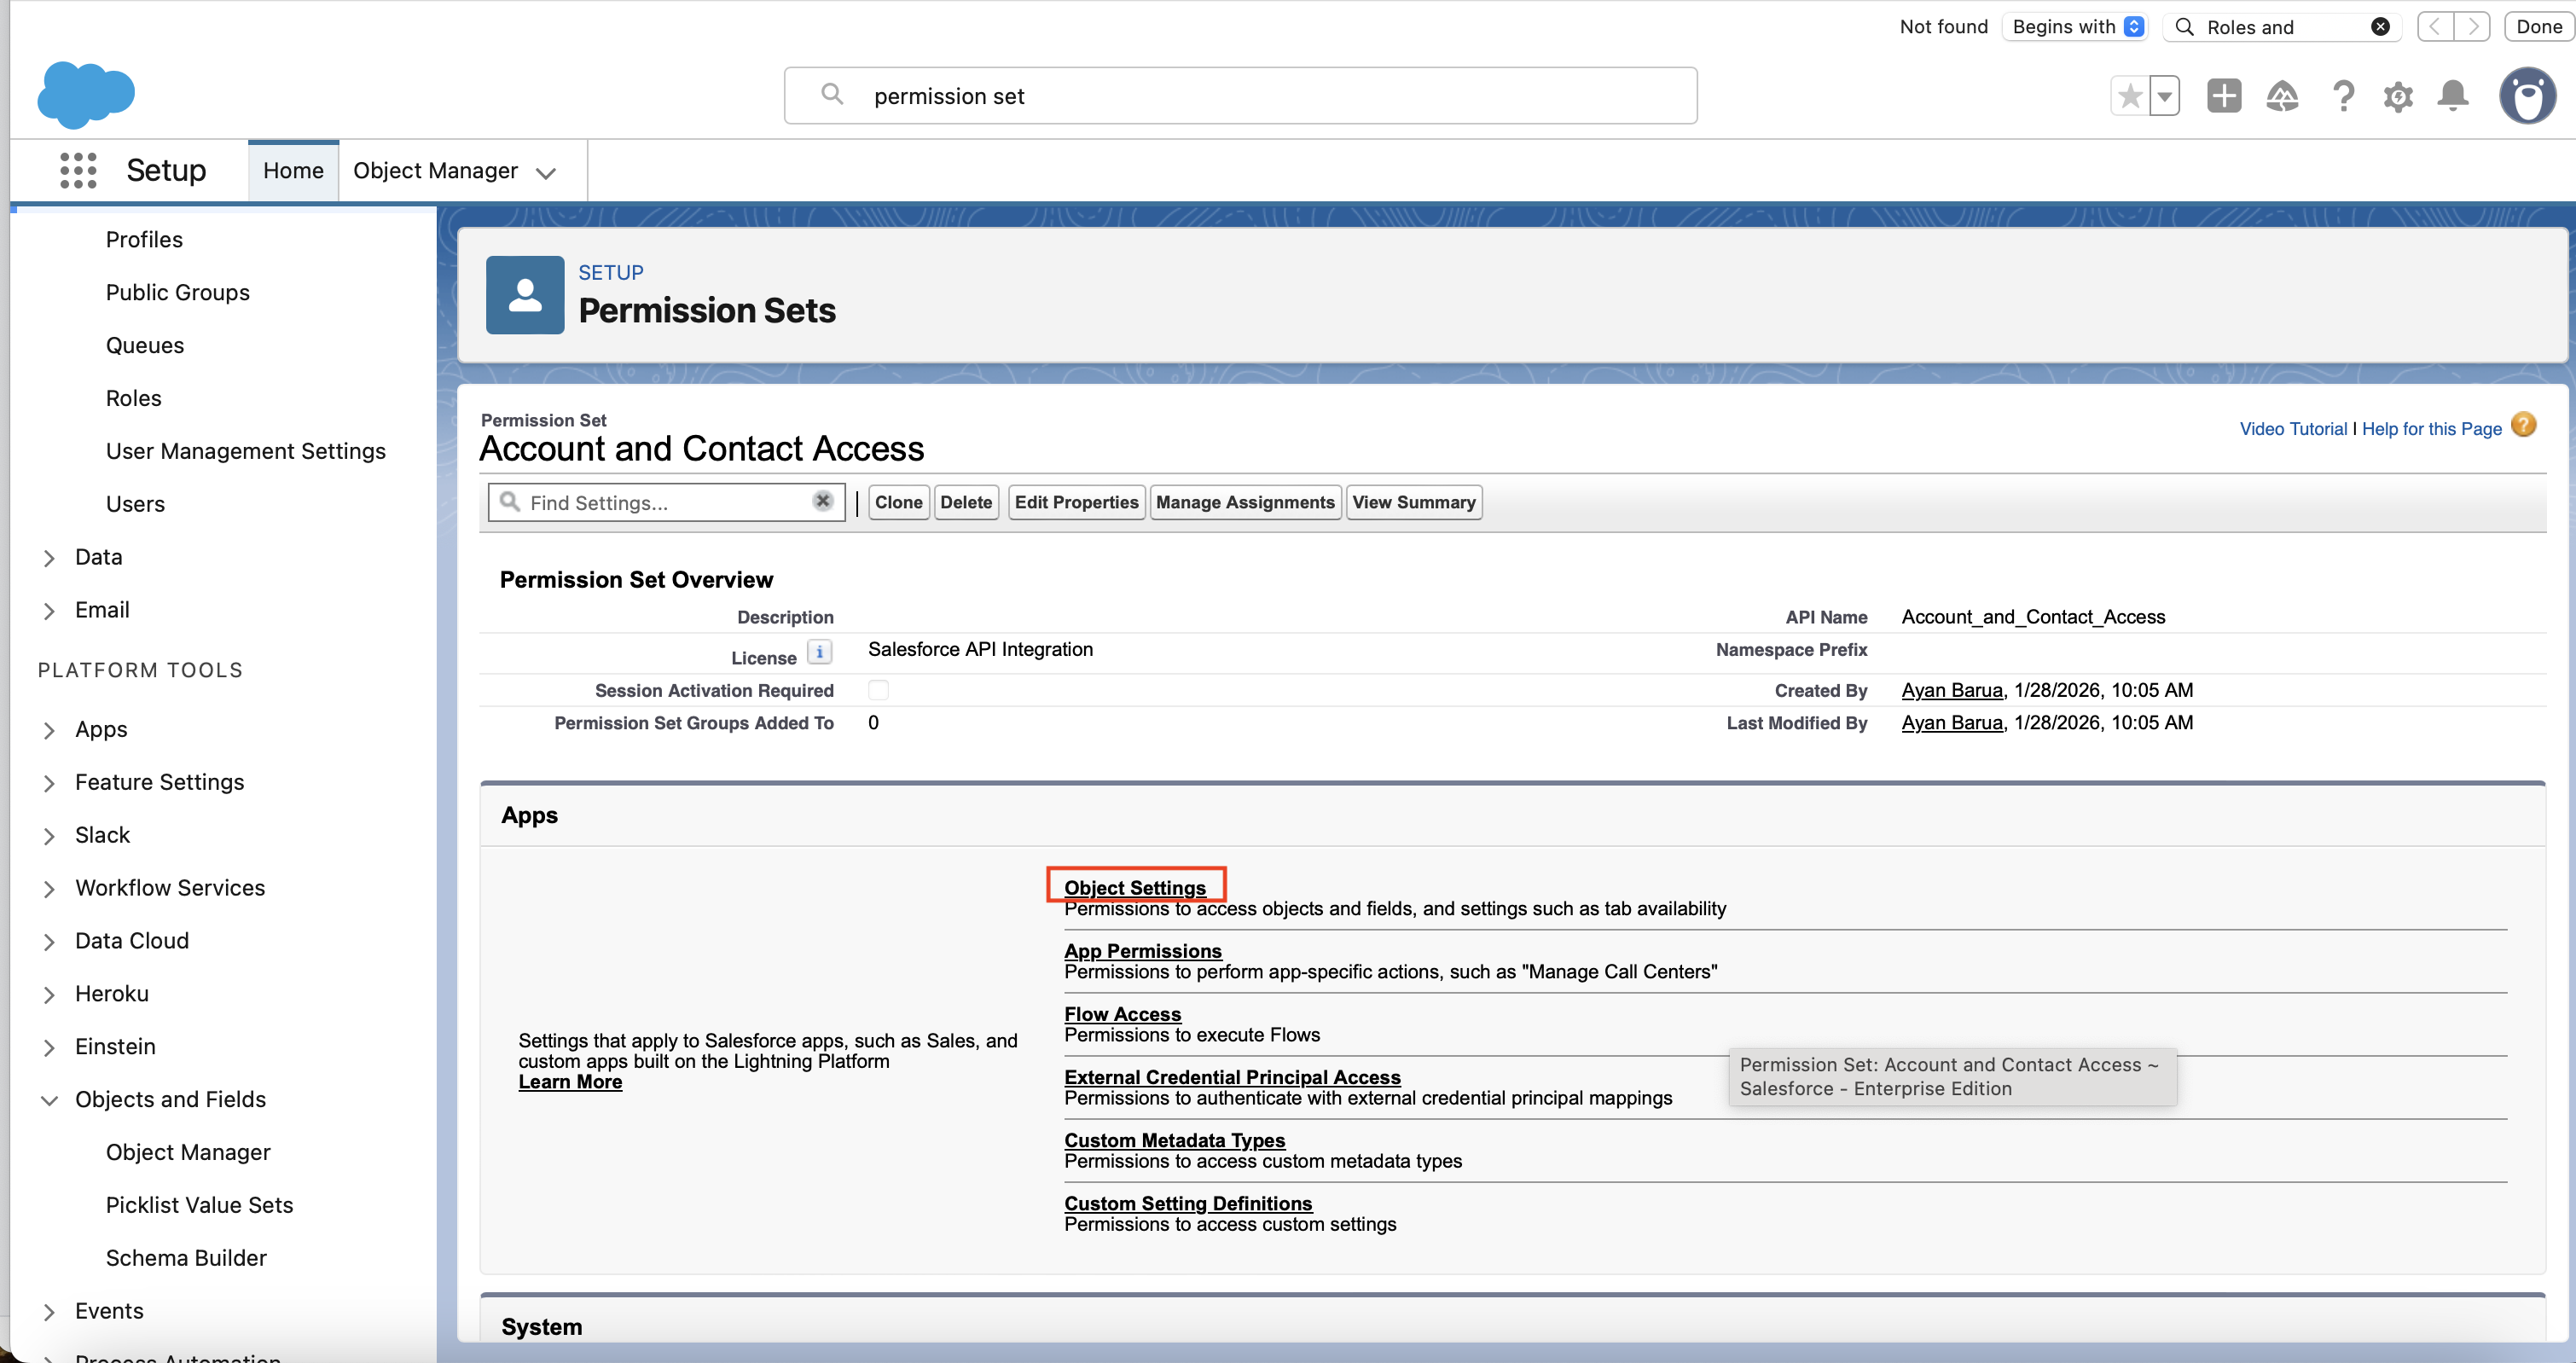
- For each of the objects that the integration needs to access you need to set up its permissions. Start by clicking on the first object, for example “Accounts”.
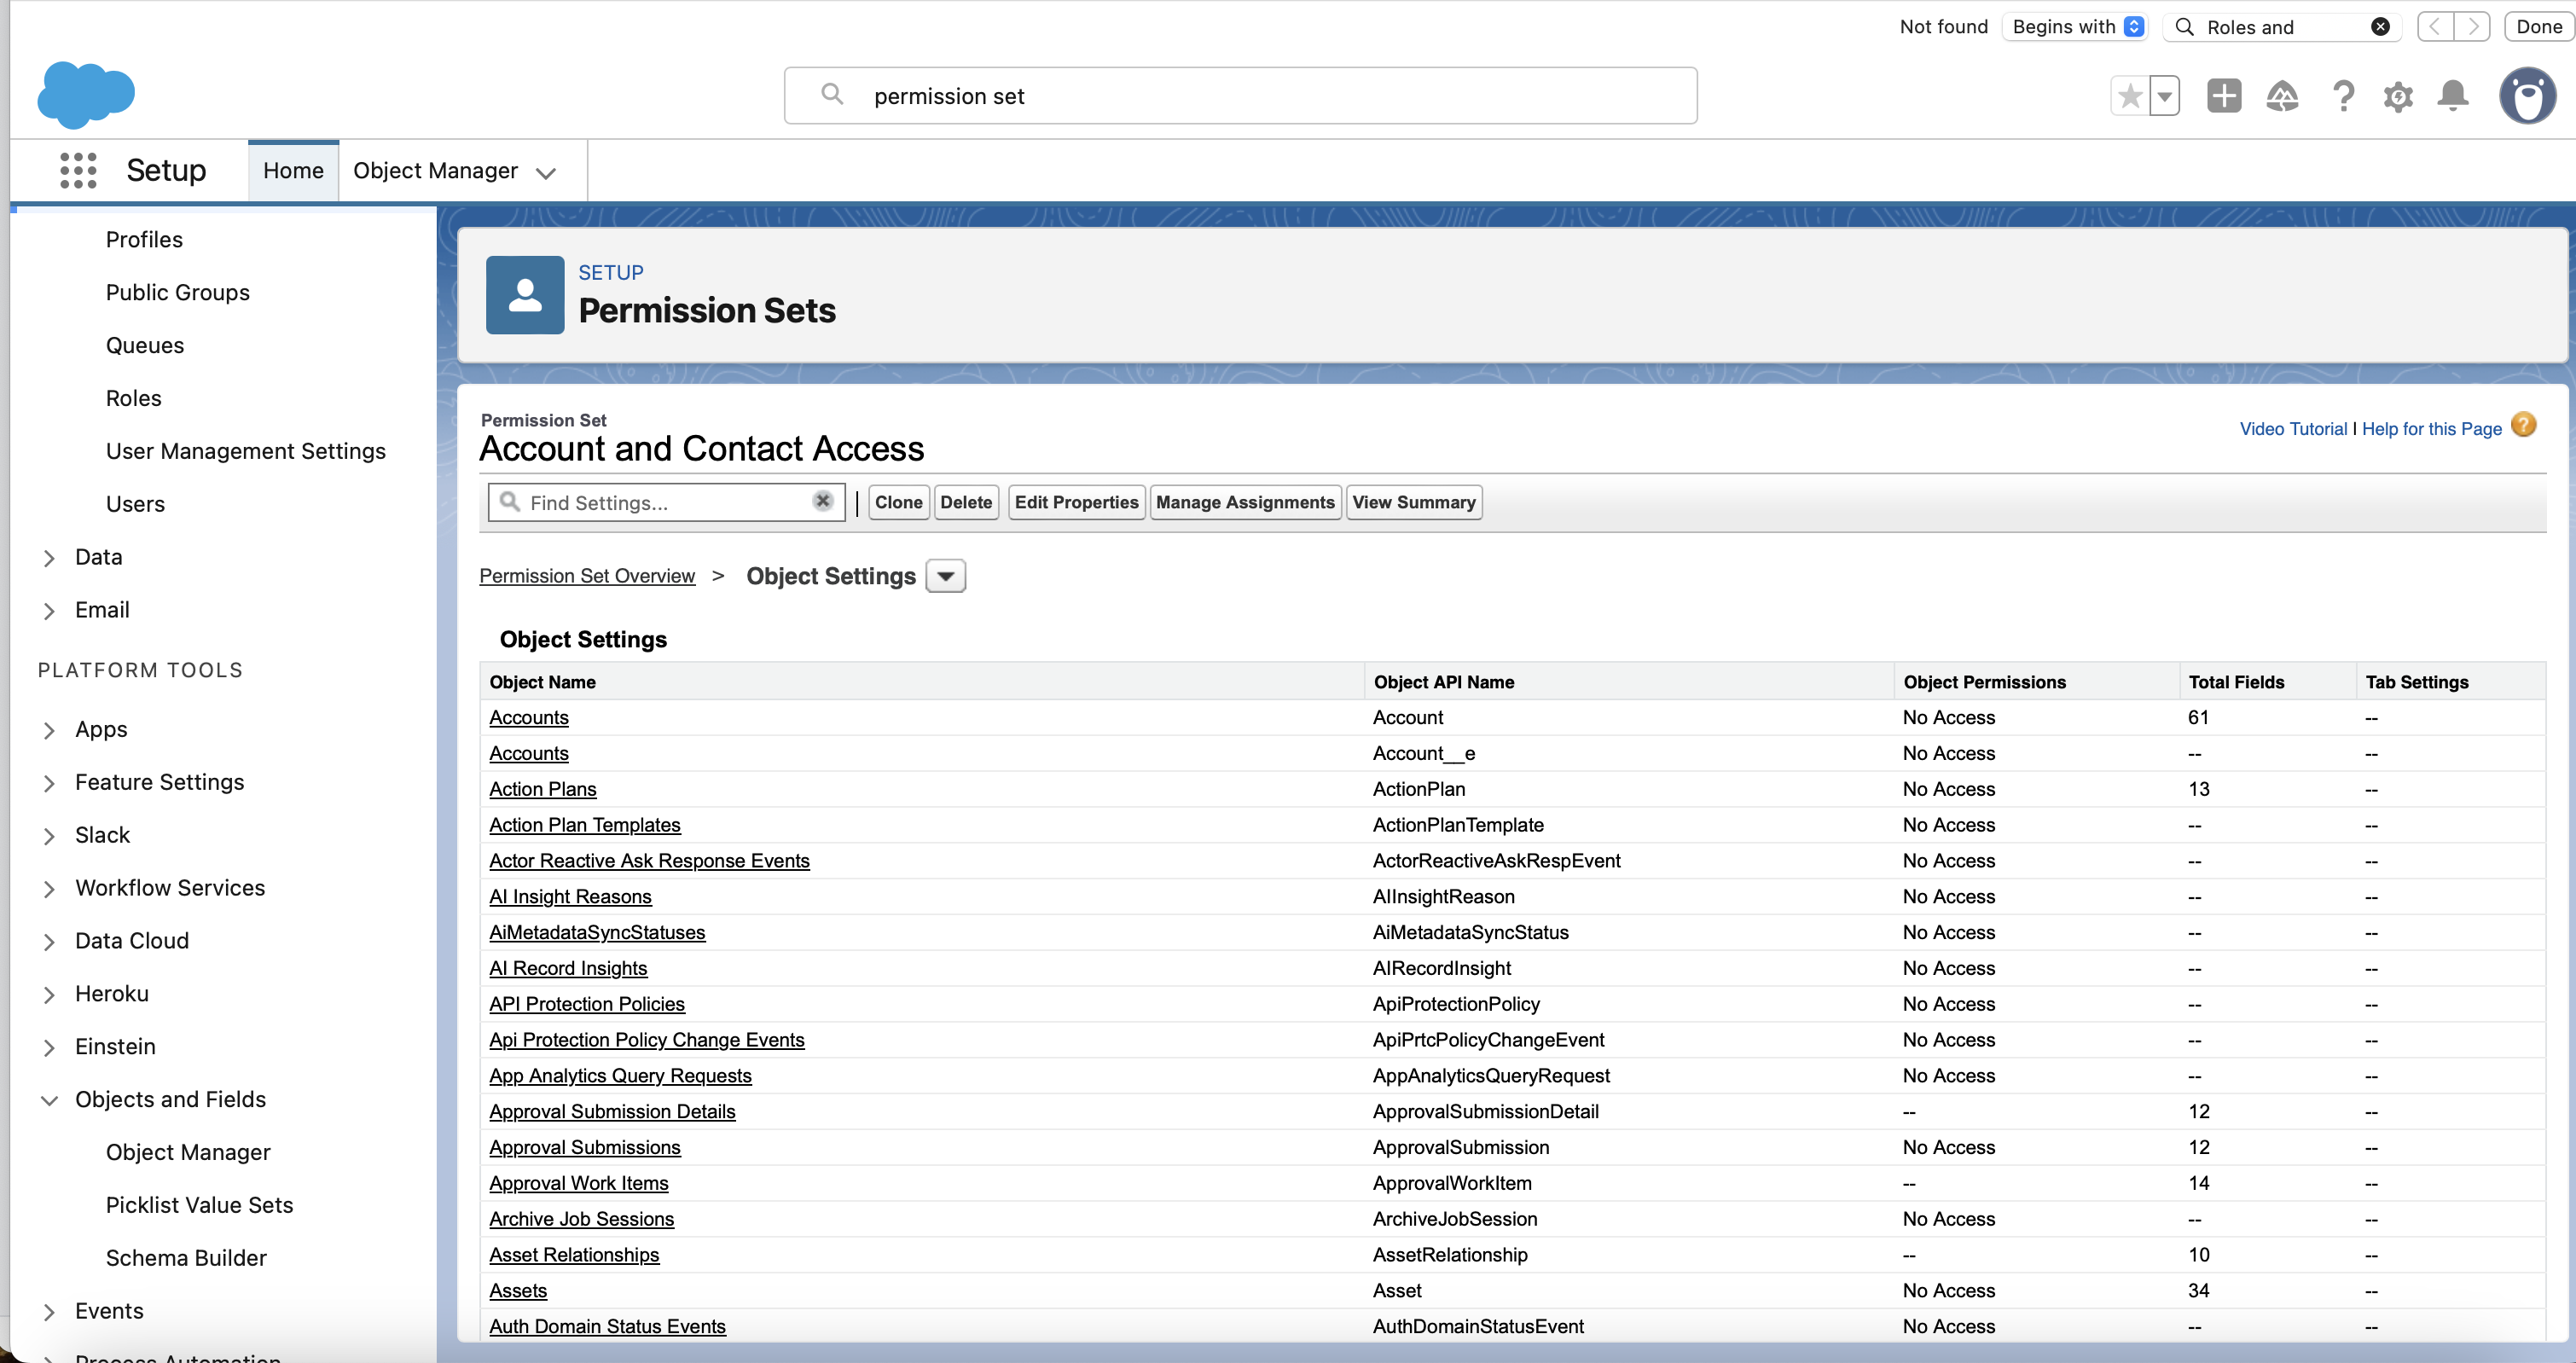
- Edit the permission so that all relevant boxes under Object Permissions and Field Permissions are checked. Then click on Save.
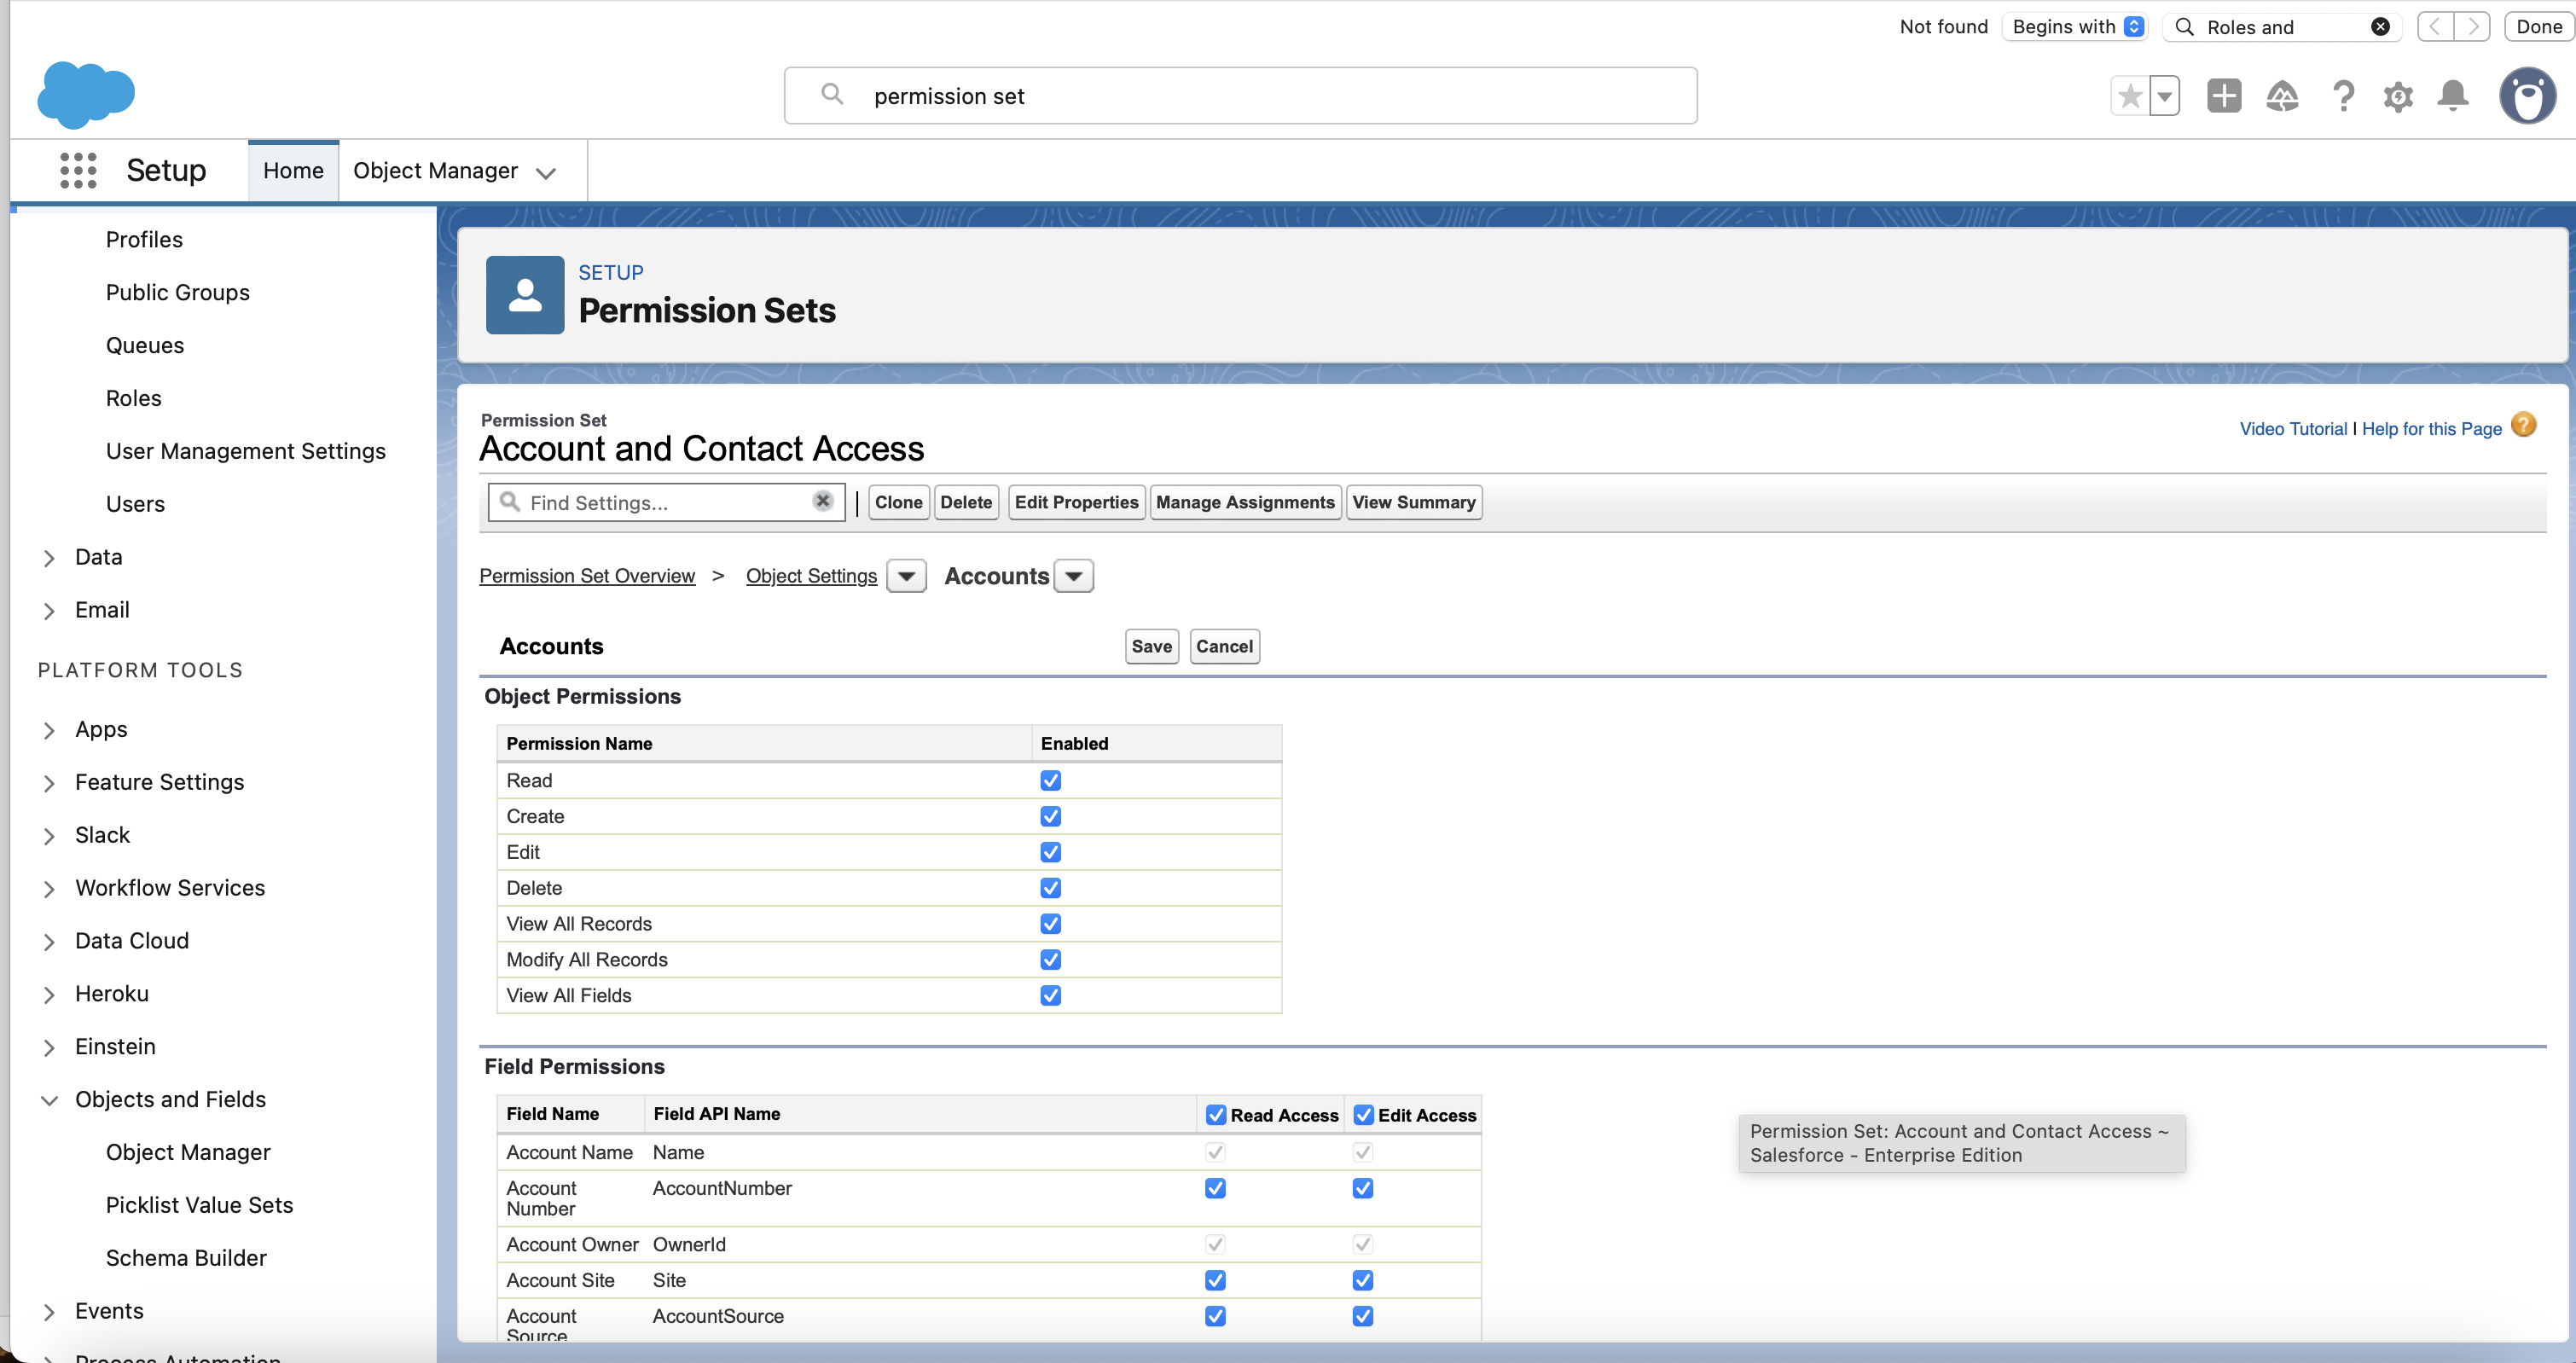
- Repeat for all the other objects that the integration needs to access.
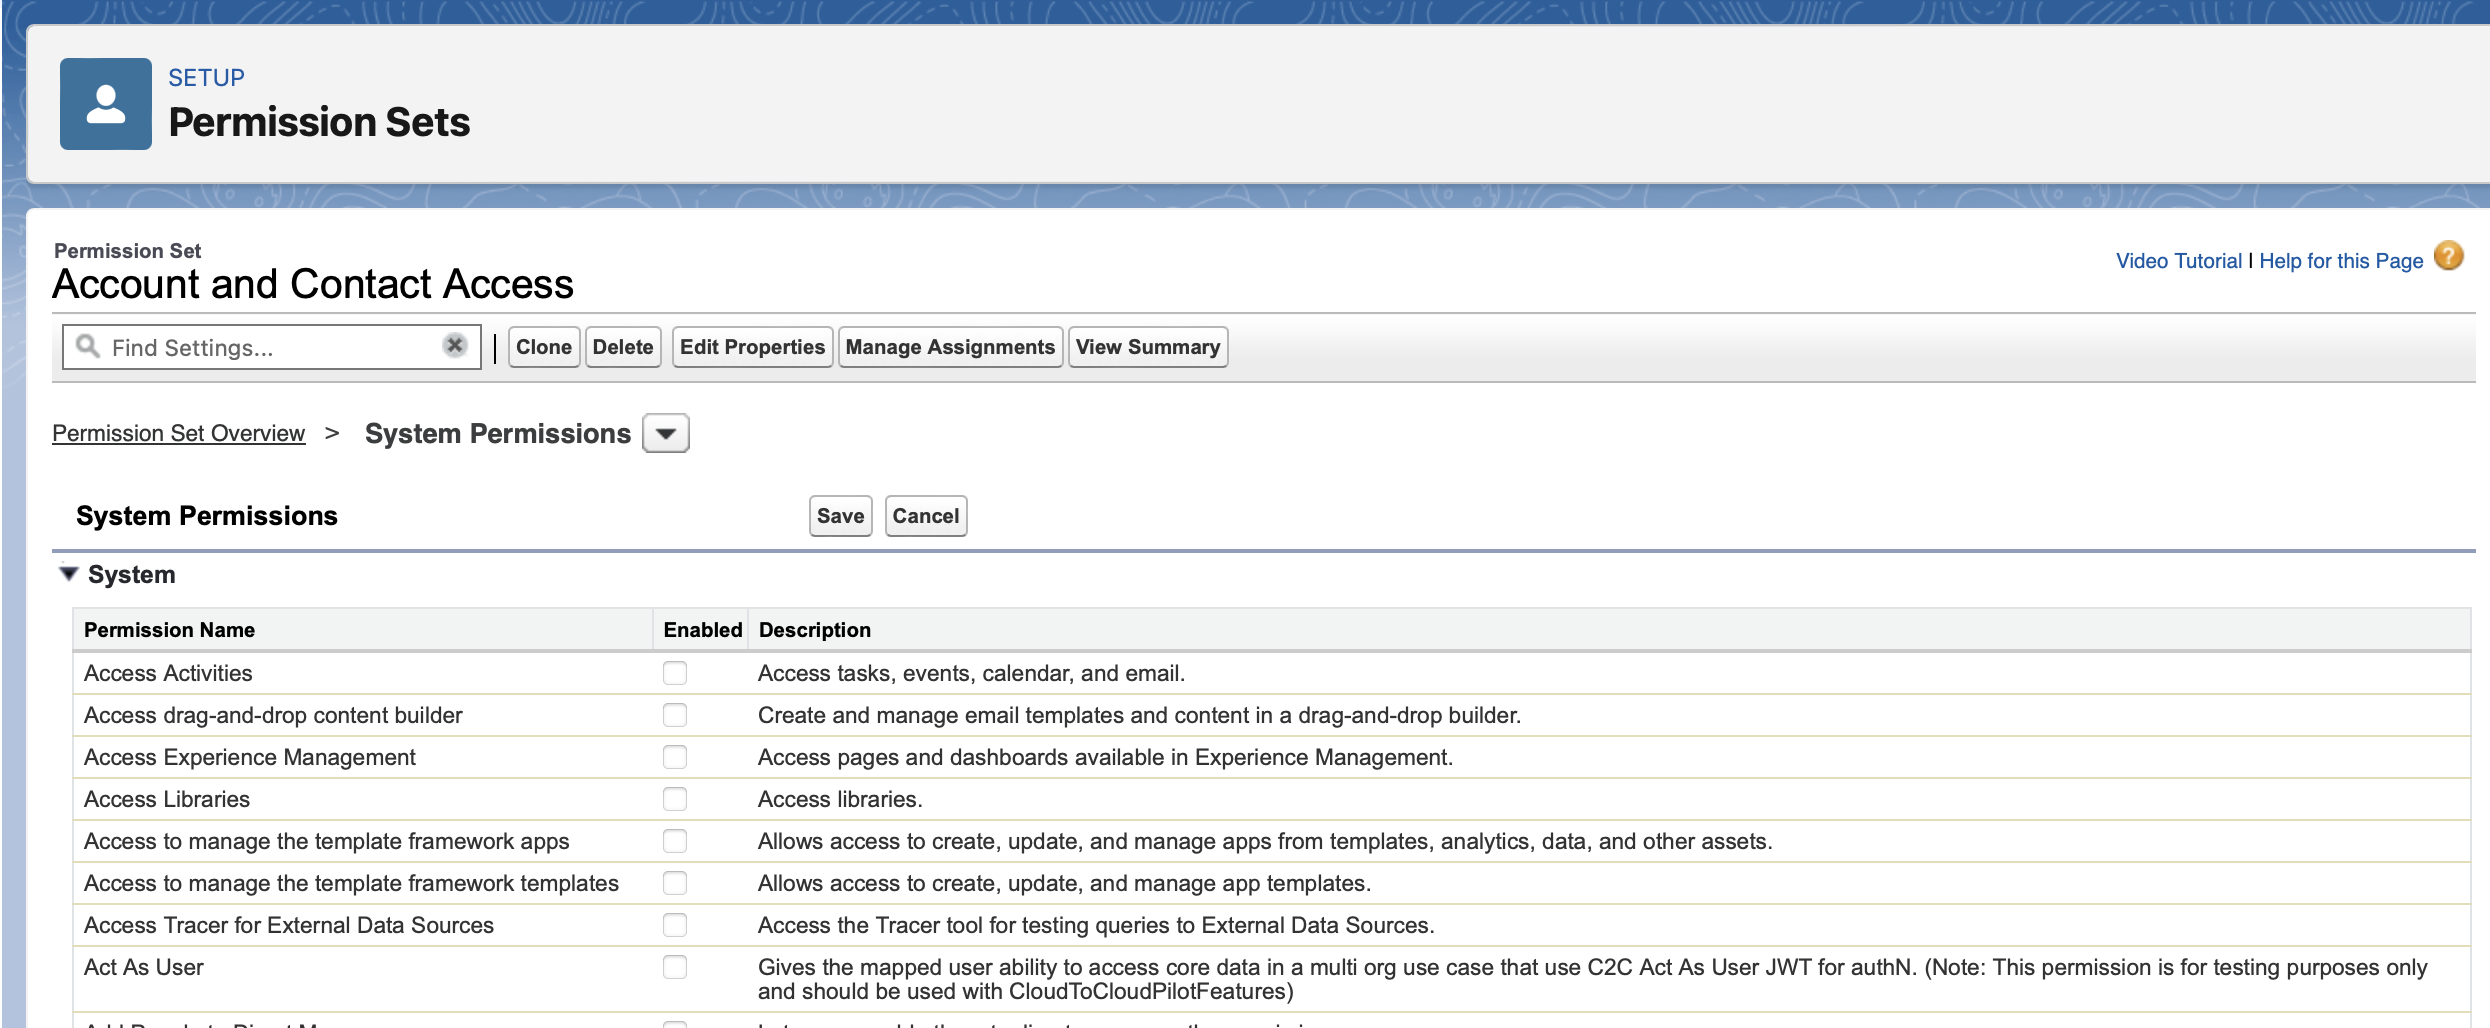
4. Configure system permissions
- Select System Permissions.
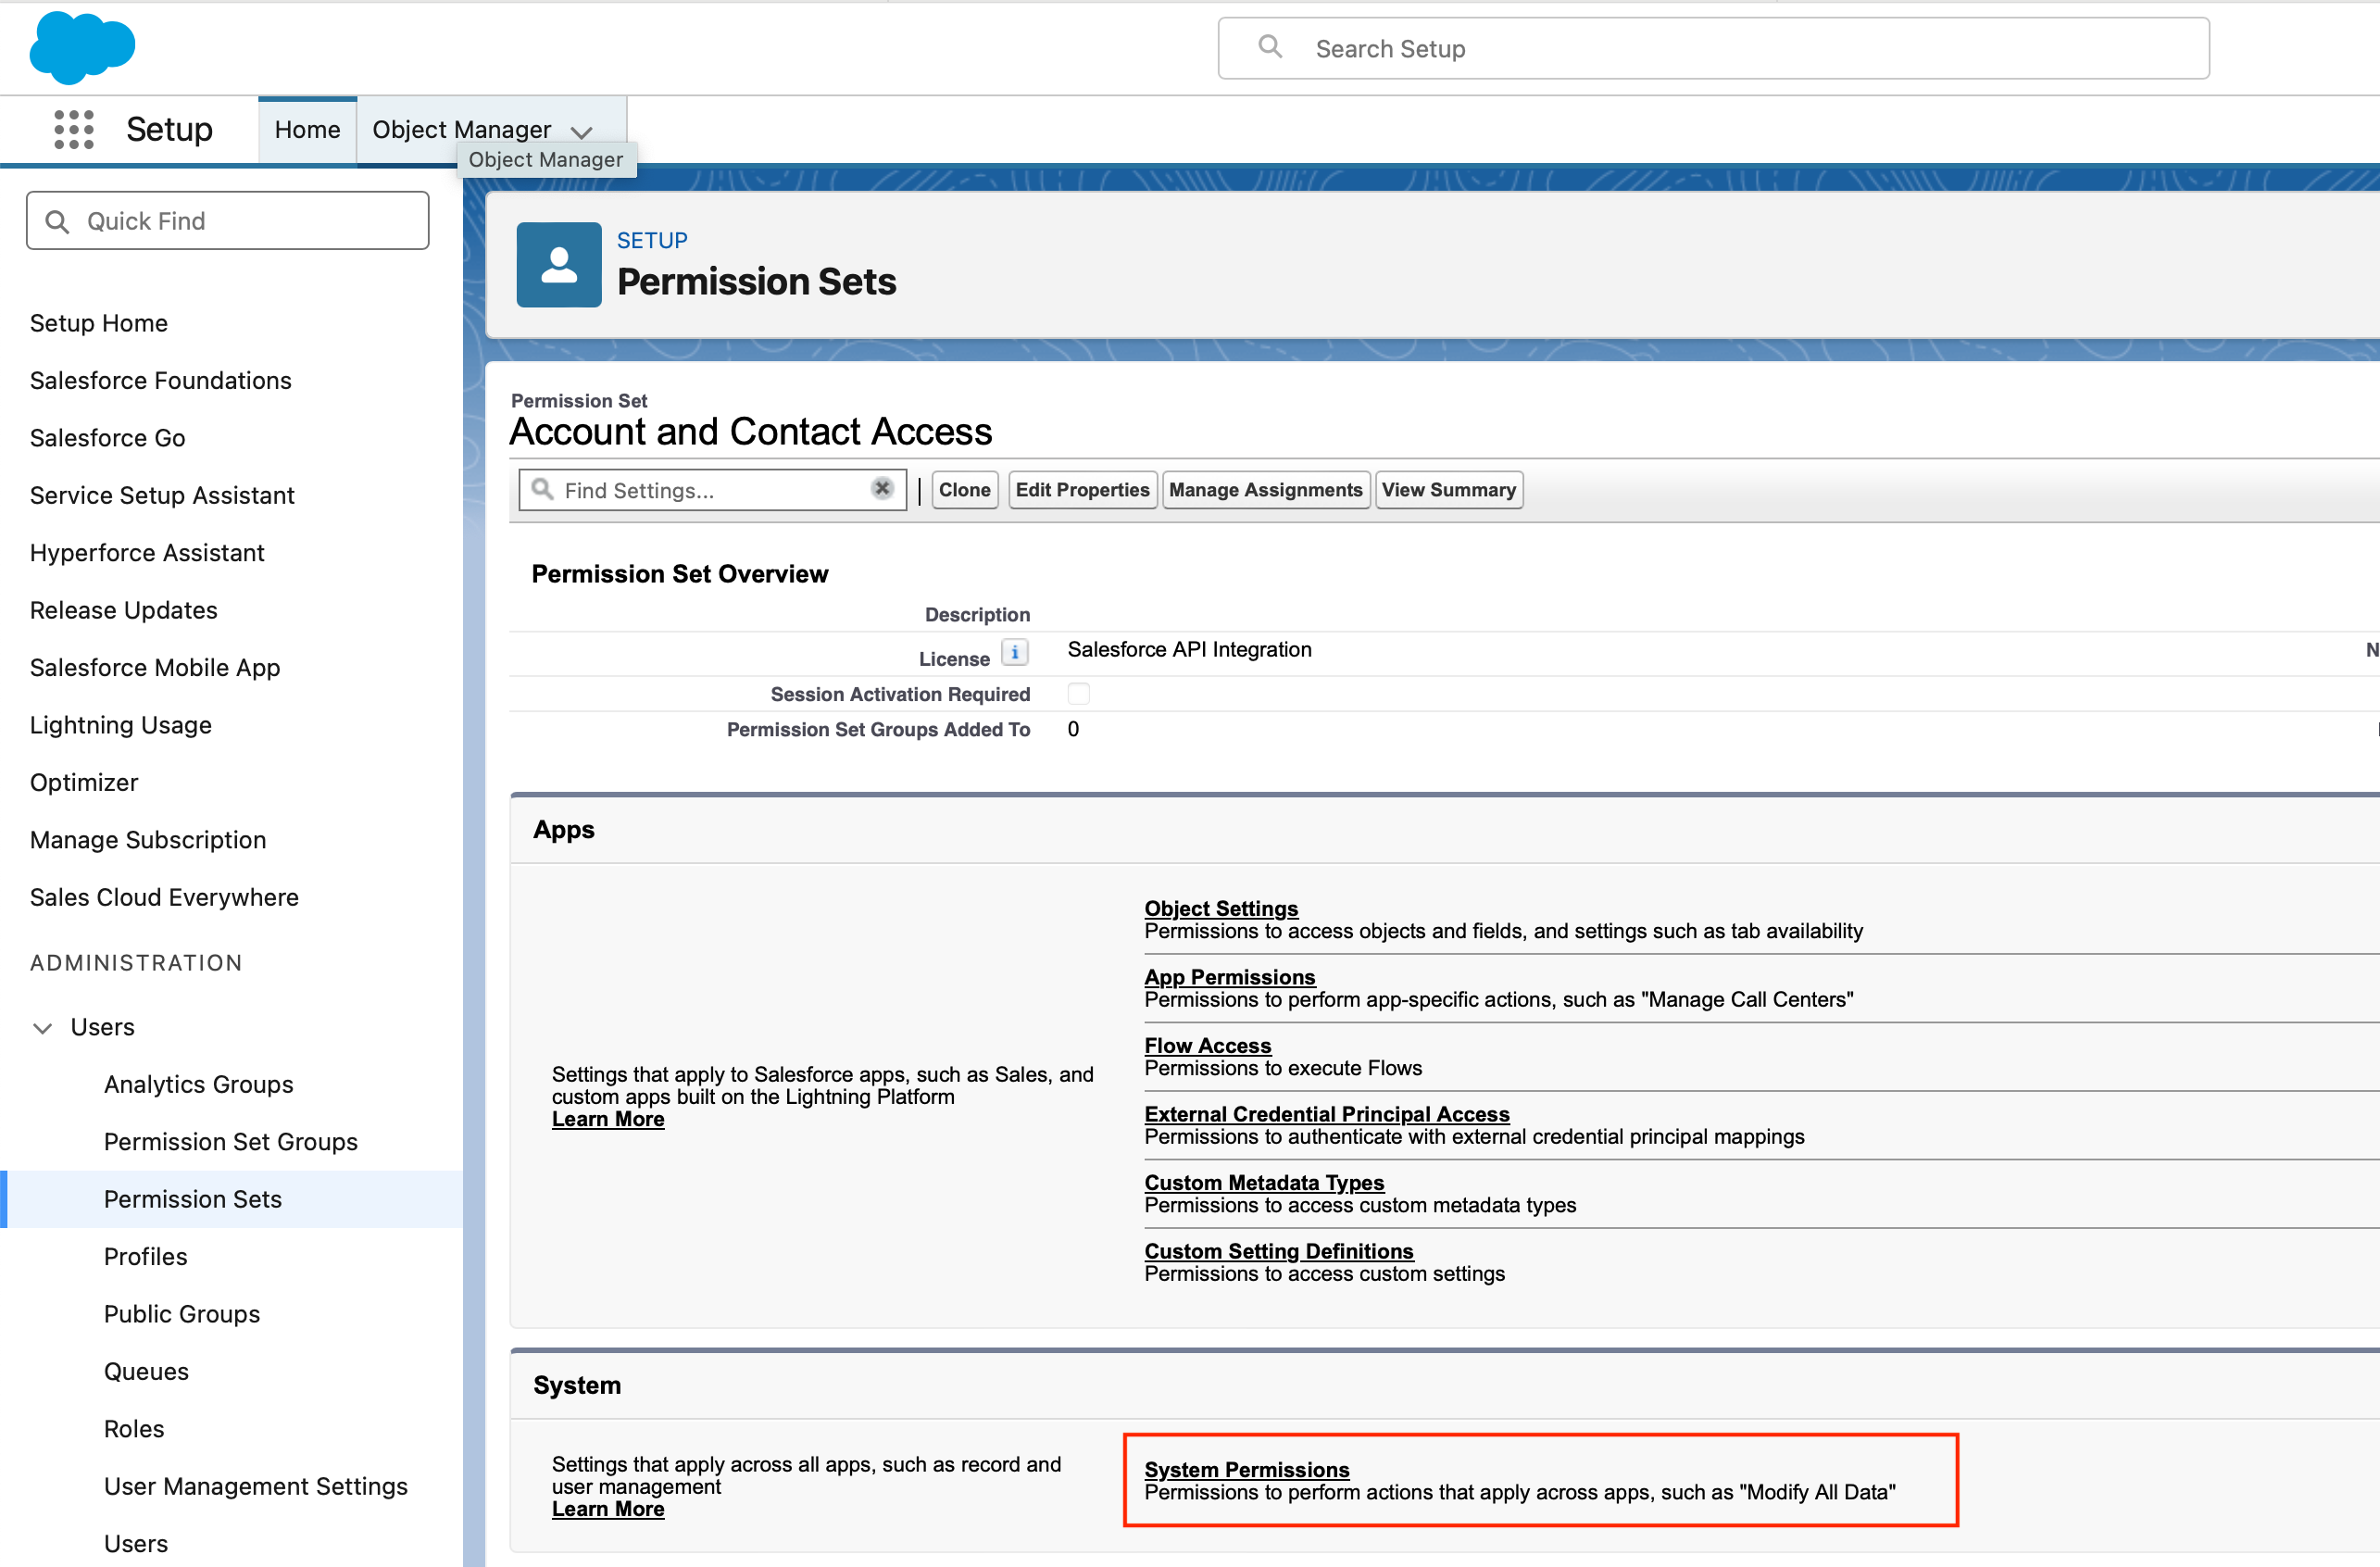
- Ensure that the checkboxes for the necessary system permissions are selected, and then click Save.
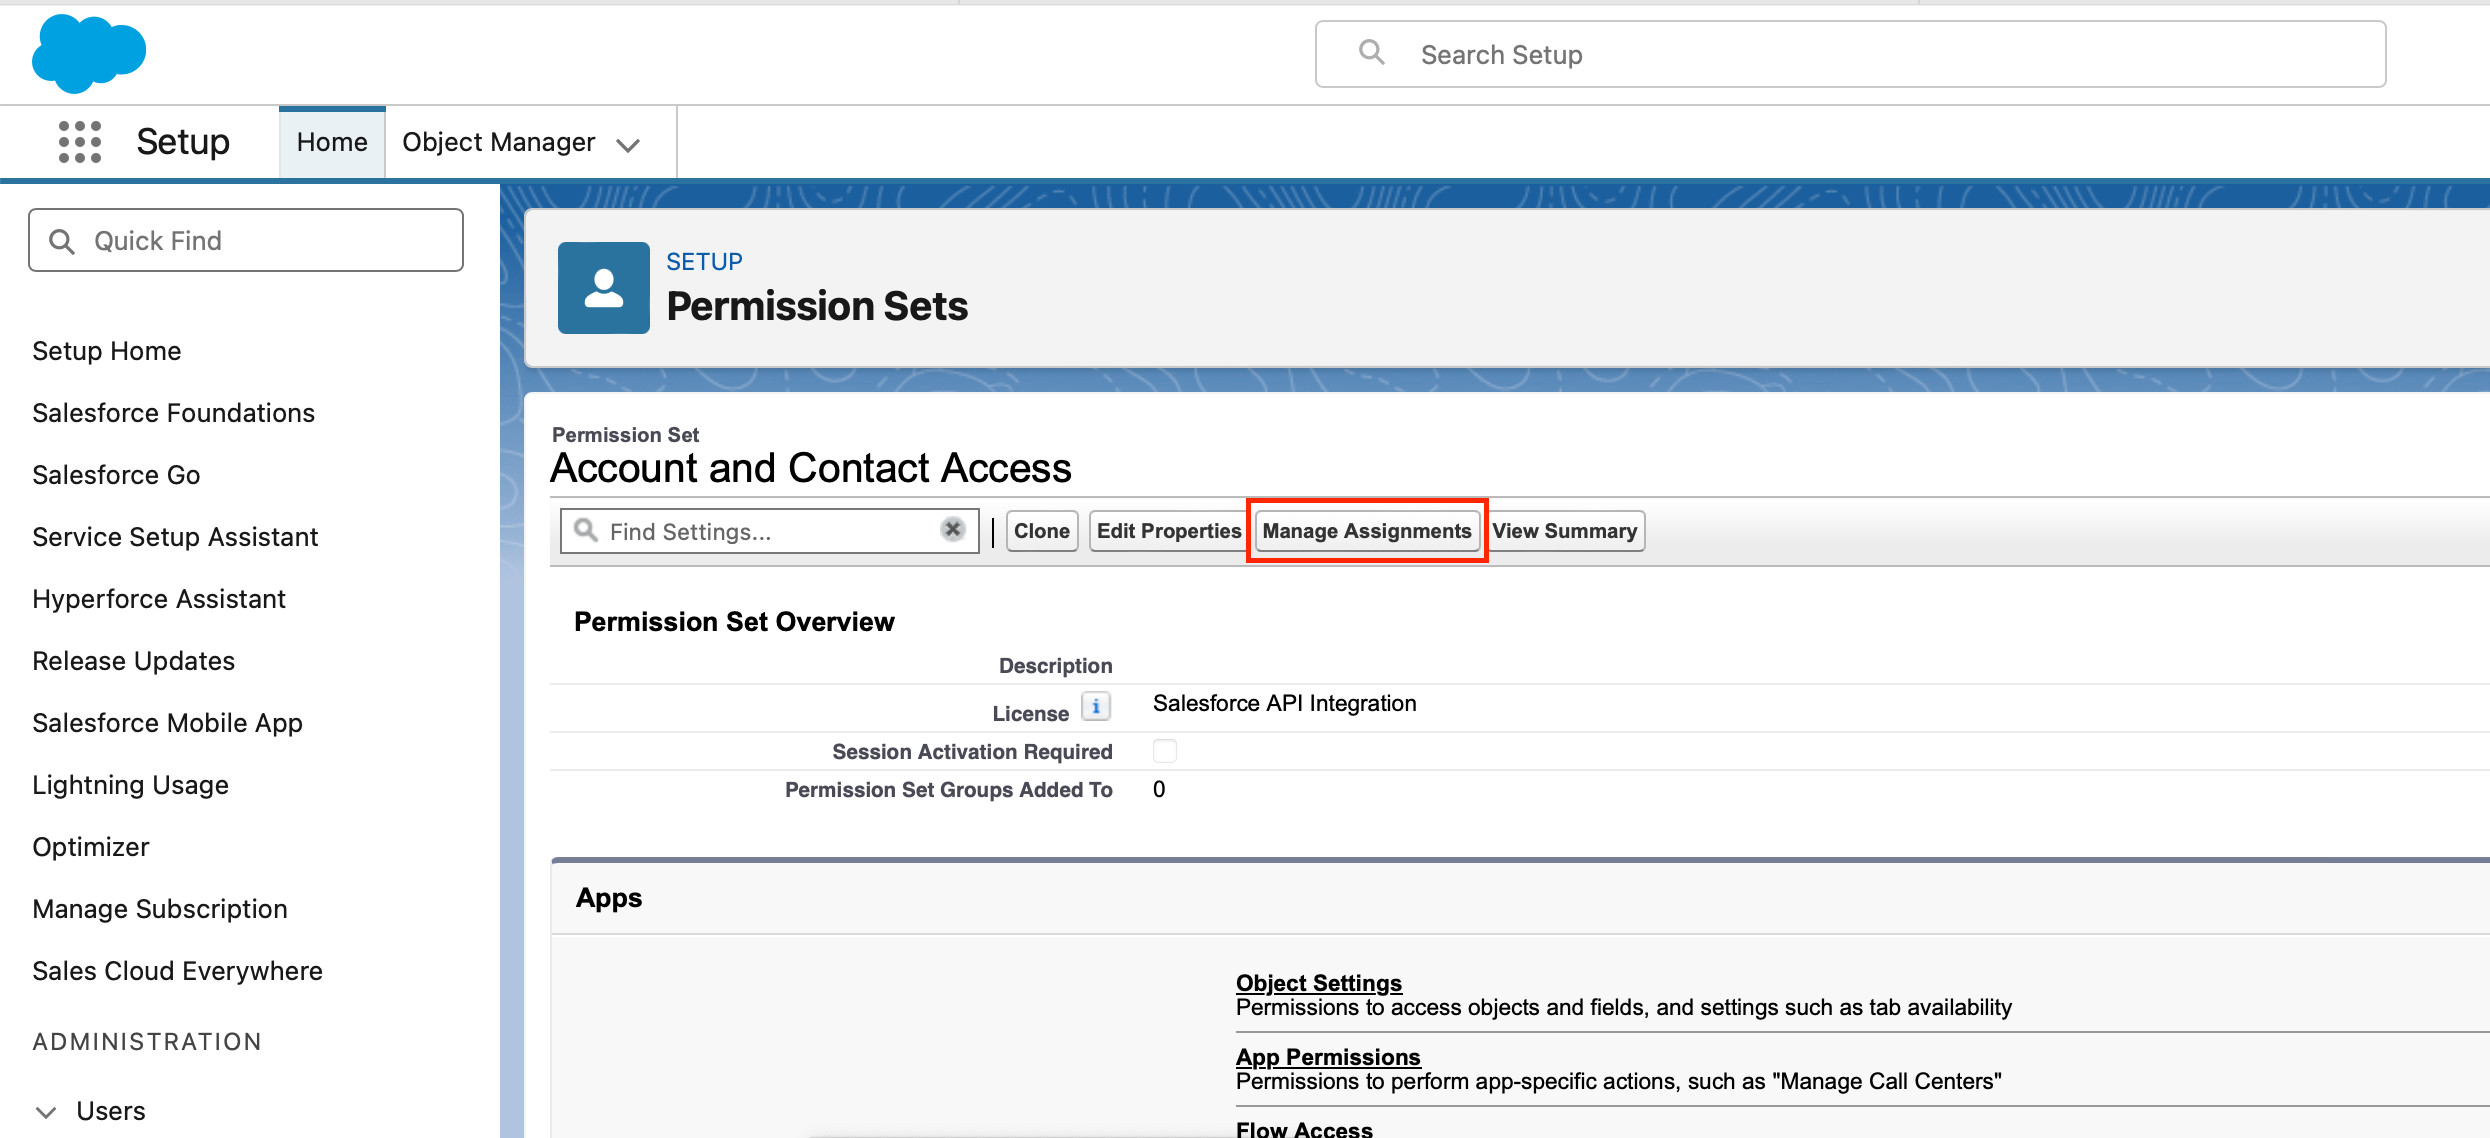
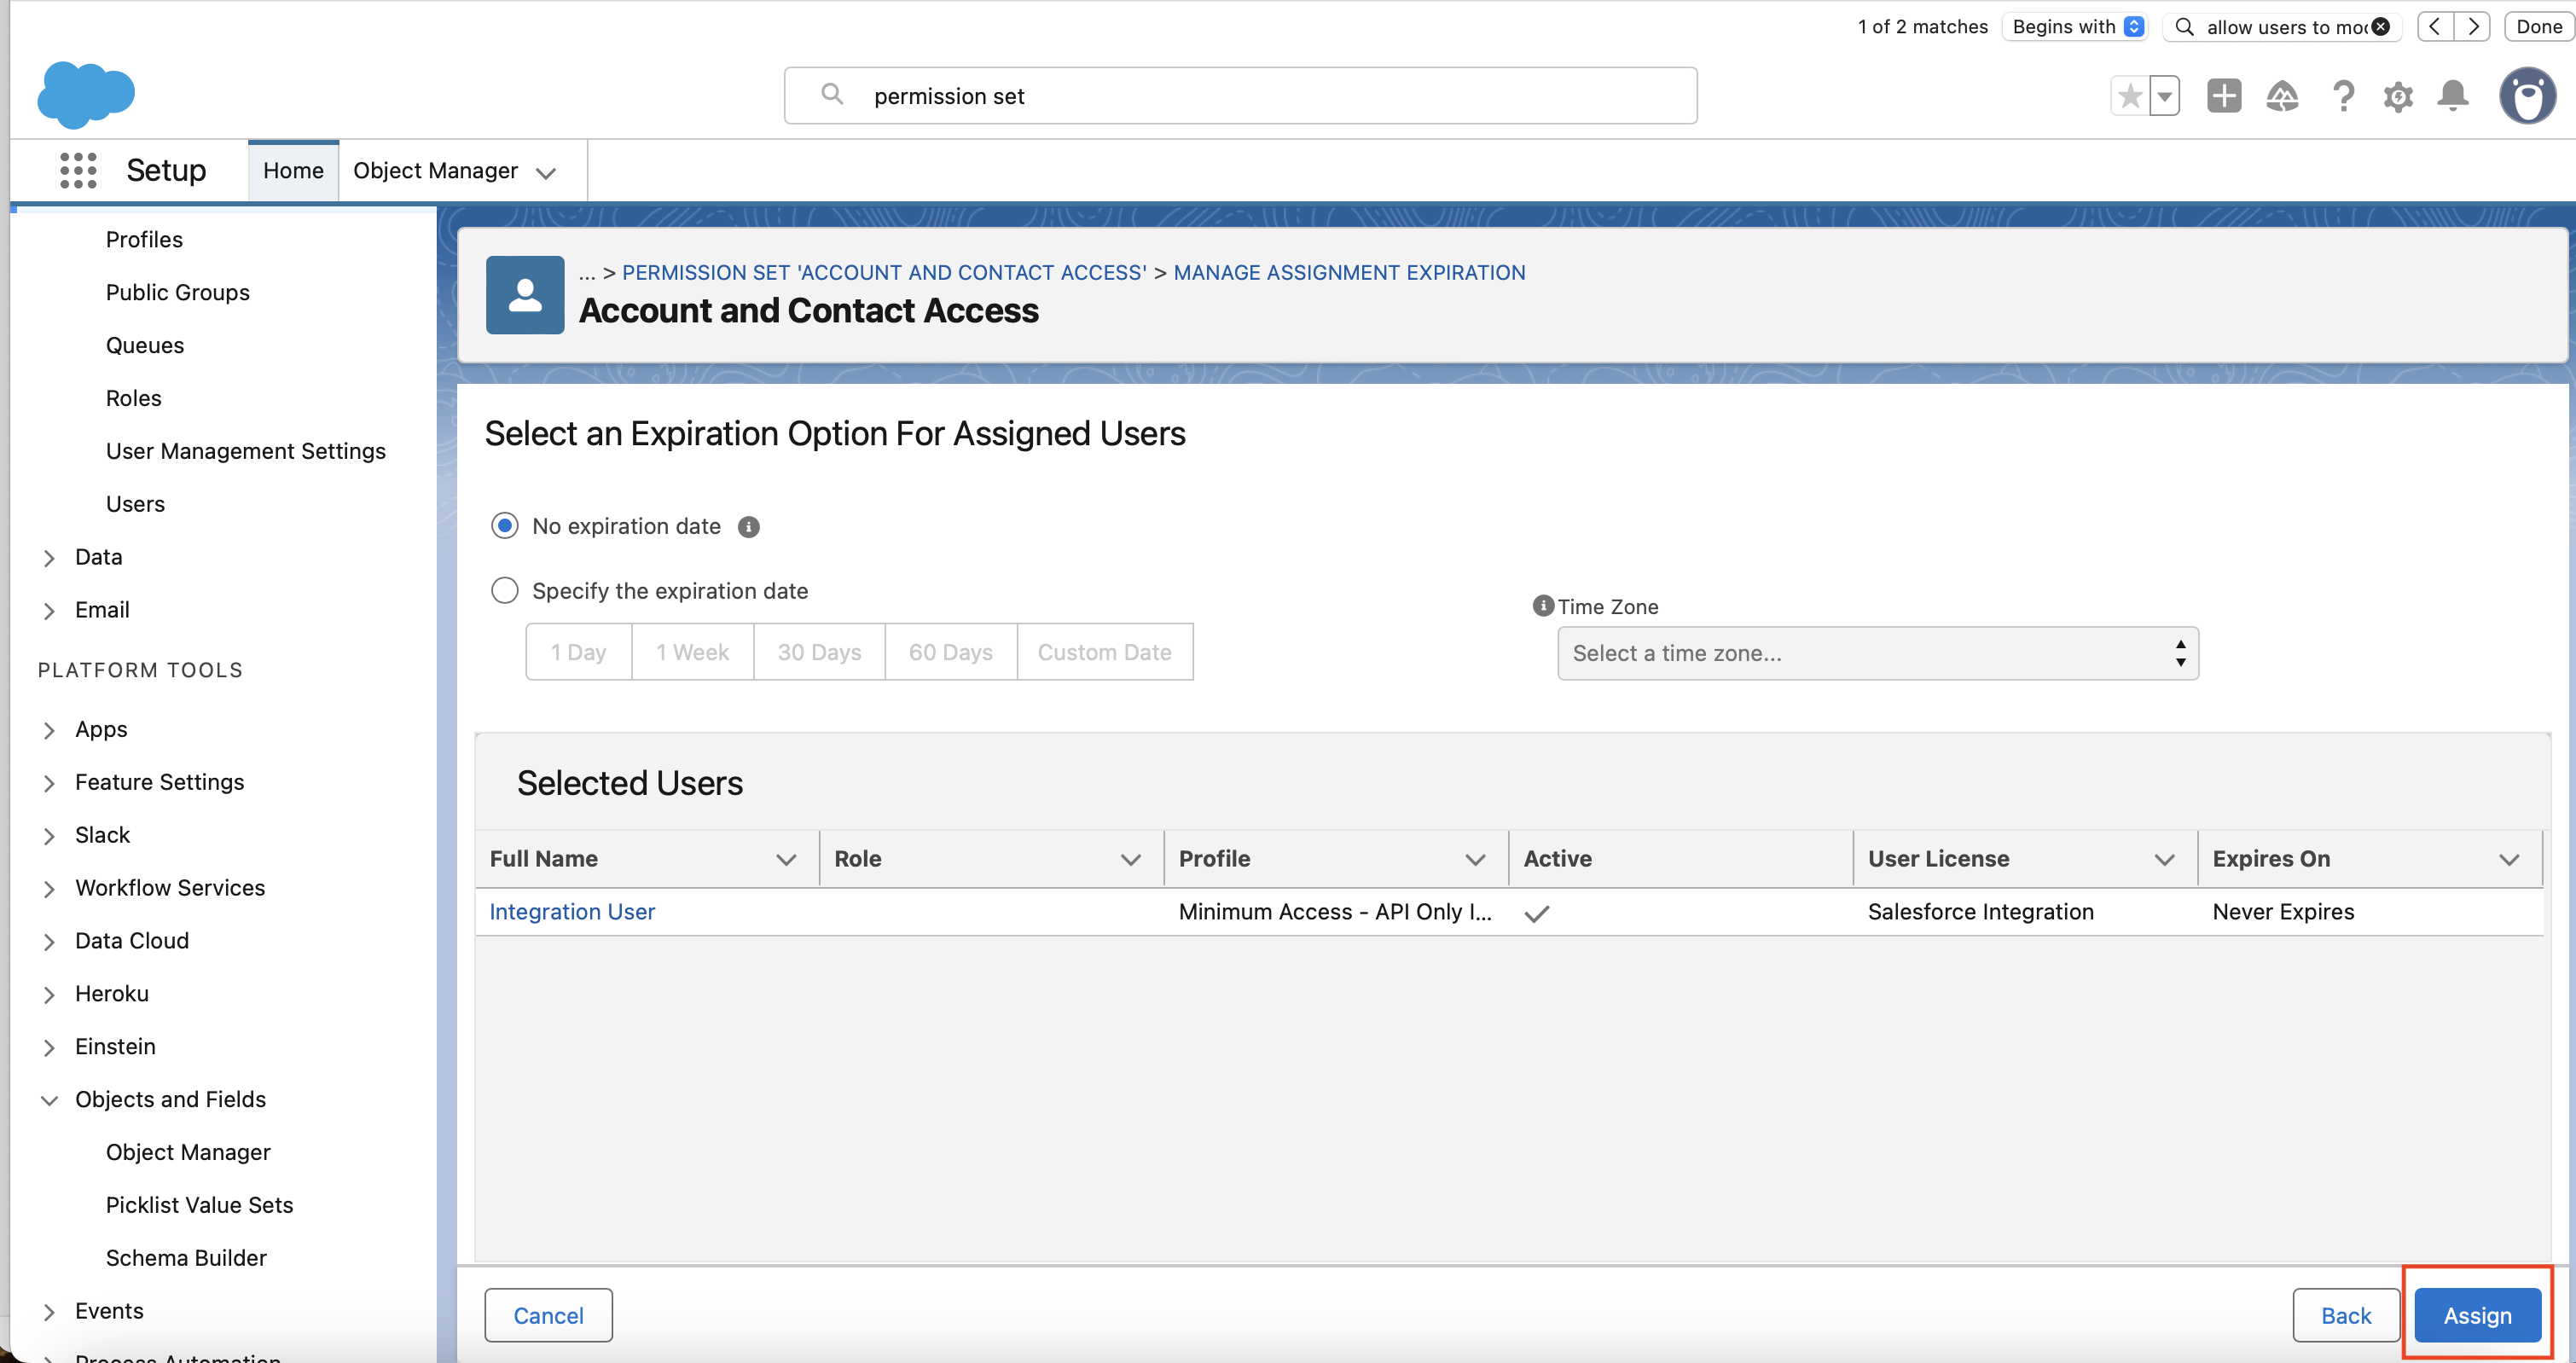
5. Assign permission set to integration user
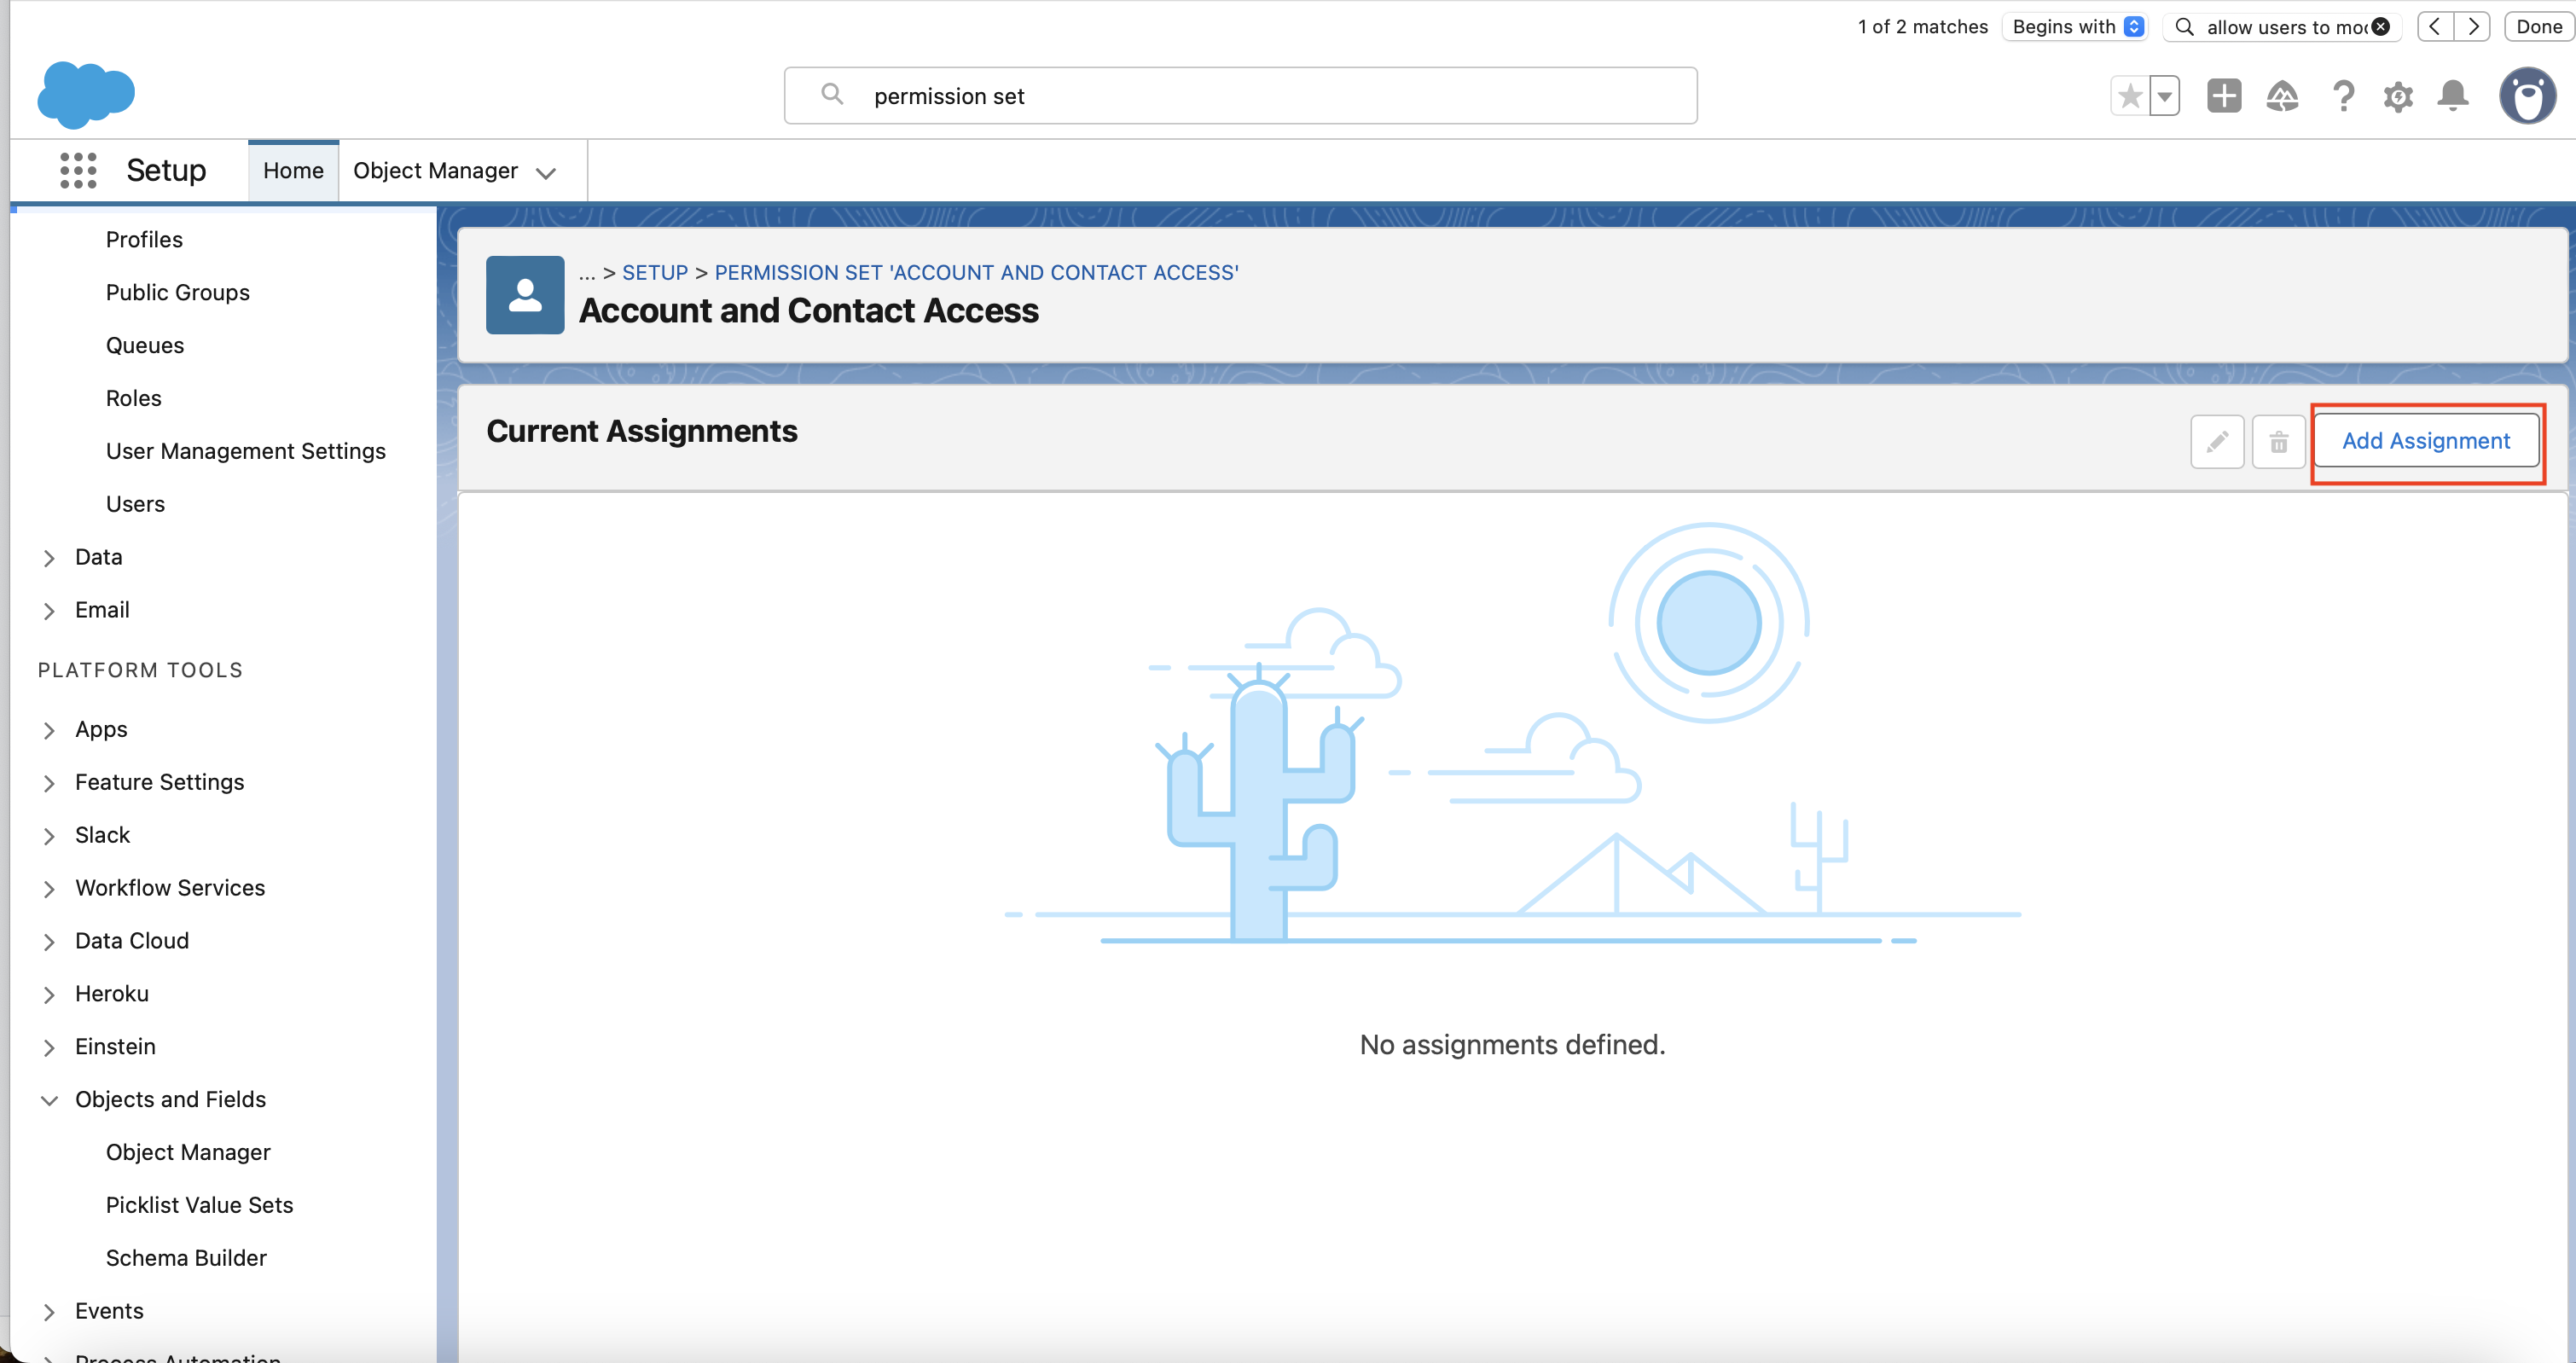
- Click on Manage Assignments.
- Click on Add Assignment.
- Select the integration user you created in step 1.
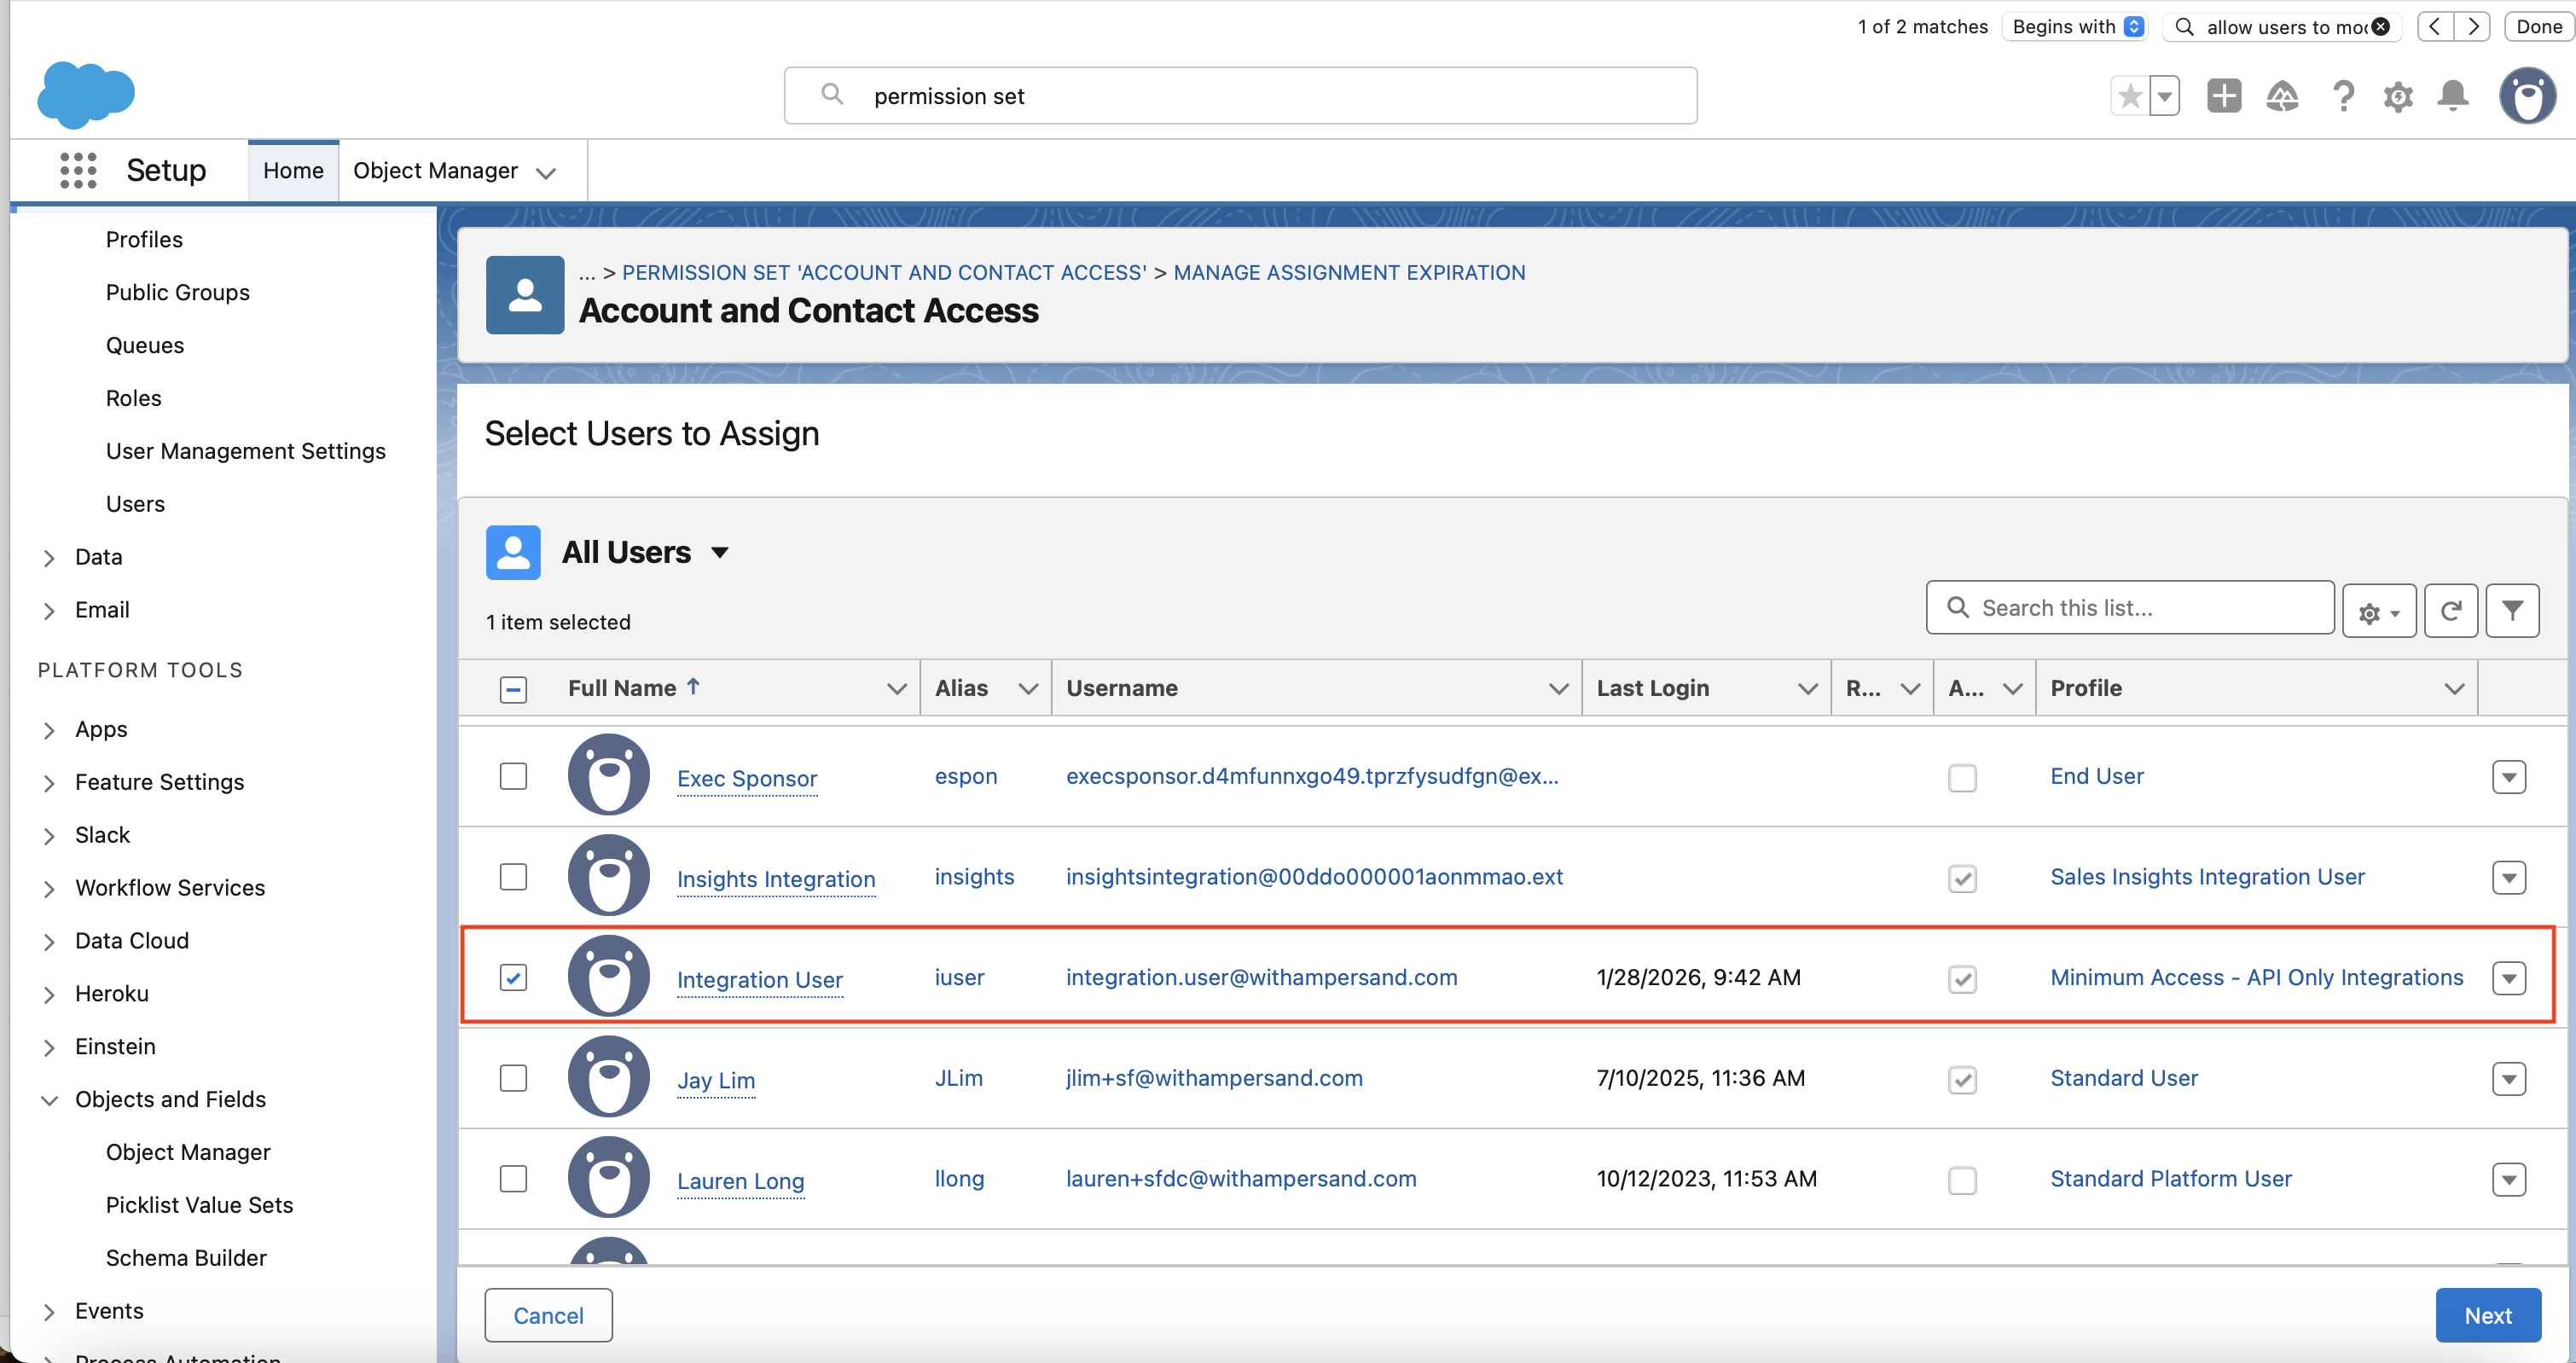
- Ensure “Expires On” is set to “Never Expires”, and then click on “Assign”.
The username you chose when creating the user is exactly the value you’ll paste into the Salesforce Username field when installing the integration. Copy it somewhere you can find it later.
6. Associate the Permission Set with the app
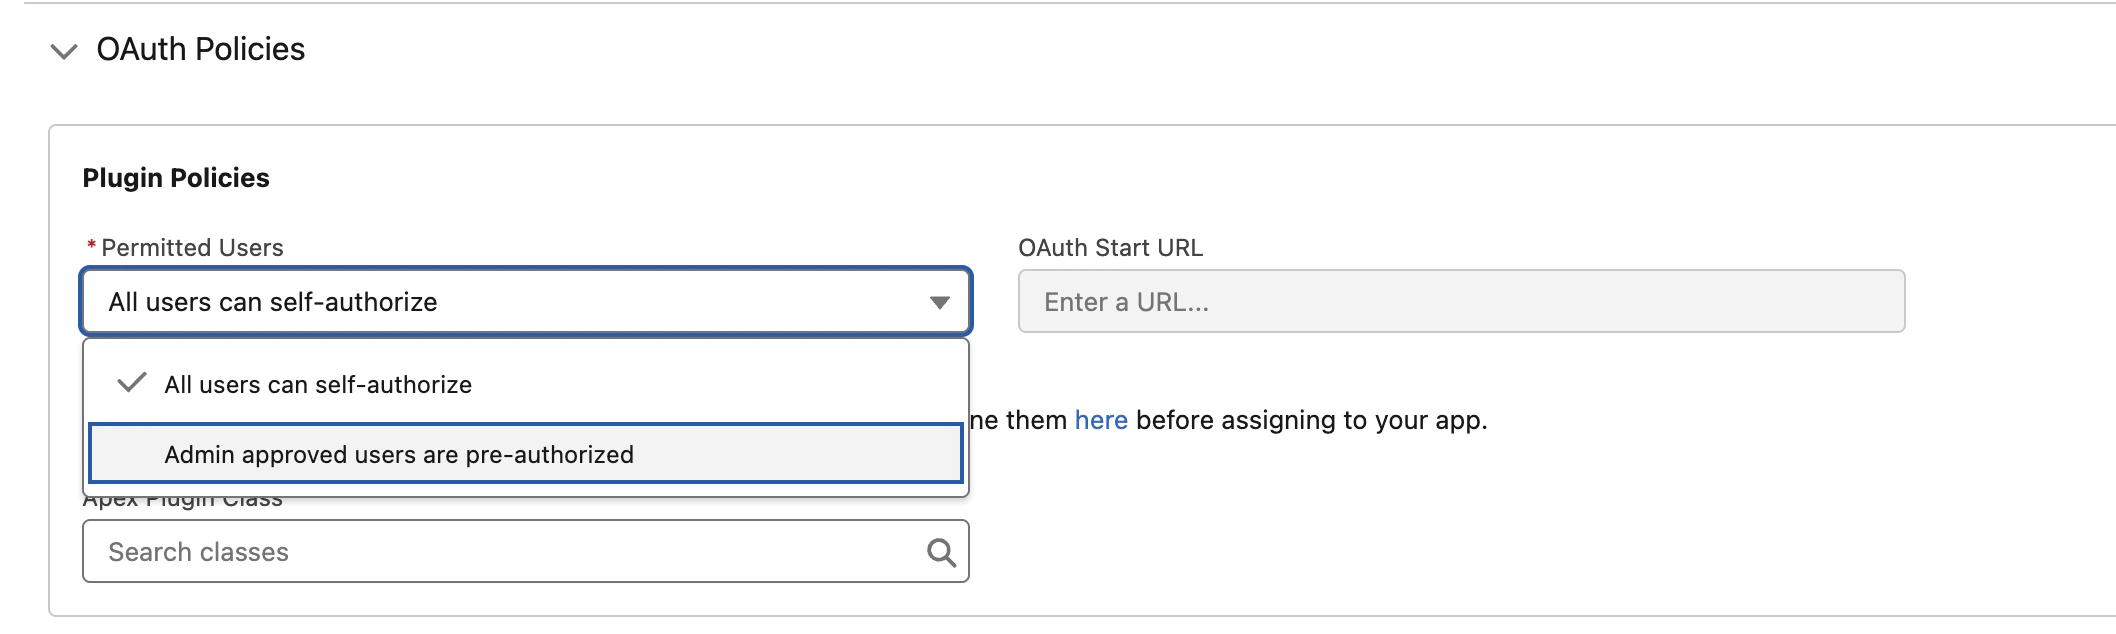
You need to add the permission set you created in step 5 to the app’s pre-authorized Permission Sets list. This is what satisfies the Admin approved users are pre-authorized OAuth policy from step 4 — it tells Salesforce “any user who has this permission set is allowed to use this app.”- In Setup, open External Client App Manager and select your External Client App.
- Go to the Policies tab, click Edit.
- Expand OAuth Policies, under Plugin Policies, set Permitted Users to Admin approved users are pre-authorized. Click on OK in the dialog that pops up.
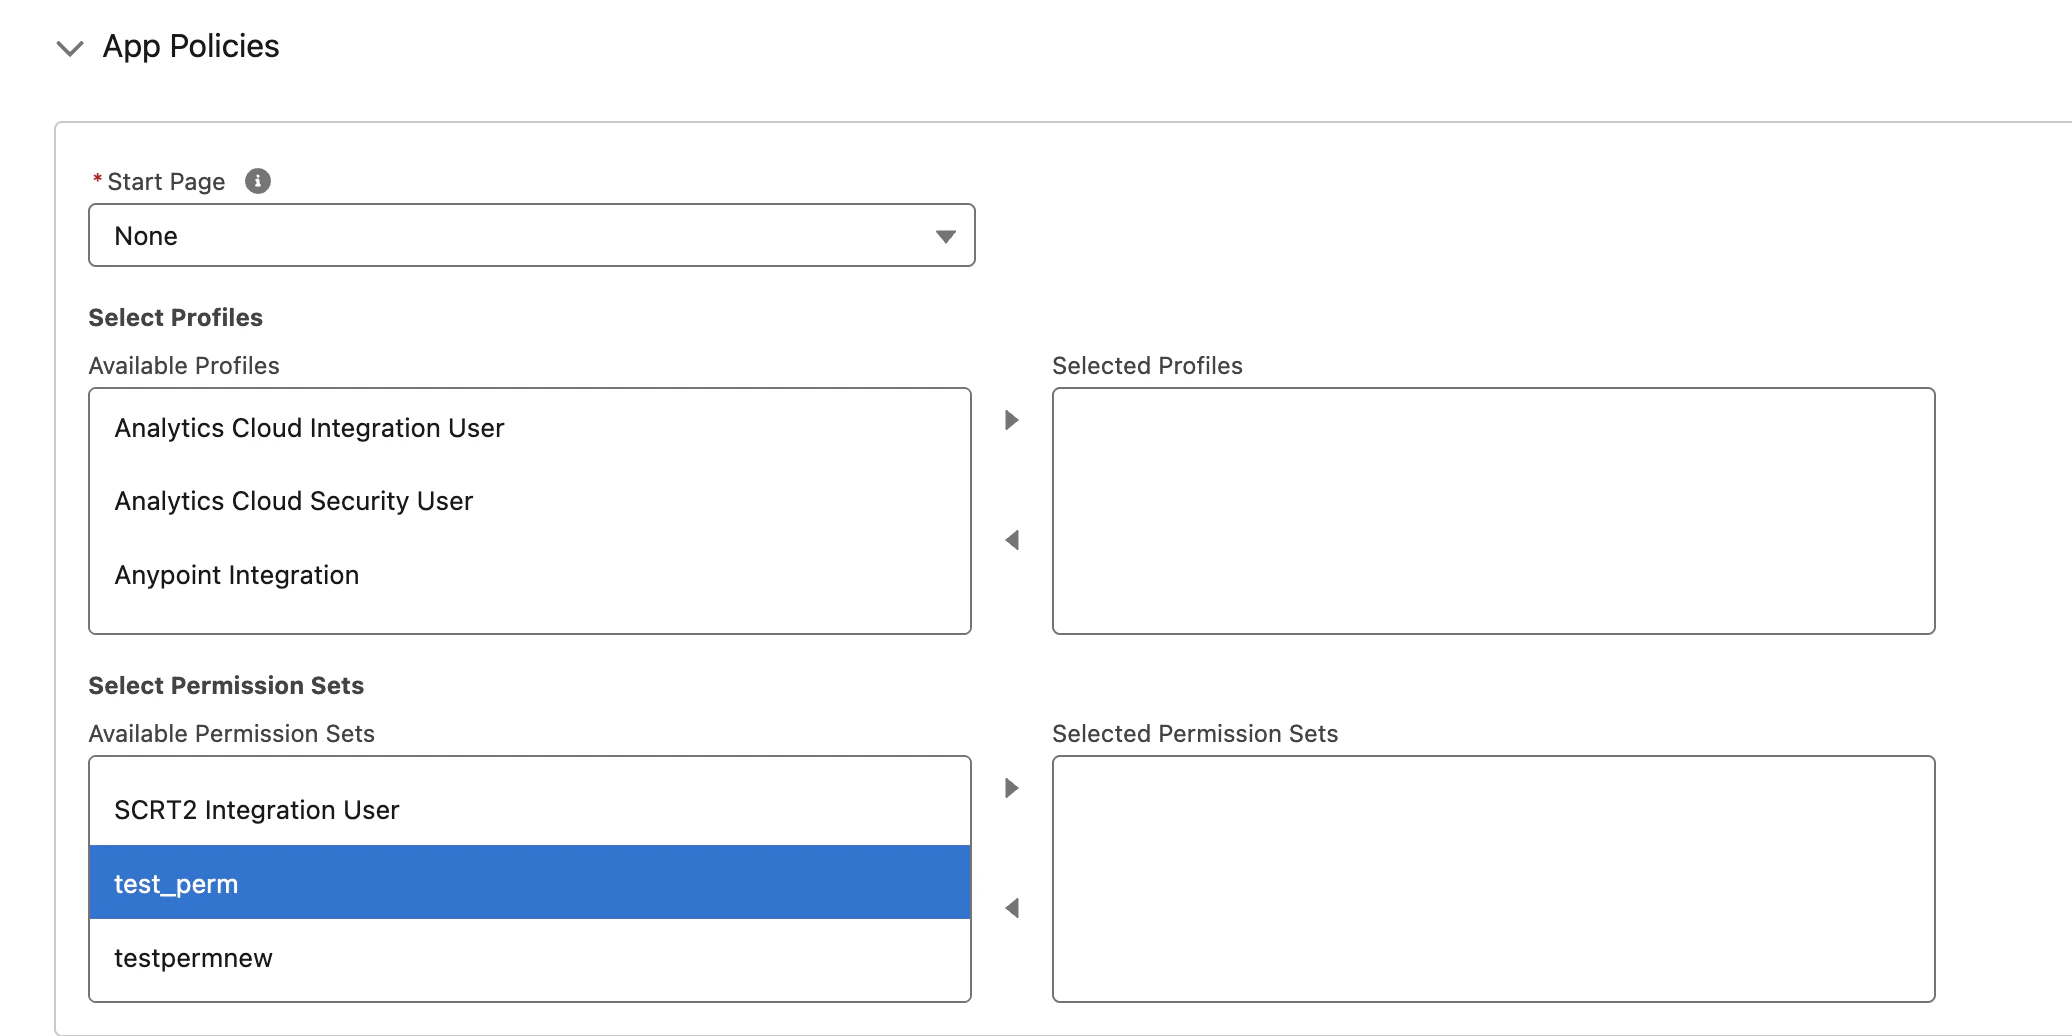
- Expand App Policies, under Select Permission Sets, move the permission set that you created in step 5 from Available Permission Sets to Selected Permission Sets using the arrow button (
>). - Click Save.
This is the step that actually pre-authorizes the integration user for JWT Bearer. Without it — even if everything else is configured correctly — Salesforce rejects the JWT assertion with
invalid_app_access: user is not admin approved to access this app.7. Confirm your Salesforce subdomain
Your Salesforce My Domain subdomain is the unique part of your Salesforce URL. You will need it to install the integration.- Production: if your login URL is
https://acme.my.salesforce.com, your subdomain isacme. - Sandbox (Enhanced Domains): if your login URL is
https://acme--dev.sandbox.my.salesforce.com, your subdomain isacme--dev.sandbox. - Sandbox (legacy): if your login URL is
https://acme--dev.my.salesforce.com, your subdomain isacme--dev. - Developer accounts: if your login URL is
https://acme-dev-ed.develop.my.salesforce.com, your subdomain isacme-dev-ed.develop.
Installing the integration
When you are installing the integration, you will be prompted for a number of inputs. Here is where to find each value:Sandbox refresh: After refreshing a sandbox, the integration user’s username may be re-suffixed with the sandbox name (e.g.
integration@acme.com becomes integration@acme.com.dev). If this happens, update the Salesforce Username field on your Ampersand connection to match the new username.Troubleshooting
If the integration experiences authentication errors after setup, here are some common causes.invalid_app_access: user is not admin approved to access this app: The integration user’s permission set is not in the app’s Selected Permission Sets list. Revisit step 6 and confirm the permission set from step 5 is in Selected Permission Sets (not just Available Permission Sets), and that the permission set is actually assigned to the integration user. To reproduce the error independently, use the Salesforce CLI:sf org login jwt --client-id <key> --jwt-key-file private-key.pem --username <user> --instance-url https://<workspace>.my.salesforce.com.user hasn't approved this consumer: Either the integration user’s permission set is not associated with your app (revisit step 6), or the Refresh Token Policy on the app is not set to Refresh token is valid until revoked (revisit step 4). Both are required.- Worked for weeks or months, then started failing with
invalid_grant: Almost always the Refresh Token Policy silently aging out the approval. Set Refresh Token Policy to Refresh token is valid until revoked and re-associate the permission set if needed. invalid_grant: audience is invalid: The production vs sandbox environment was auto-detected incorrectly from your subdomain. Double-check that your subdomain string matches the format shown in step 7 — sandboxes should include a--or.sandboxsegment.invalid_grant: invalid assertion: The private key or certificate is mismatched. Regenerate the pair in step 1 and re-upload the certificate in step 2.not authorized: Check IP Relaxation is set to Relax IP restrictions (step 4), and that the integration user’s permission set has API Enabled under System Permissions.- Works immediately after setup, then fails: Wait 2 to 10 minutes after creating or modifying the app for Salesforce to propagate the changes.