

Before installing a Salesforce integration
Verify your Salesforce edition supports API access
Salesforce editions offer different levels of API access, which can affect how Salesforce integrations work in Ampersand. Before setting up your Salesforce integration, confirm whether your Salesforce edition includes API access. Some editions include full API access by default, while others may offer limited access or require additional purchases. To check if your Salesforce edition supports the necessary API access for this integration, please refer to Salesforce’s official documentation on API access by edition. If your Salesforce edition does not include the required API access, contact your Salesforce account representative to upgrade your edition.Setting up the integration
- External Client App
- Connected App
Install the package
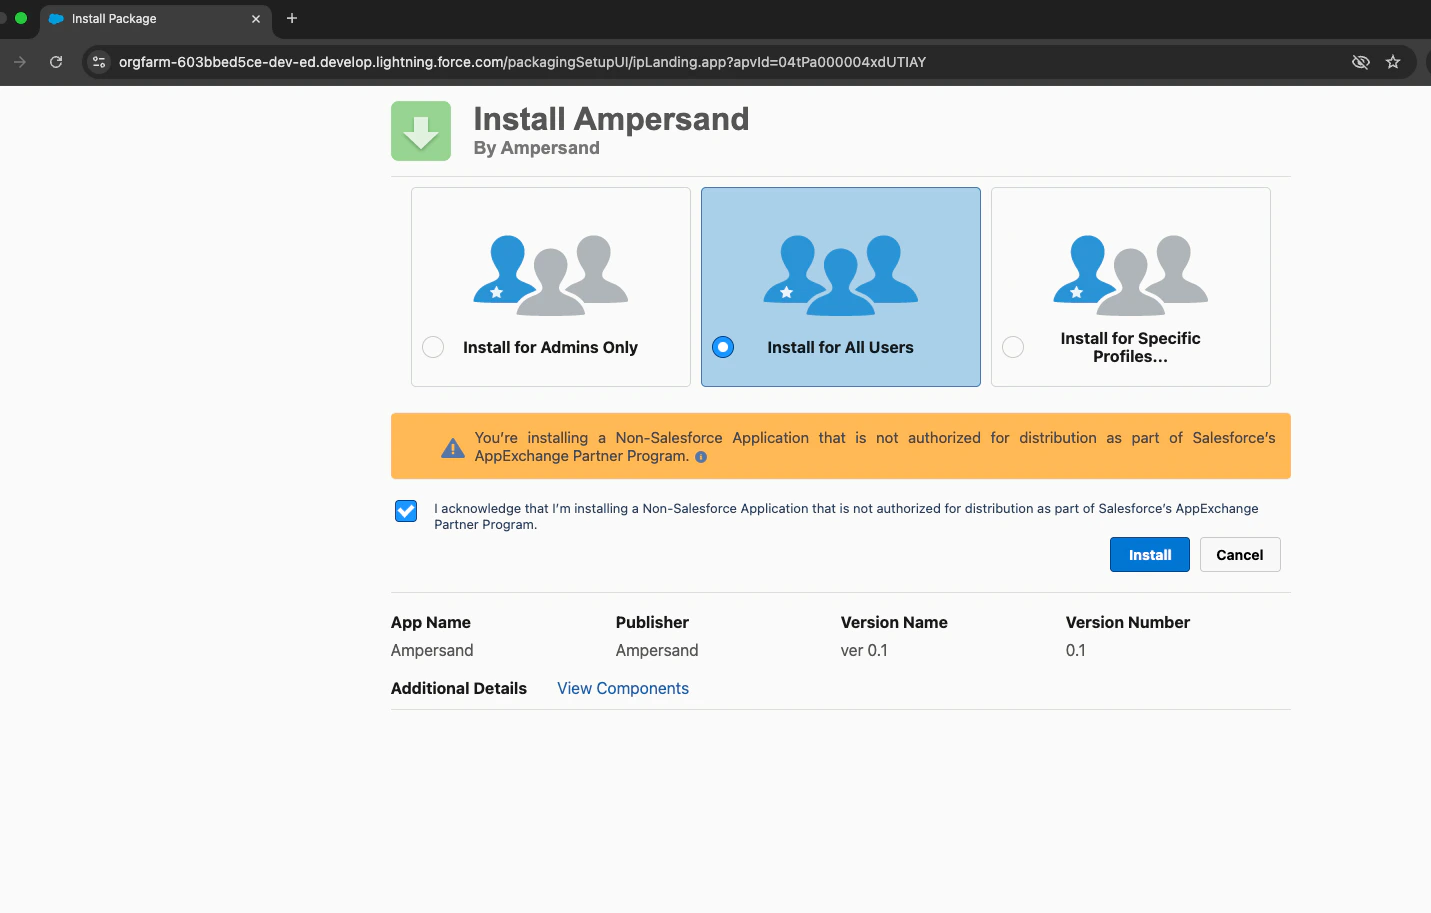
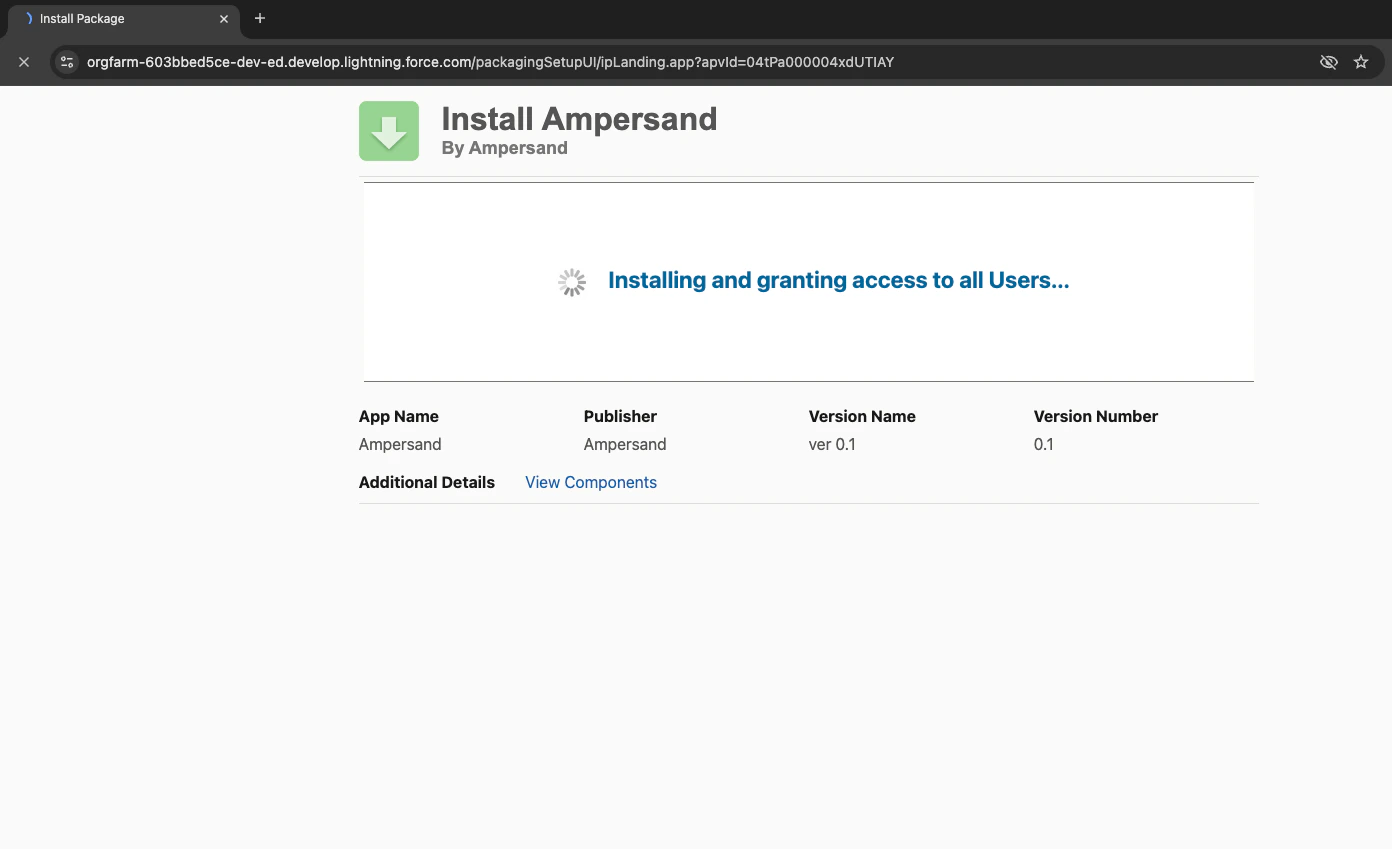
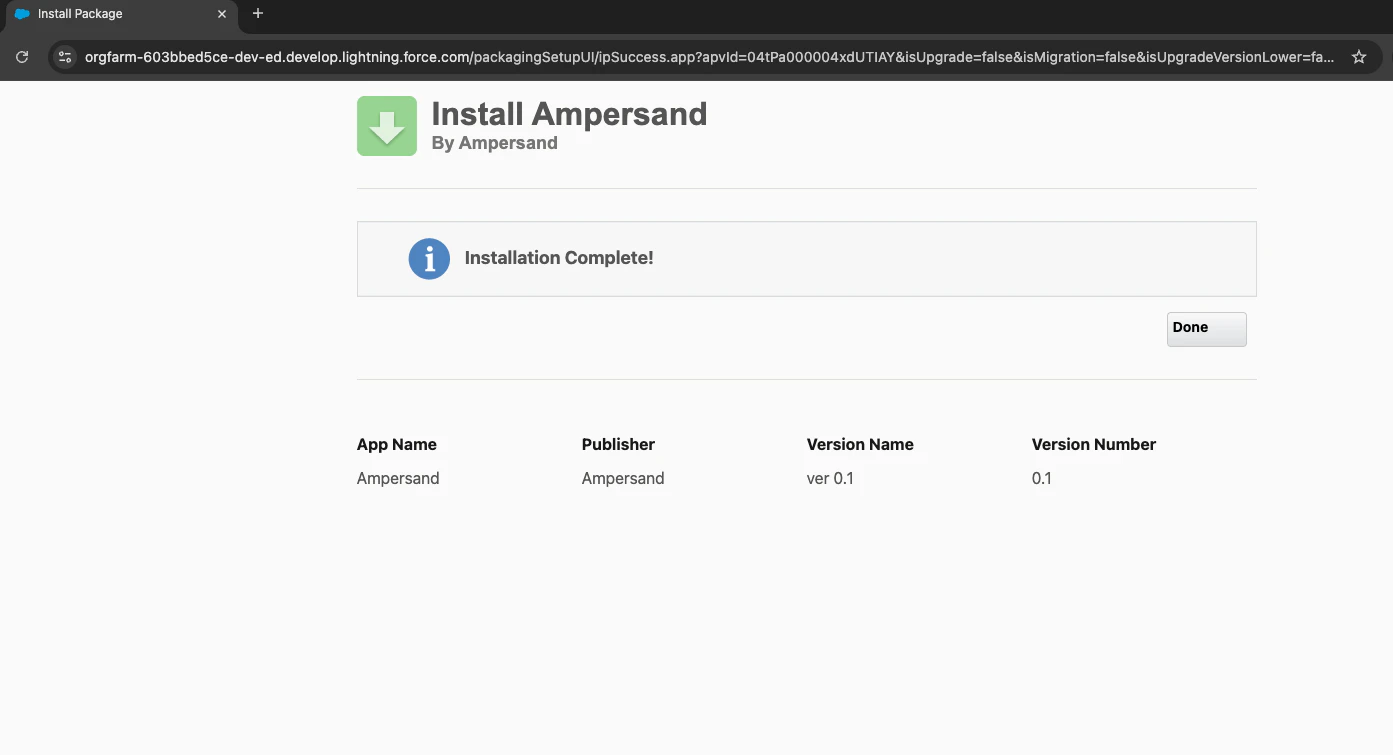
If the integration uses an External Client App, the developer will provide you with a package install URL. This URL installs the app into your Salesforce org.- Open the package install URL provided by the developer.
- Log in to your Salesforce org if prompted.
- Select Install for All Users.
- Check the acknowledgment checkbox.
- Click Install.
Ensure sufficient permissions
The credentials provided to the integration can be:- A human user, such as:
- a System Administrator. Please note that you still need to ensure that the System Admin has the correct object and field level permissions, they may not be granted by default.
- a sales team member with the Salesforce User License and the necessary permissions as specified below. This user can either have a standard profile (such as “Standard User”) or a custom profile. Please note that the Salesforce Platform User License is insufficient.
- A Salesforce integration user. This type of user is specifically for integrations, and does not have access to the Salesforce UI.
Human users
1. Configure system permissions
In Setup, search for Profiles in the Quick Find box and open it. Then:- Select the profile you’d like to view and edit.
-
Click Edit at the top of the page.
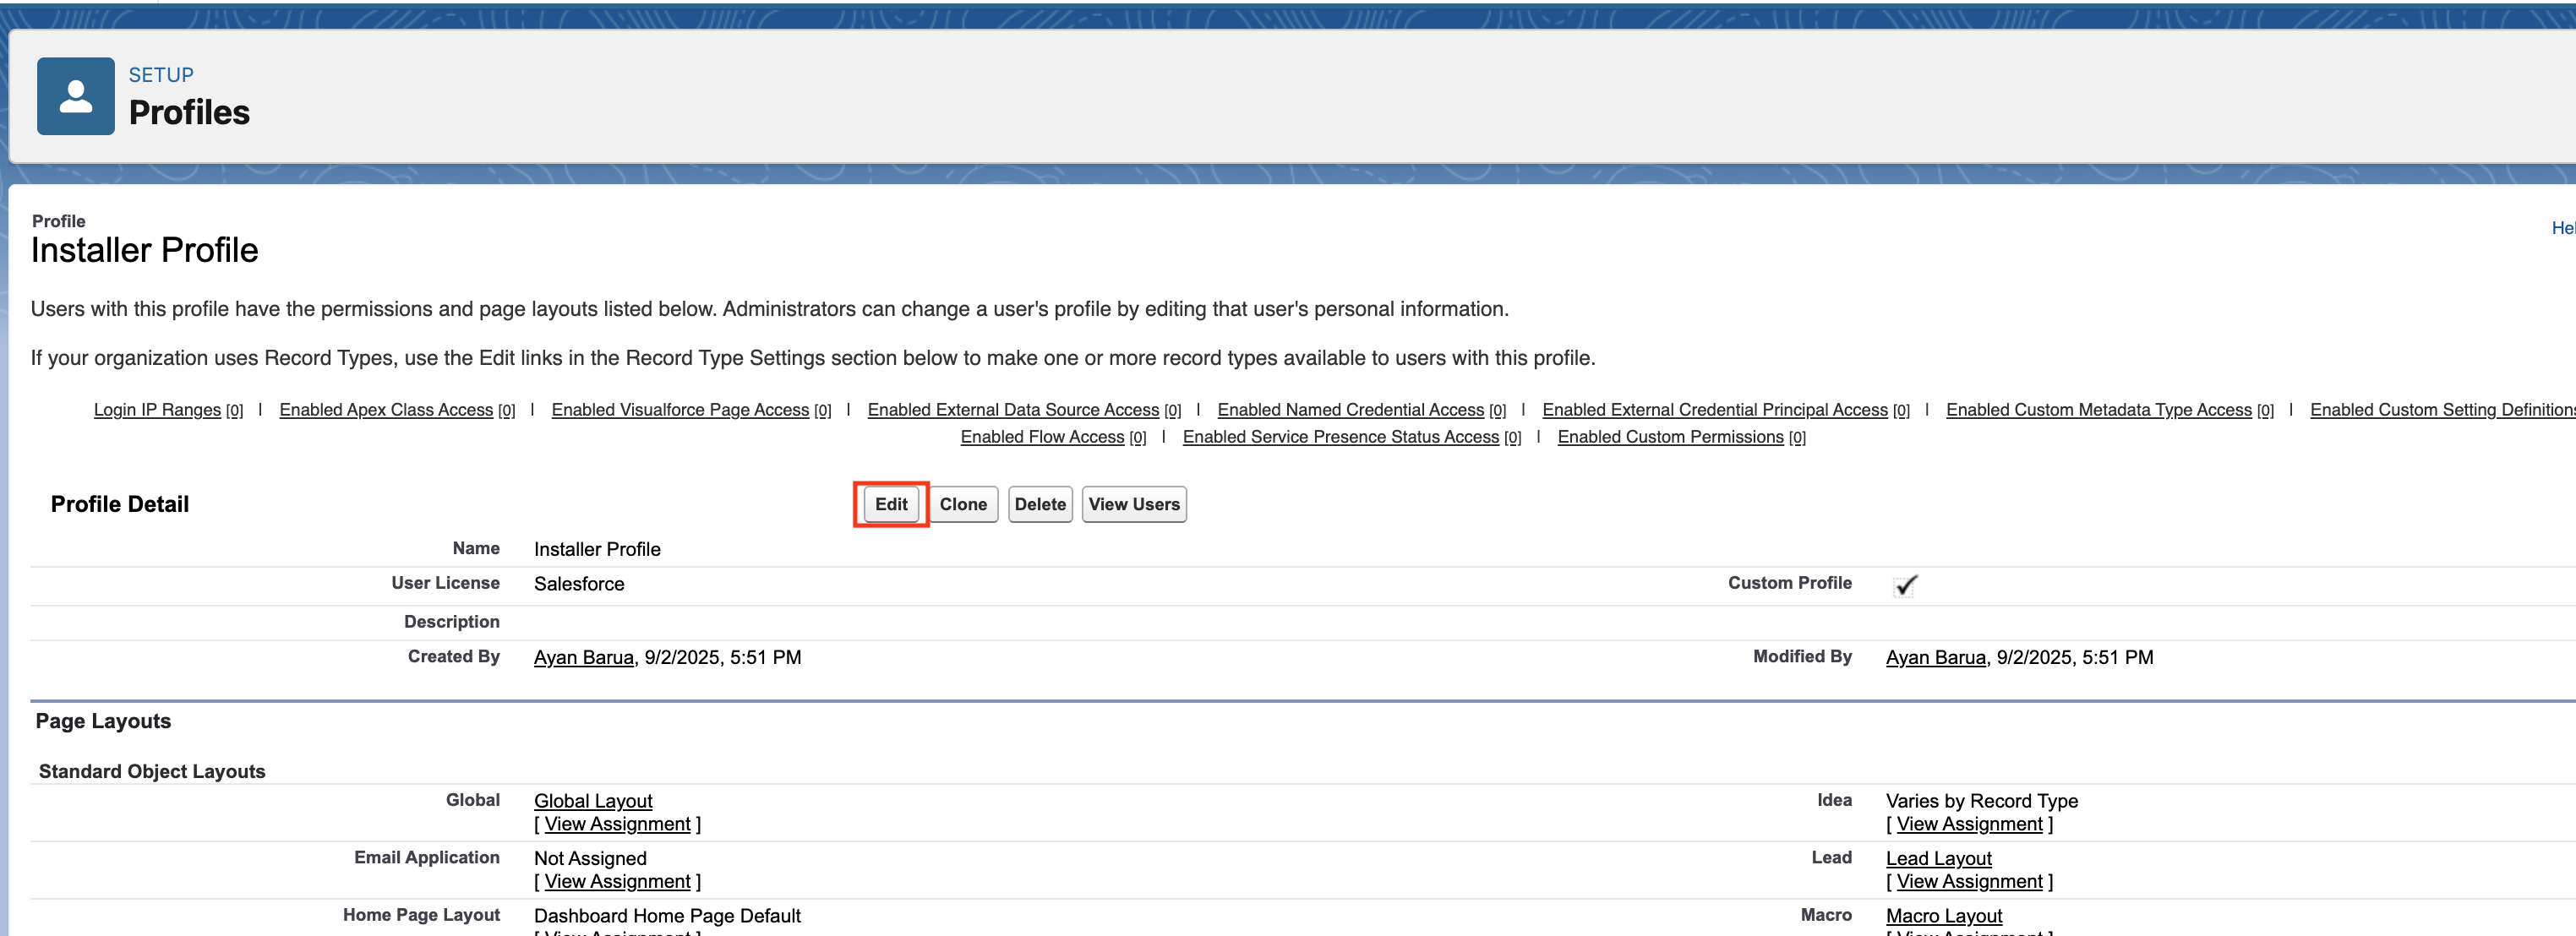
- Ensure the checkboxes for the necessary system permissions are checked.
- Click Save at the top or bottom of the page.
2a. Field permissions for standard profile
If the user has a standard profile (such as “Standard User”), then follow these instructions:- Click the gear icon in the top-right corner and select Setup.
-
In the left-hand search bar, type Object Manager and open it.
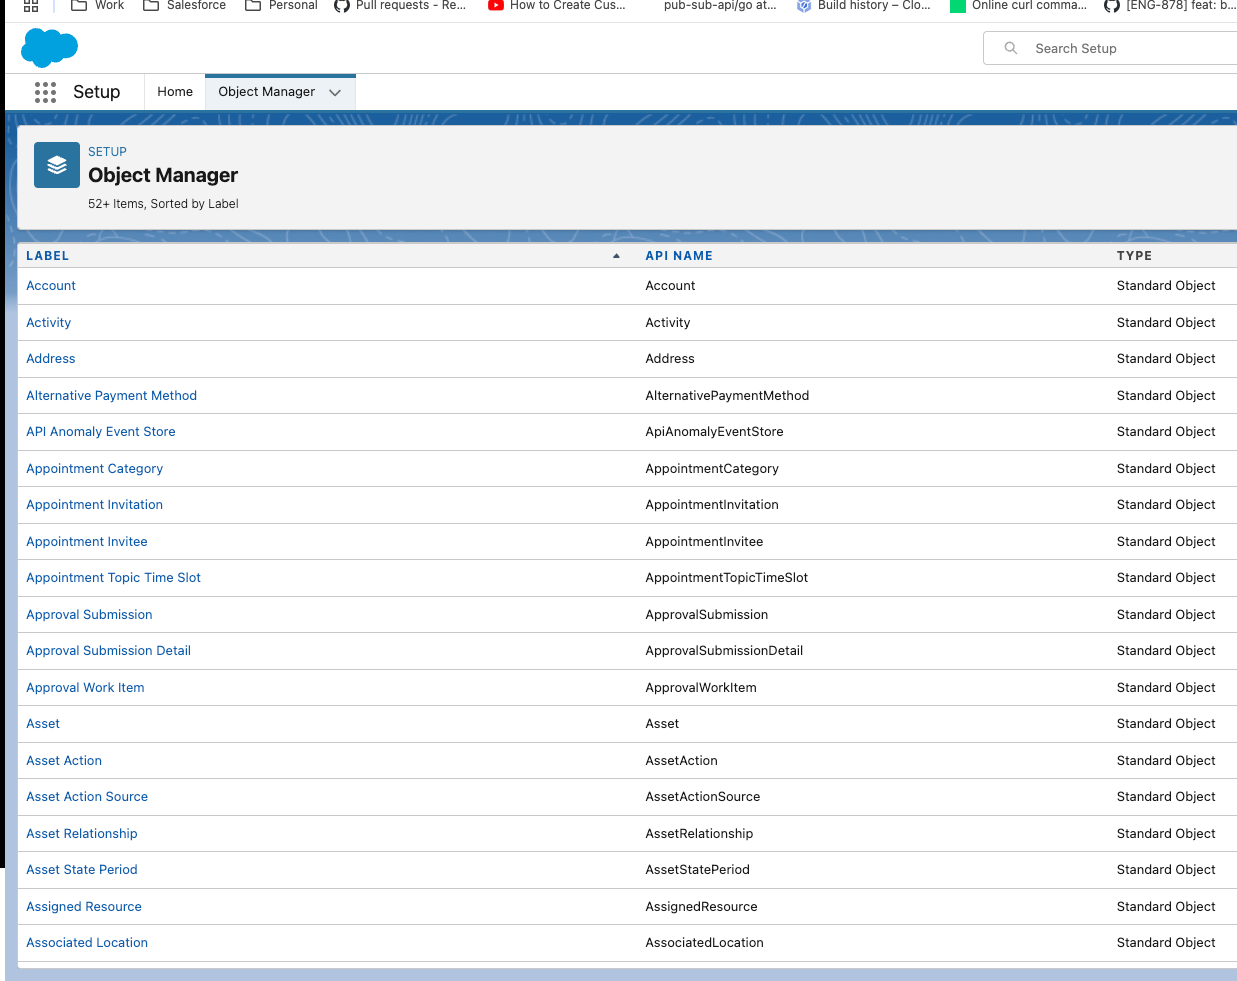
-
Choose the object you need (for example, Account), then select Fields & Relationships from the left navbar.
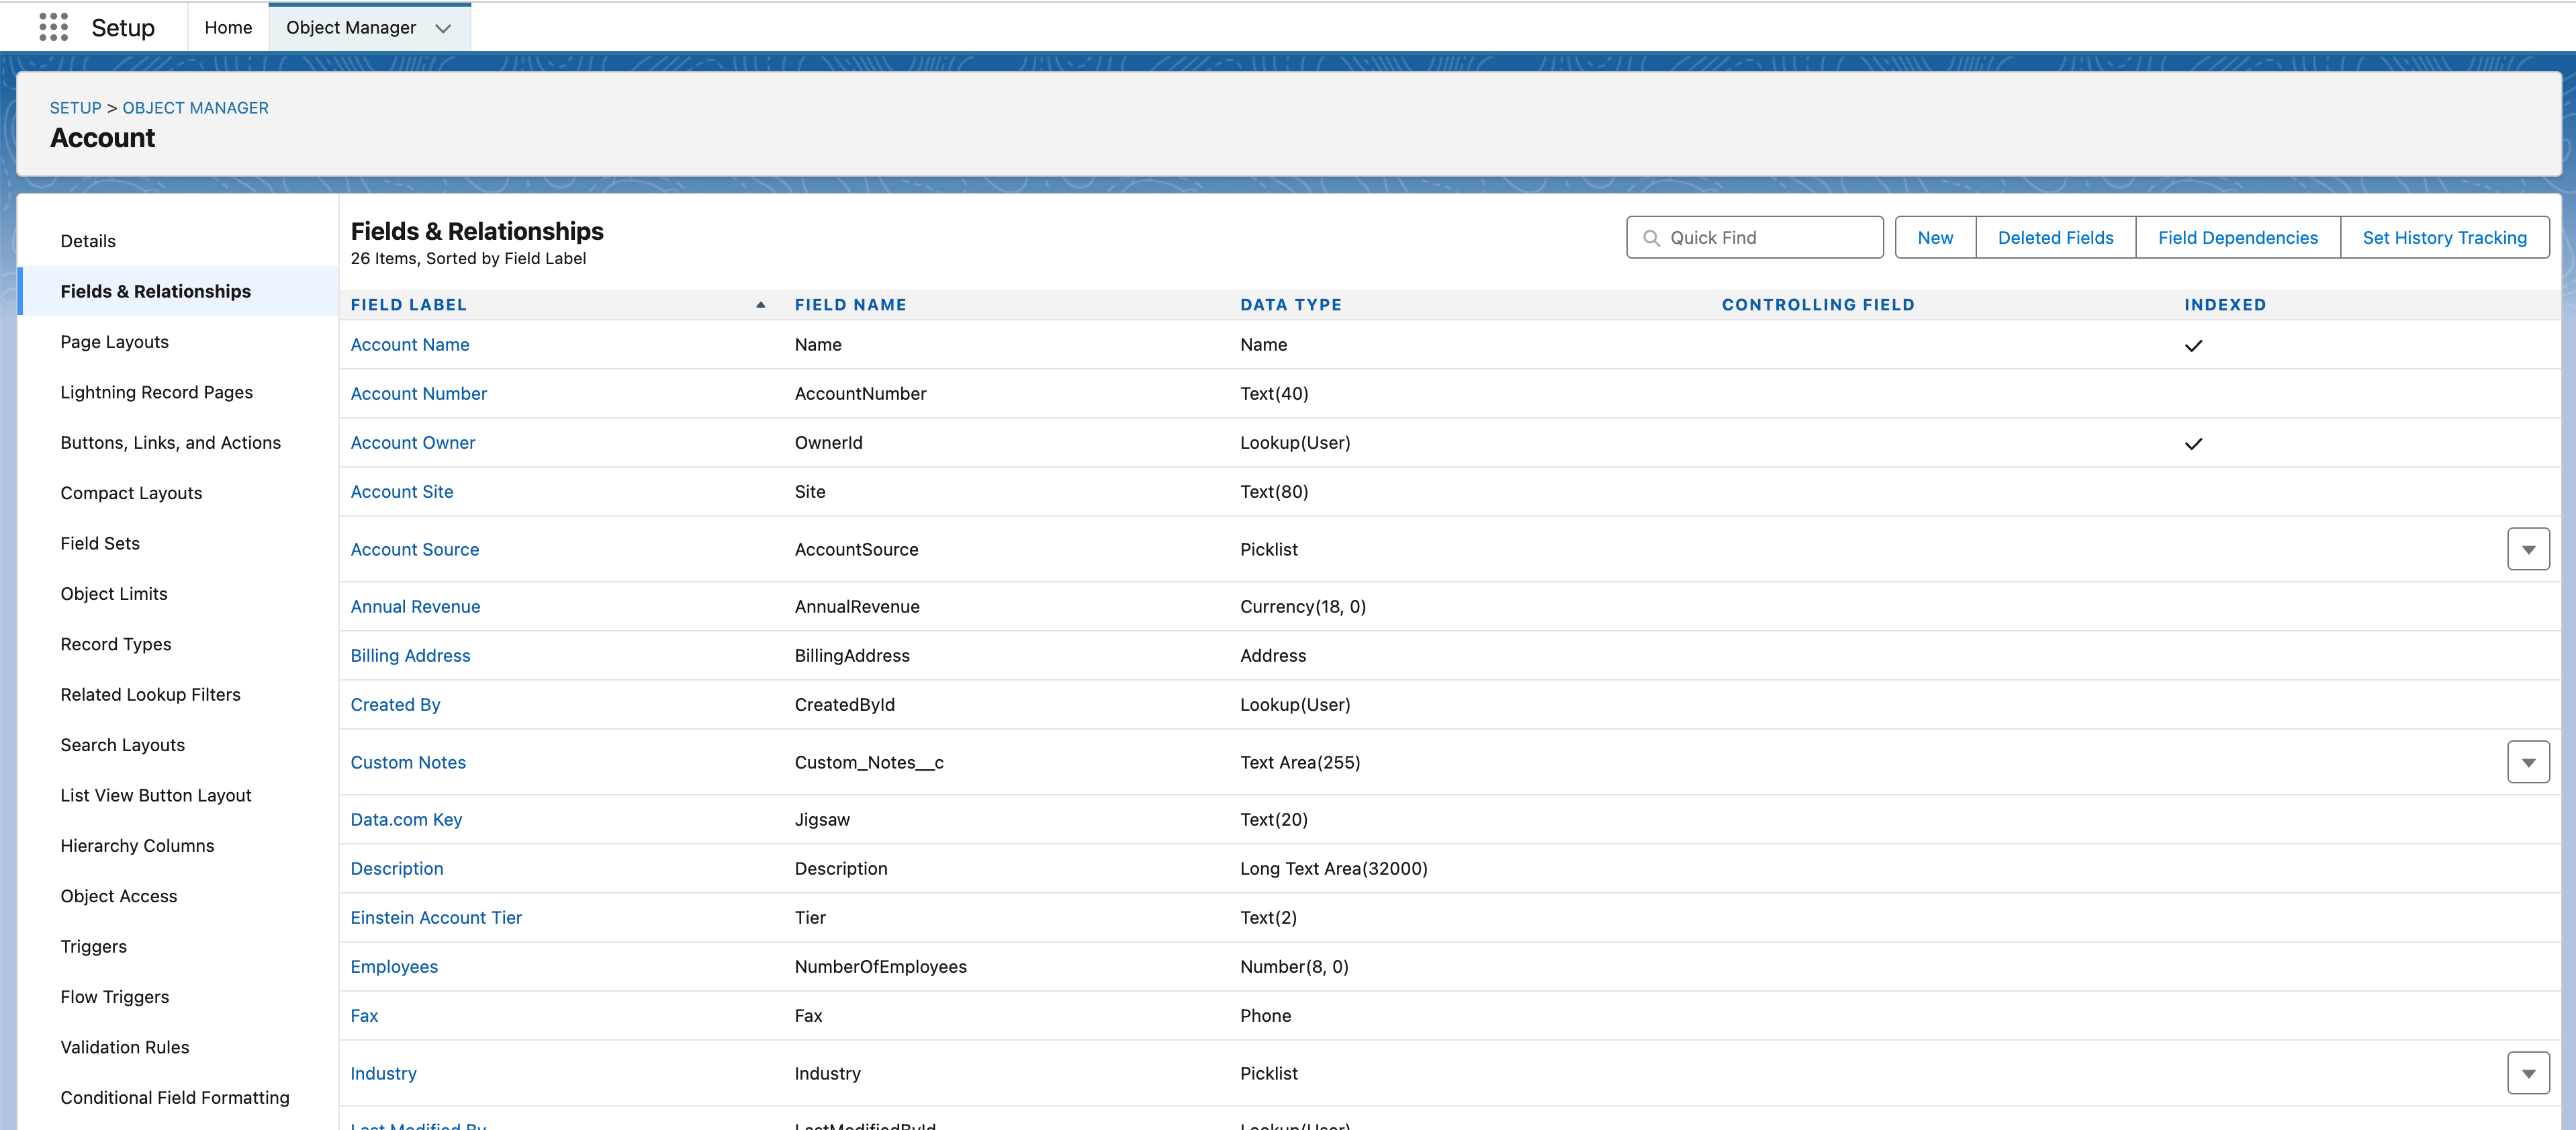
- Find the field you want to adjust and click it.
-
Click Set Field-Level Security.
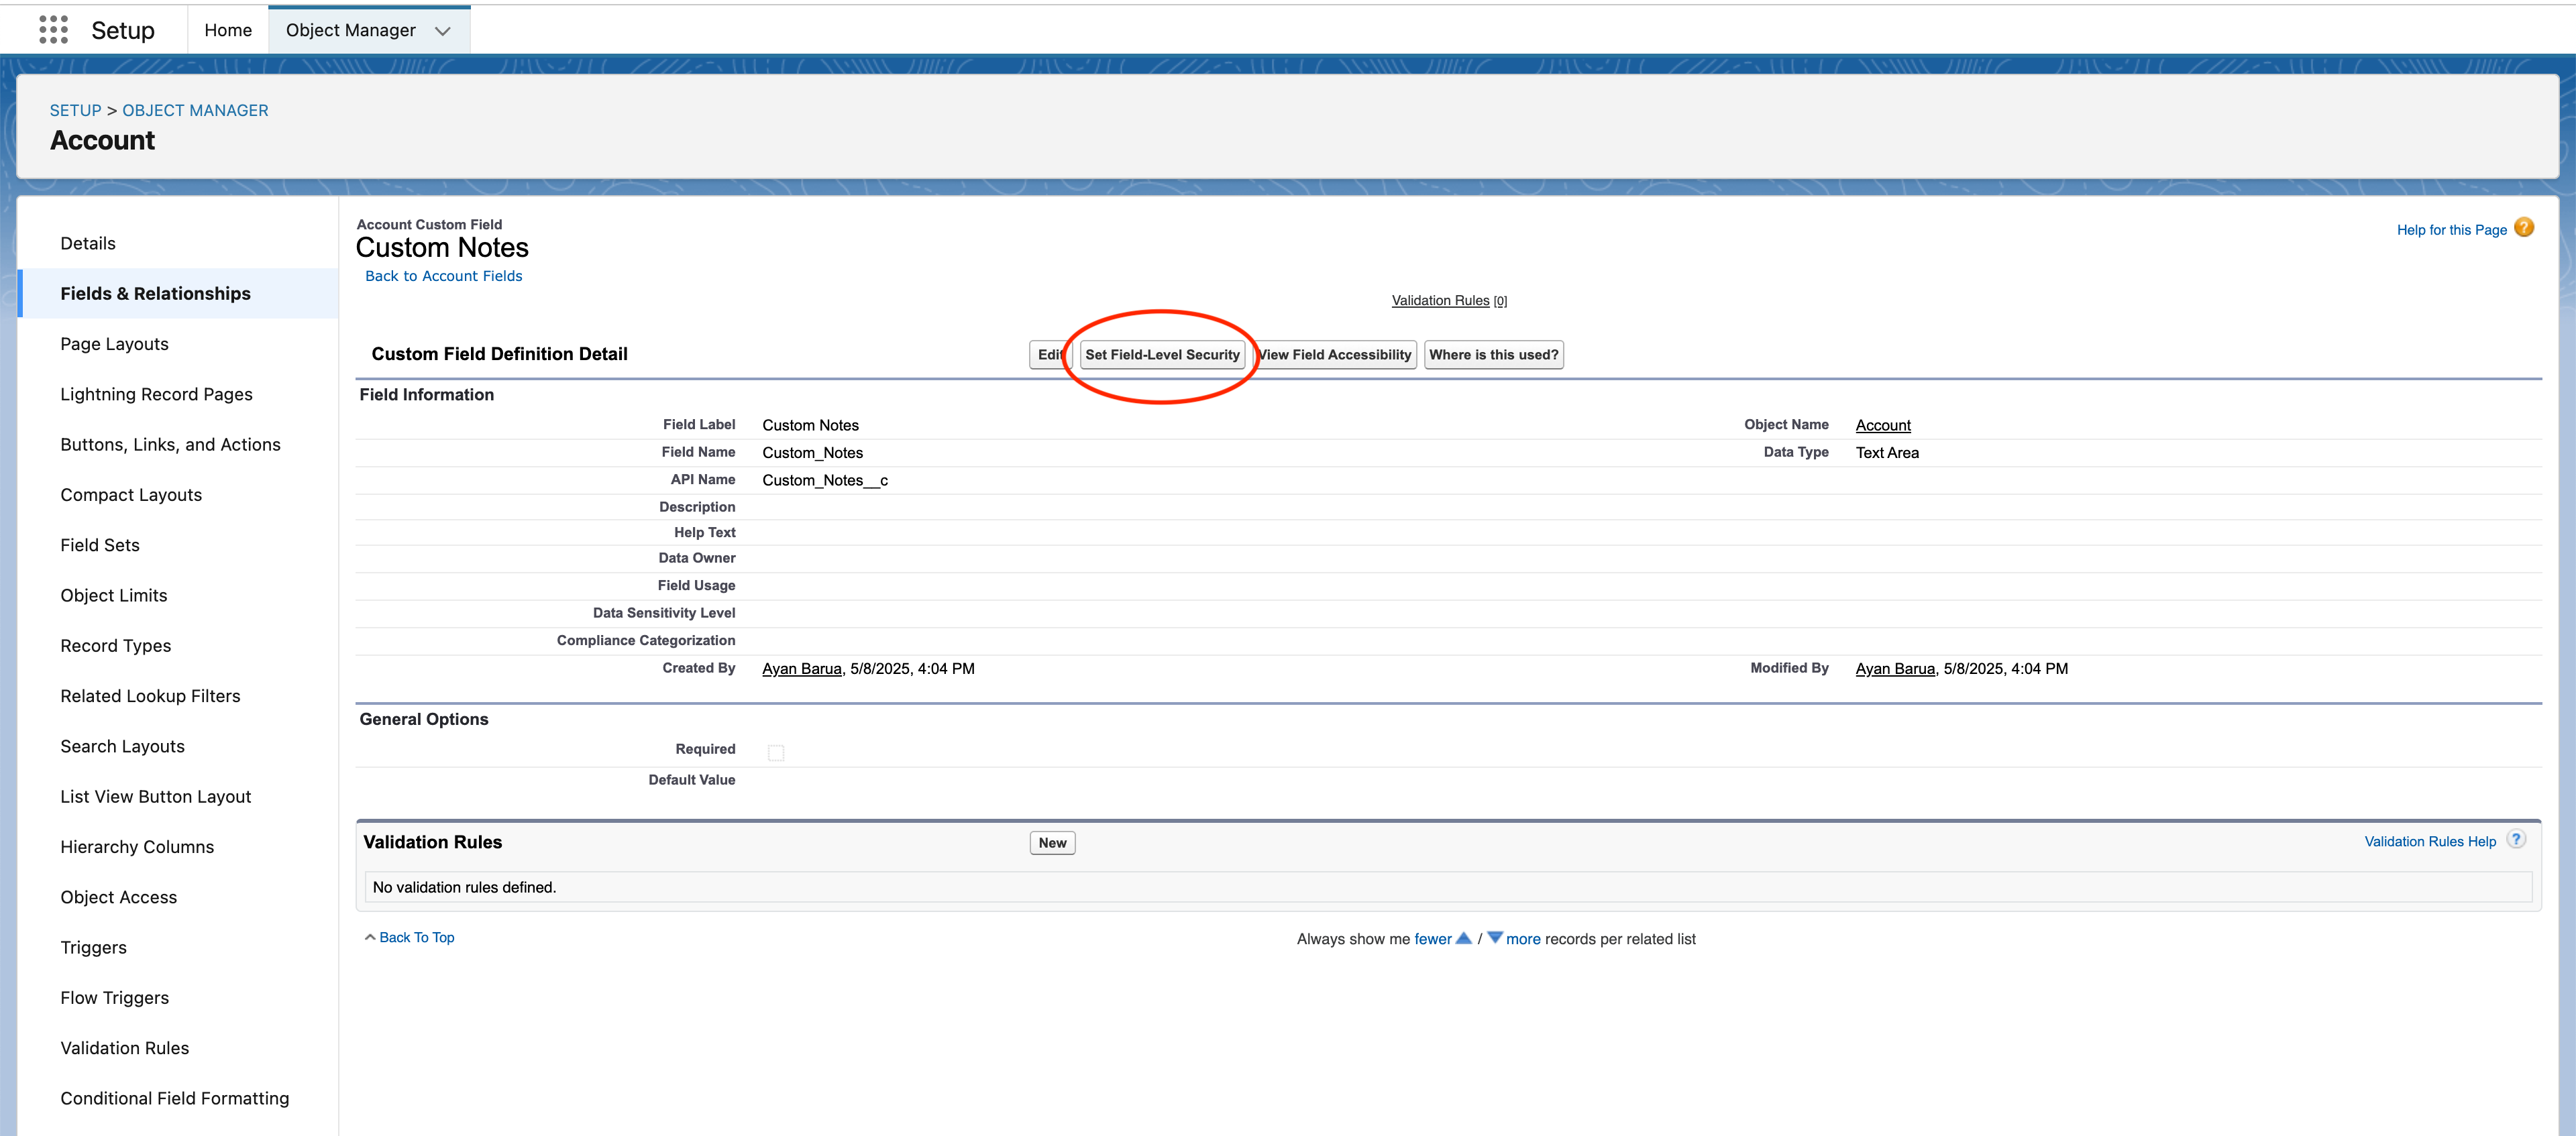
- Ensure the checkbox for Visible is selected for the profile you’re interested in. If the profile is not visible in this list, it means that it does not have access to the object. This is not possible to modify.
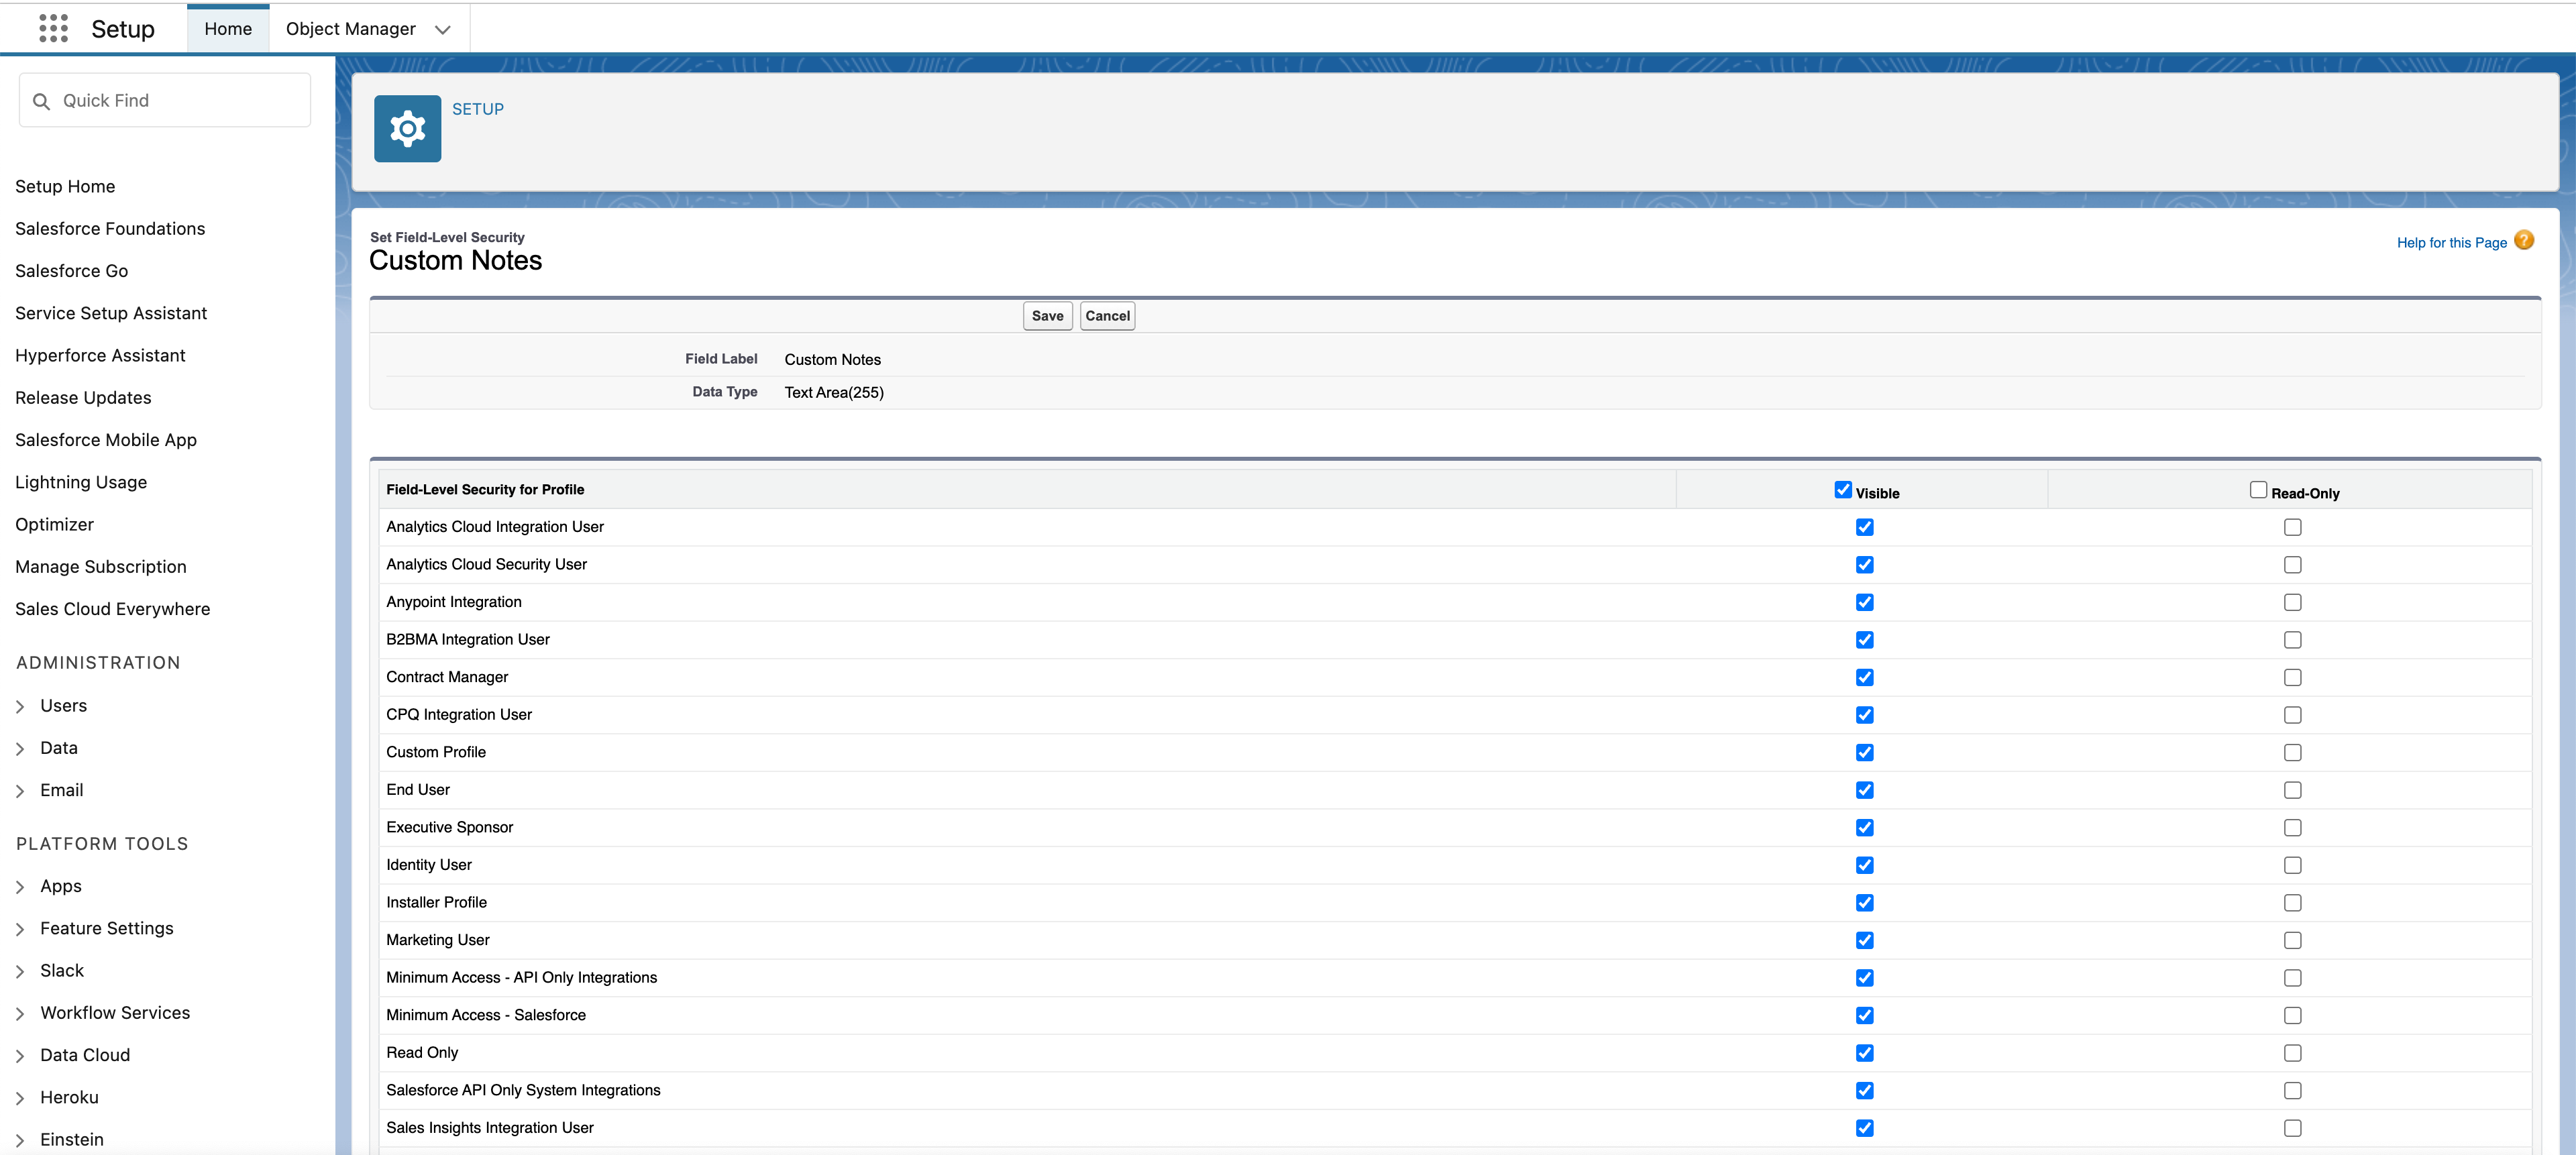
- Repeat steps 4–6 for all fields that the integration needs to read, especially custom fields.
2b. Object and field permissions for custom profile
If the user has a custom profile, then follow these instructions:- Click the gear icon in the top-right corner and select Setup.
-
In the left-hand search bar, type Object Manager and open it.
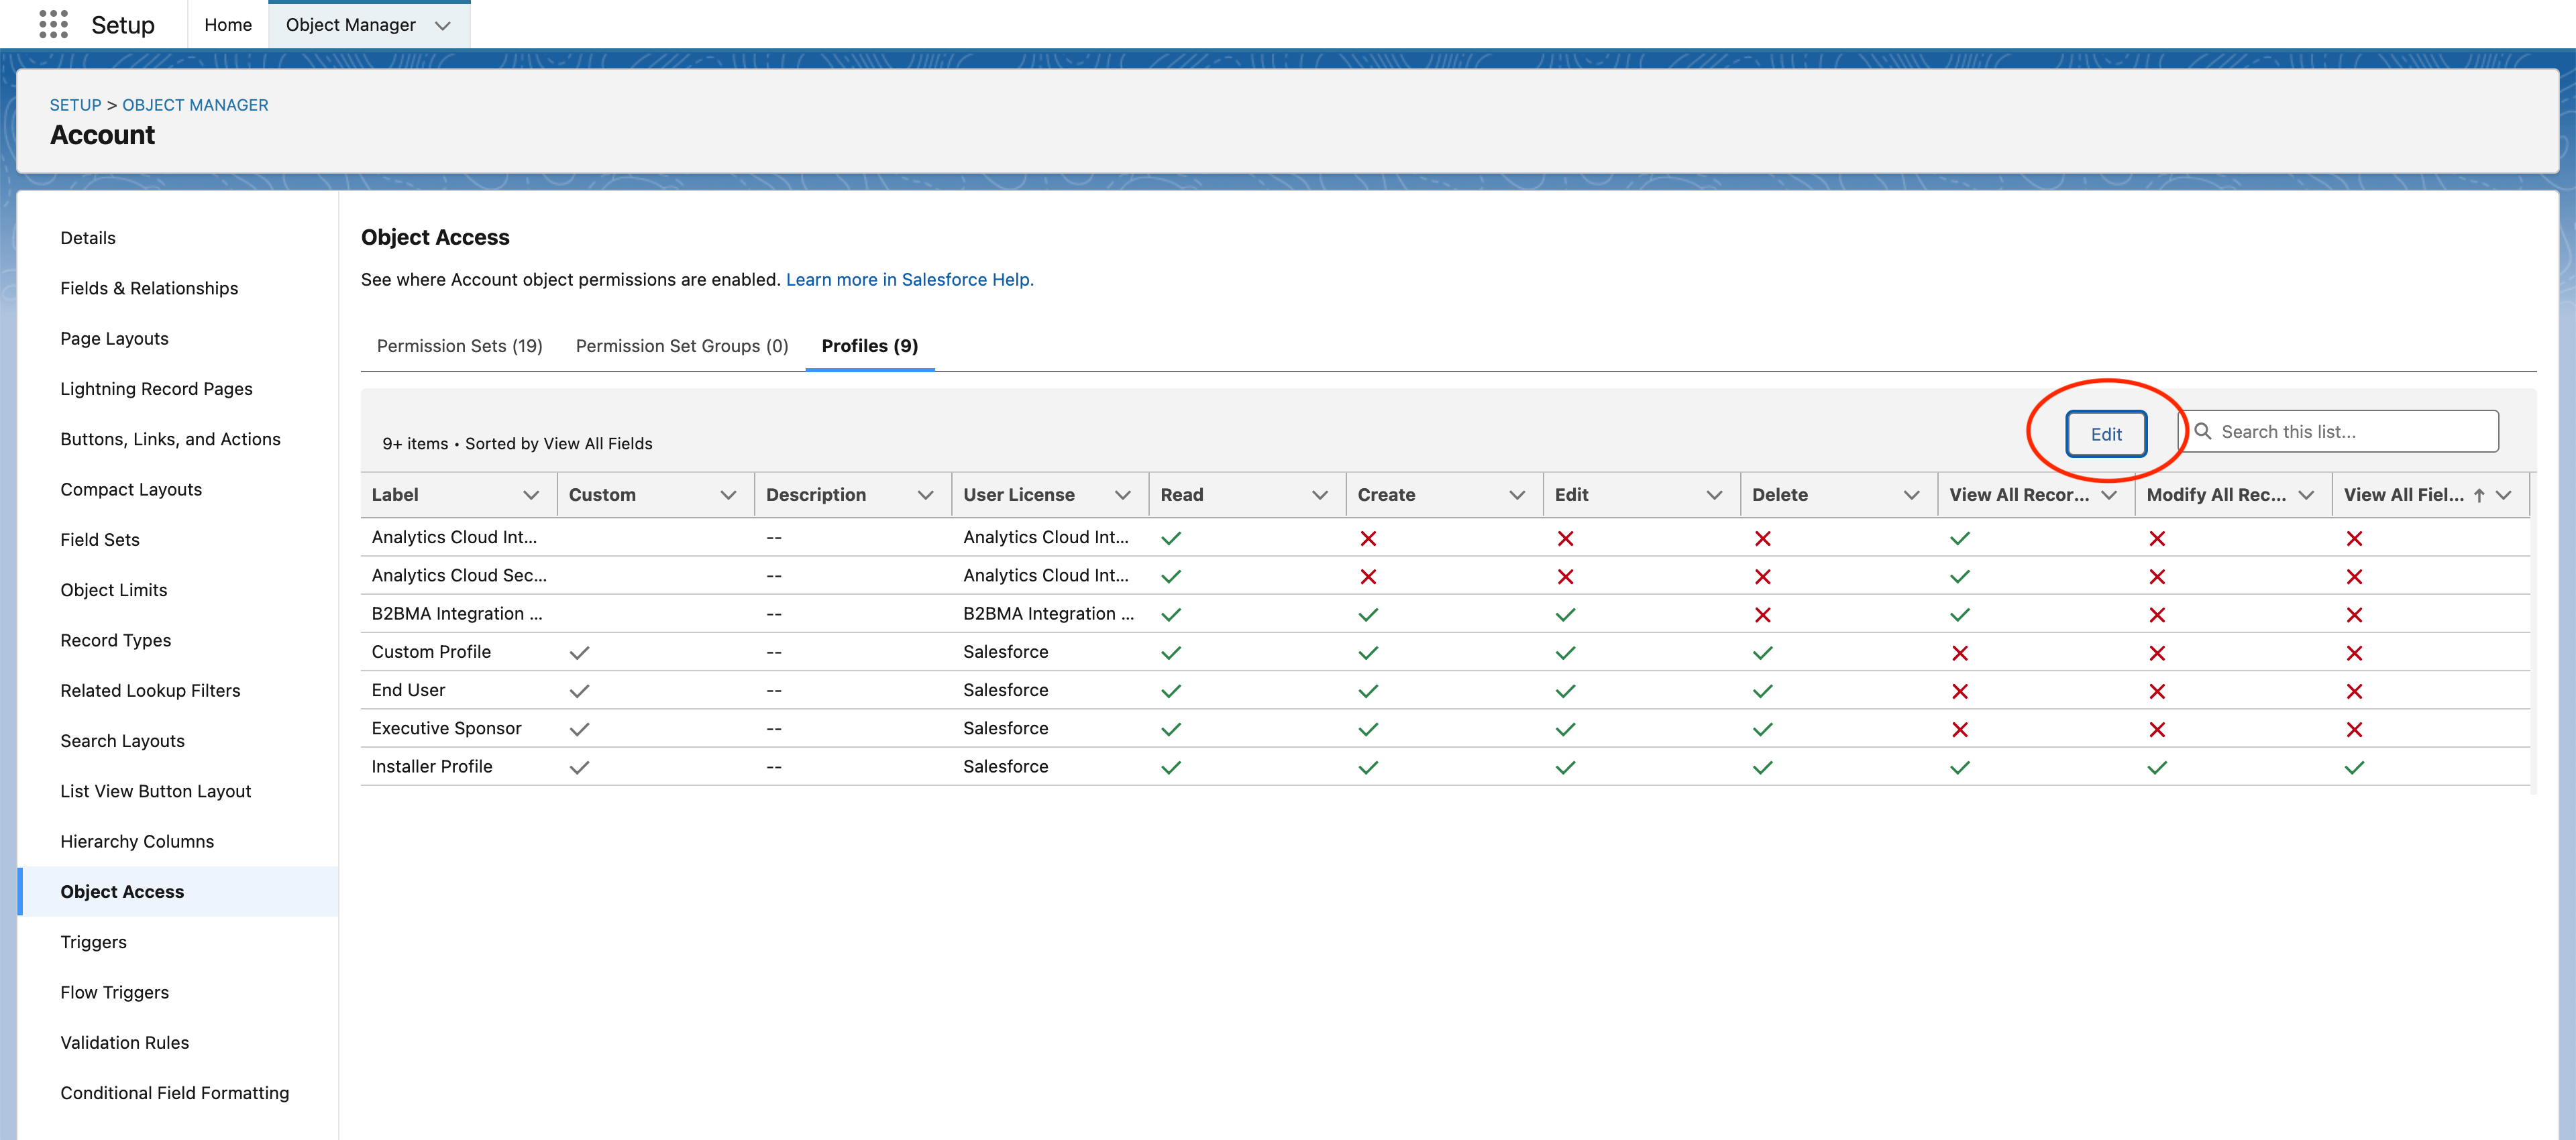
- Choose the object you need (for example, Account) and go to Object Access in the left navbar. Select the Profiles tab at the top. Click Edit and grant the necessary permissions for your custom profile.
- If the integration needs to read data, ensure that
Read,View All Records, andView All Fieldsare checked. - If the integration needs to write data, ensure that all boxes are checked.
Salesforce Integration users
The Salesforce Integration user license type is a special type of license that can be used for integrations and does not have UI access.1. Create a new user
- Click the gear icon in the top-right corner and select Setup.
- In the left-hand search bar, type Users and open it.
- Create a new user:
- For User License, select
Salesforce Integration. - For Profile, select
Minimum Access - API Only Integrations.

2. Create a Permission Set
- Click the gear icon in the top-right corner and select Setup.
- In the left-hand search bar, type Permission Sets and open it.
- Click on “New” to create a new permission set.
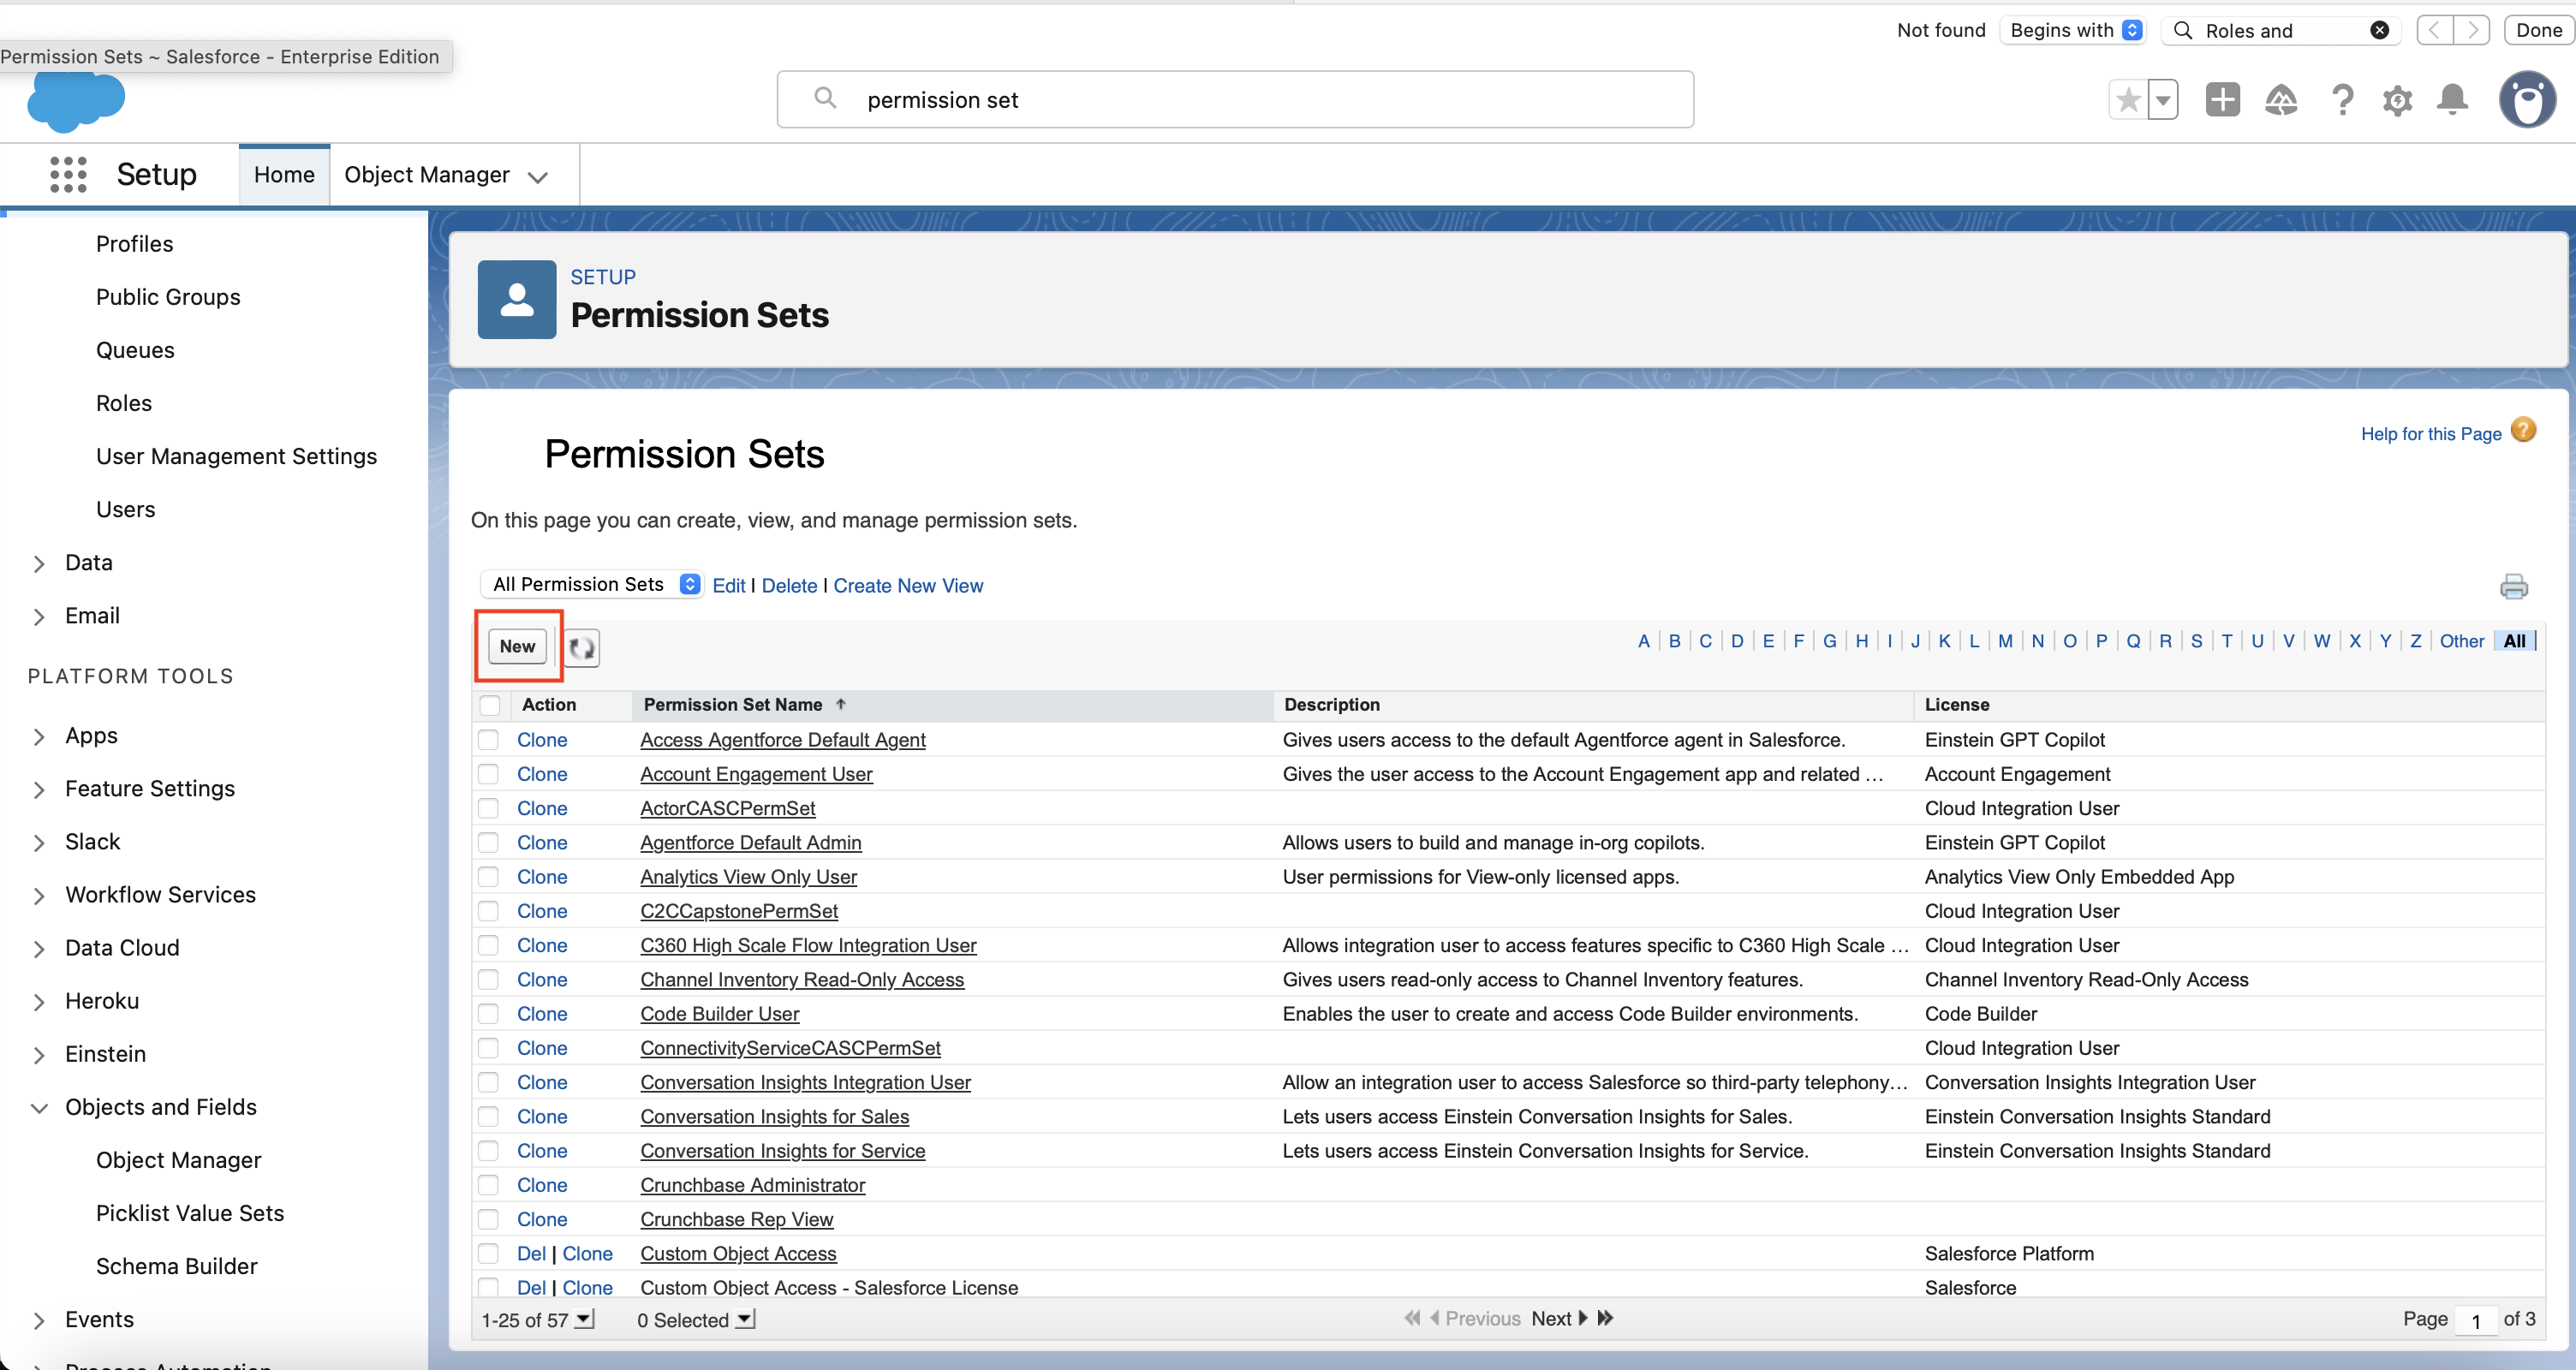
- Follow the prompts to create the permission set:
- For the name, you can call it something general like
Integration User Permission Setor something that describes the level of access it has - such asAccount and Contact Access. - In the License dropdown, you must select
Salesforce API Integration.

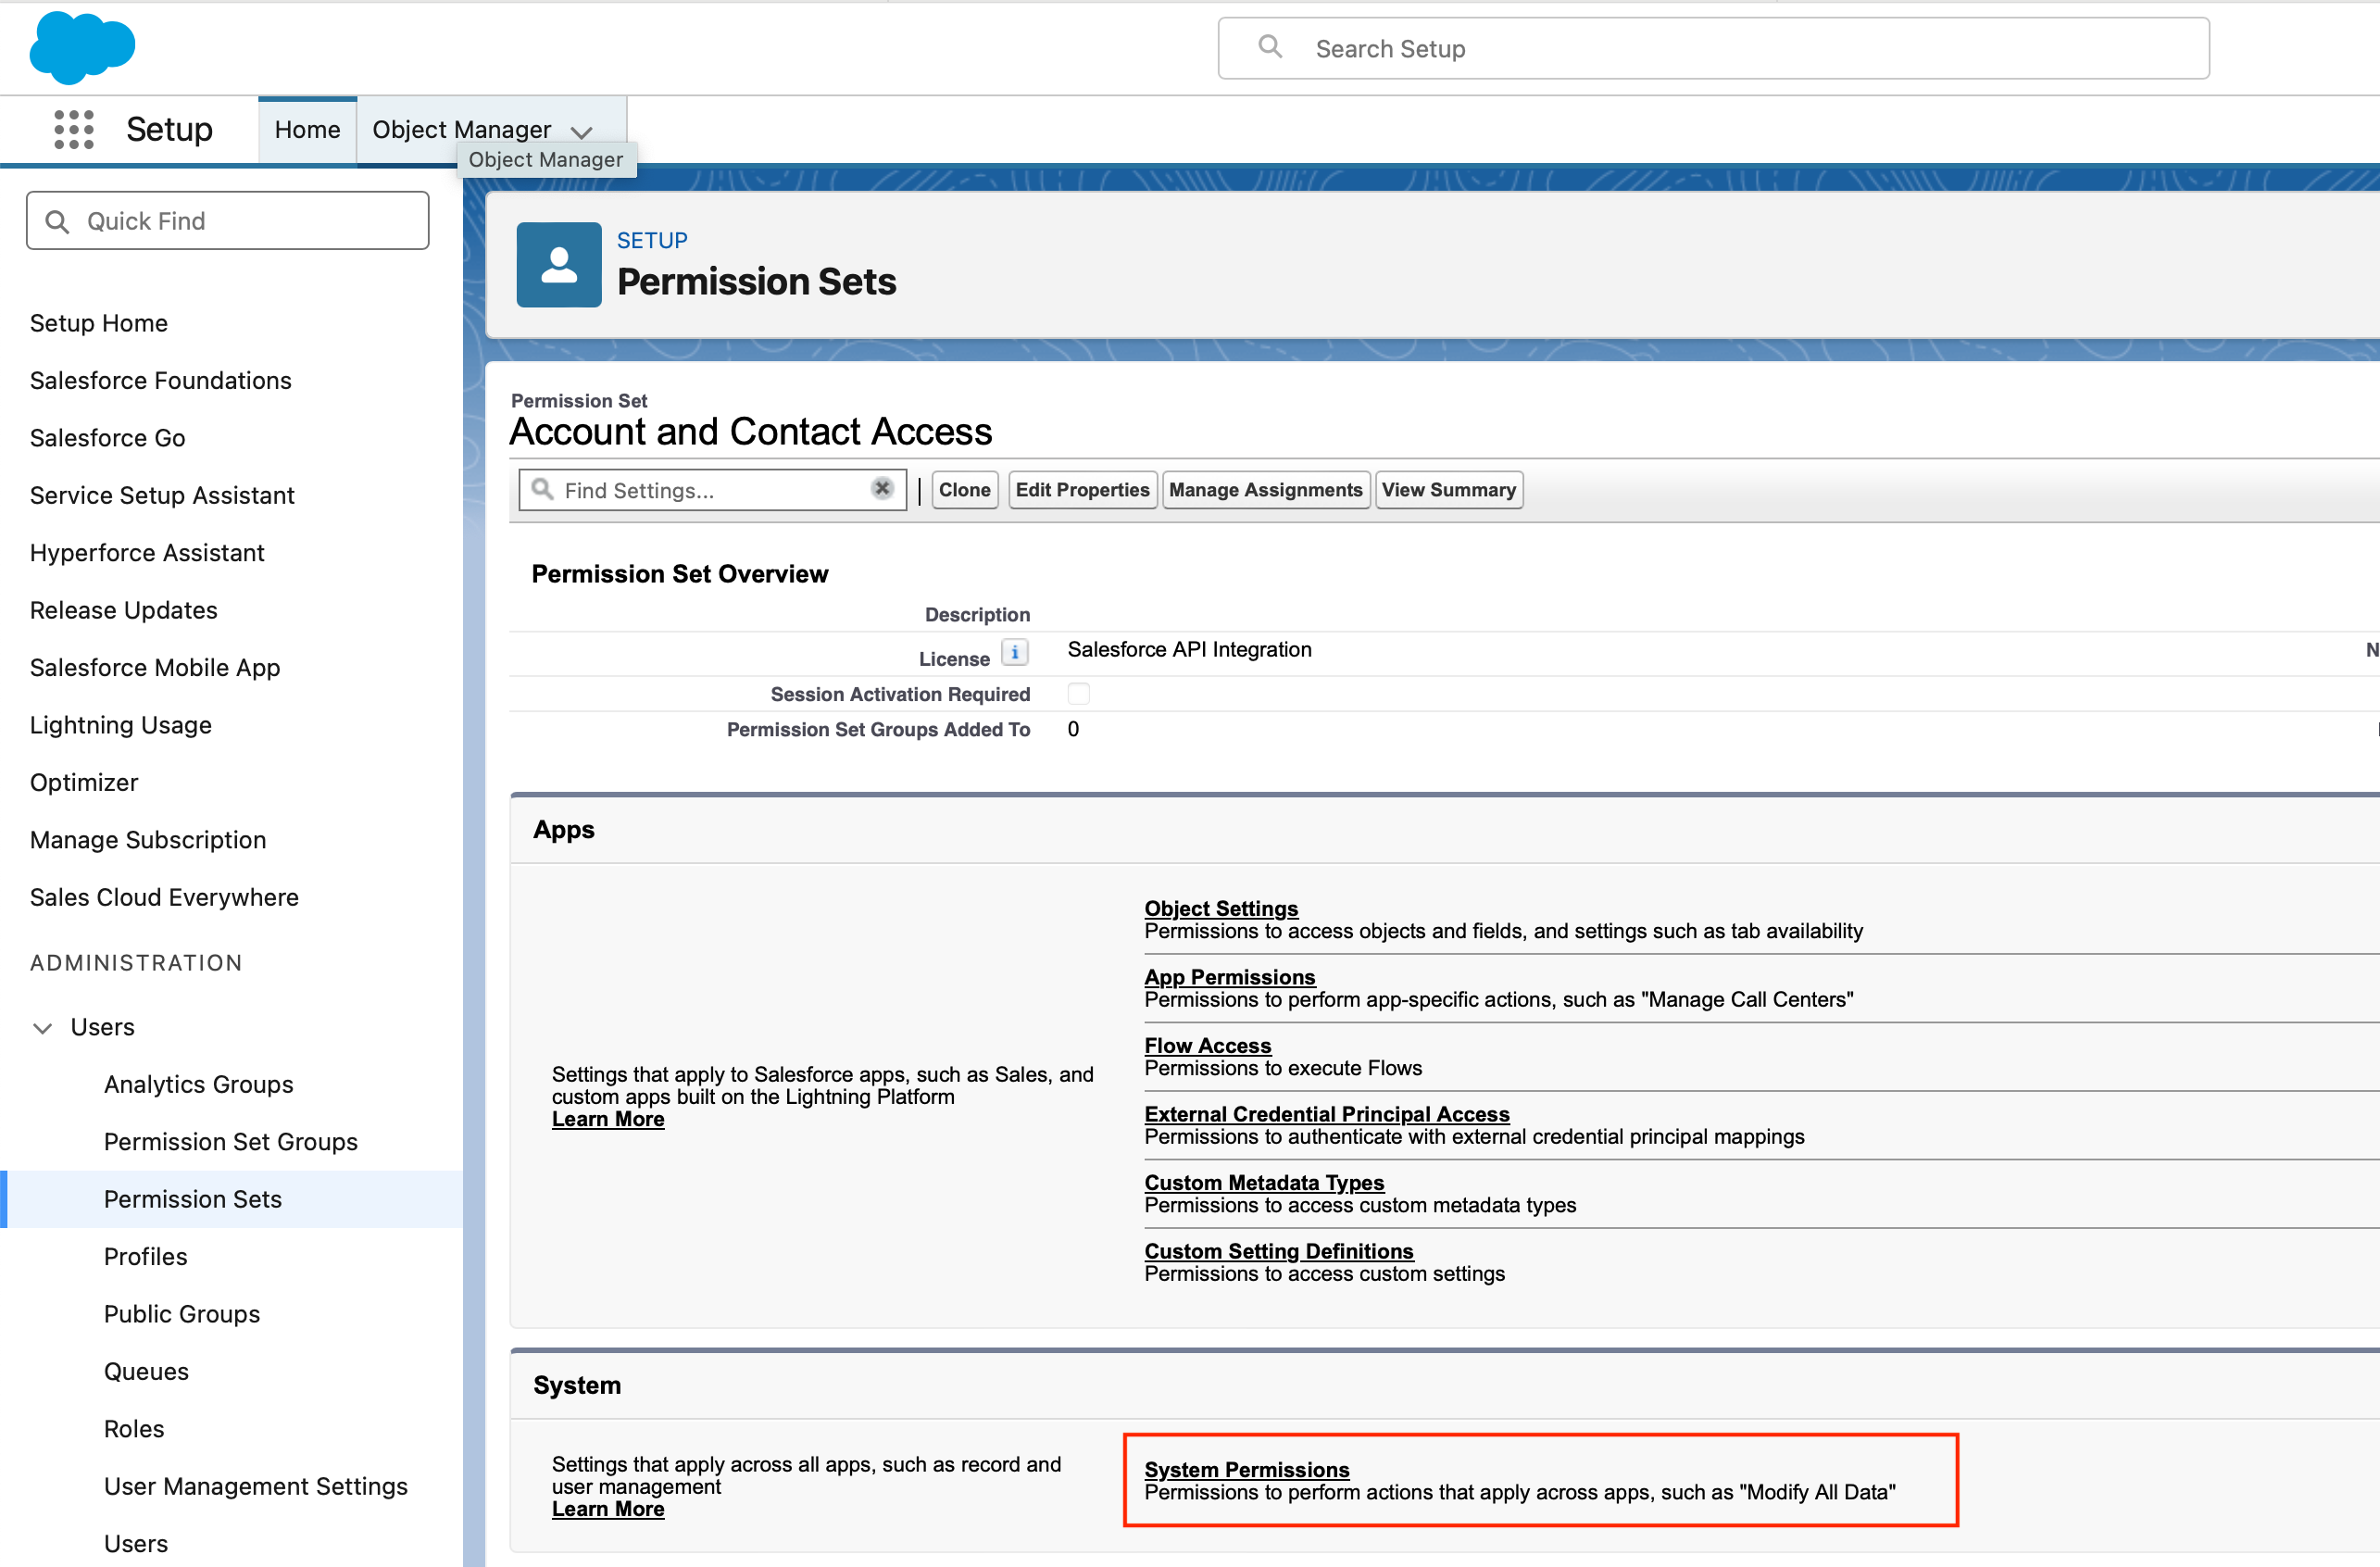
3. Configure object permissions
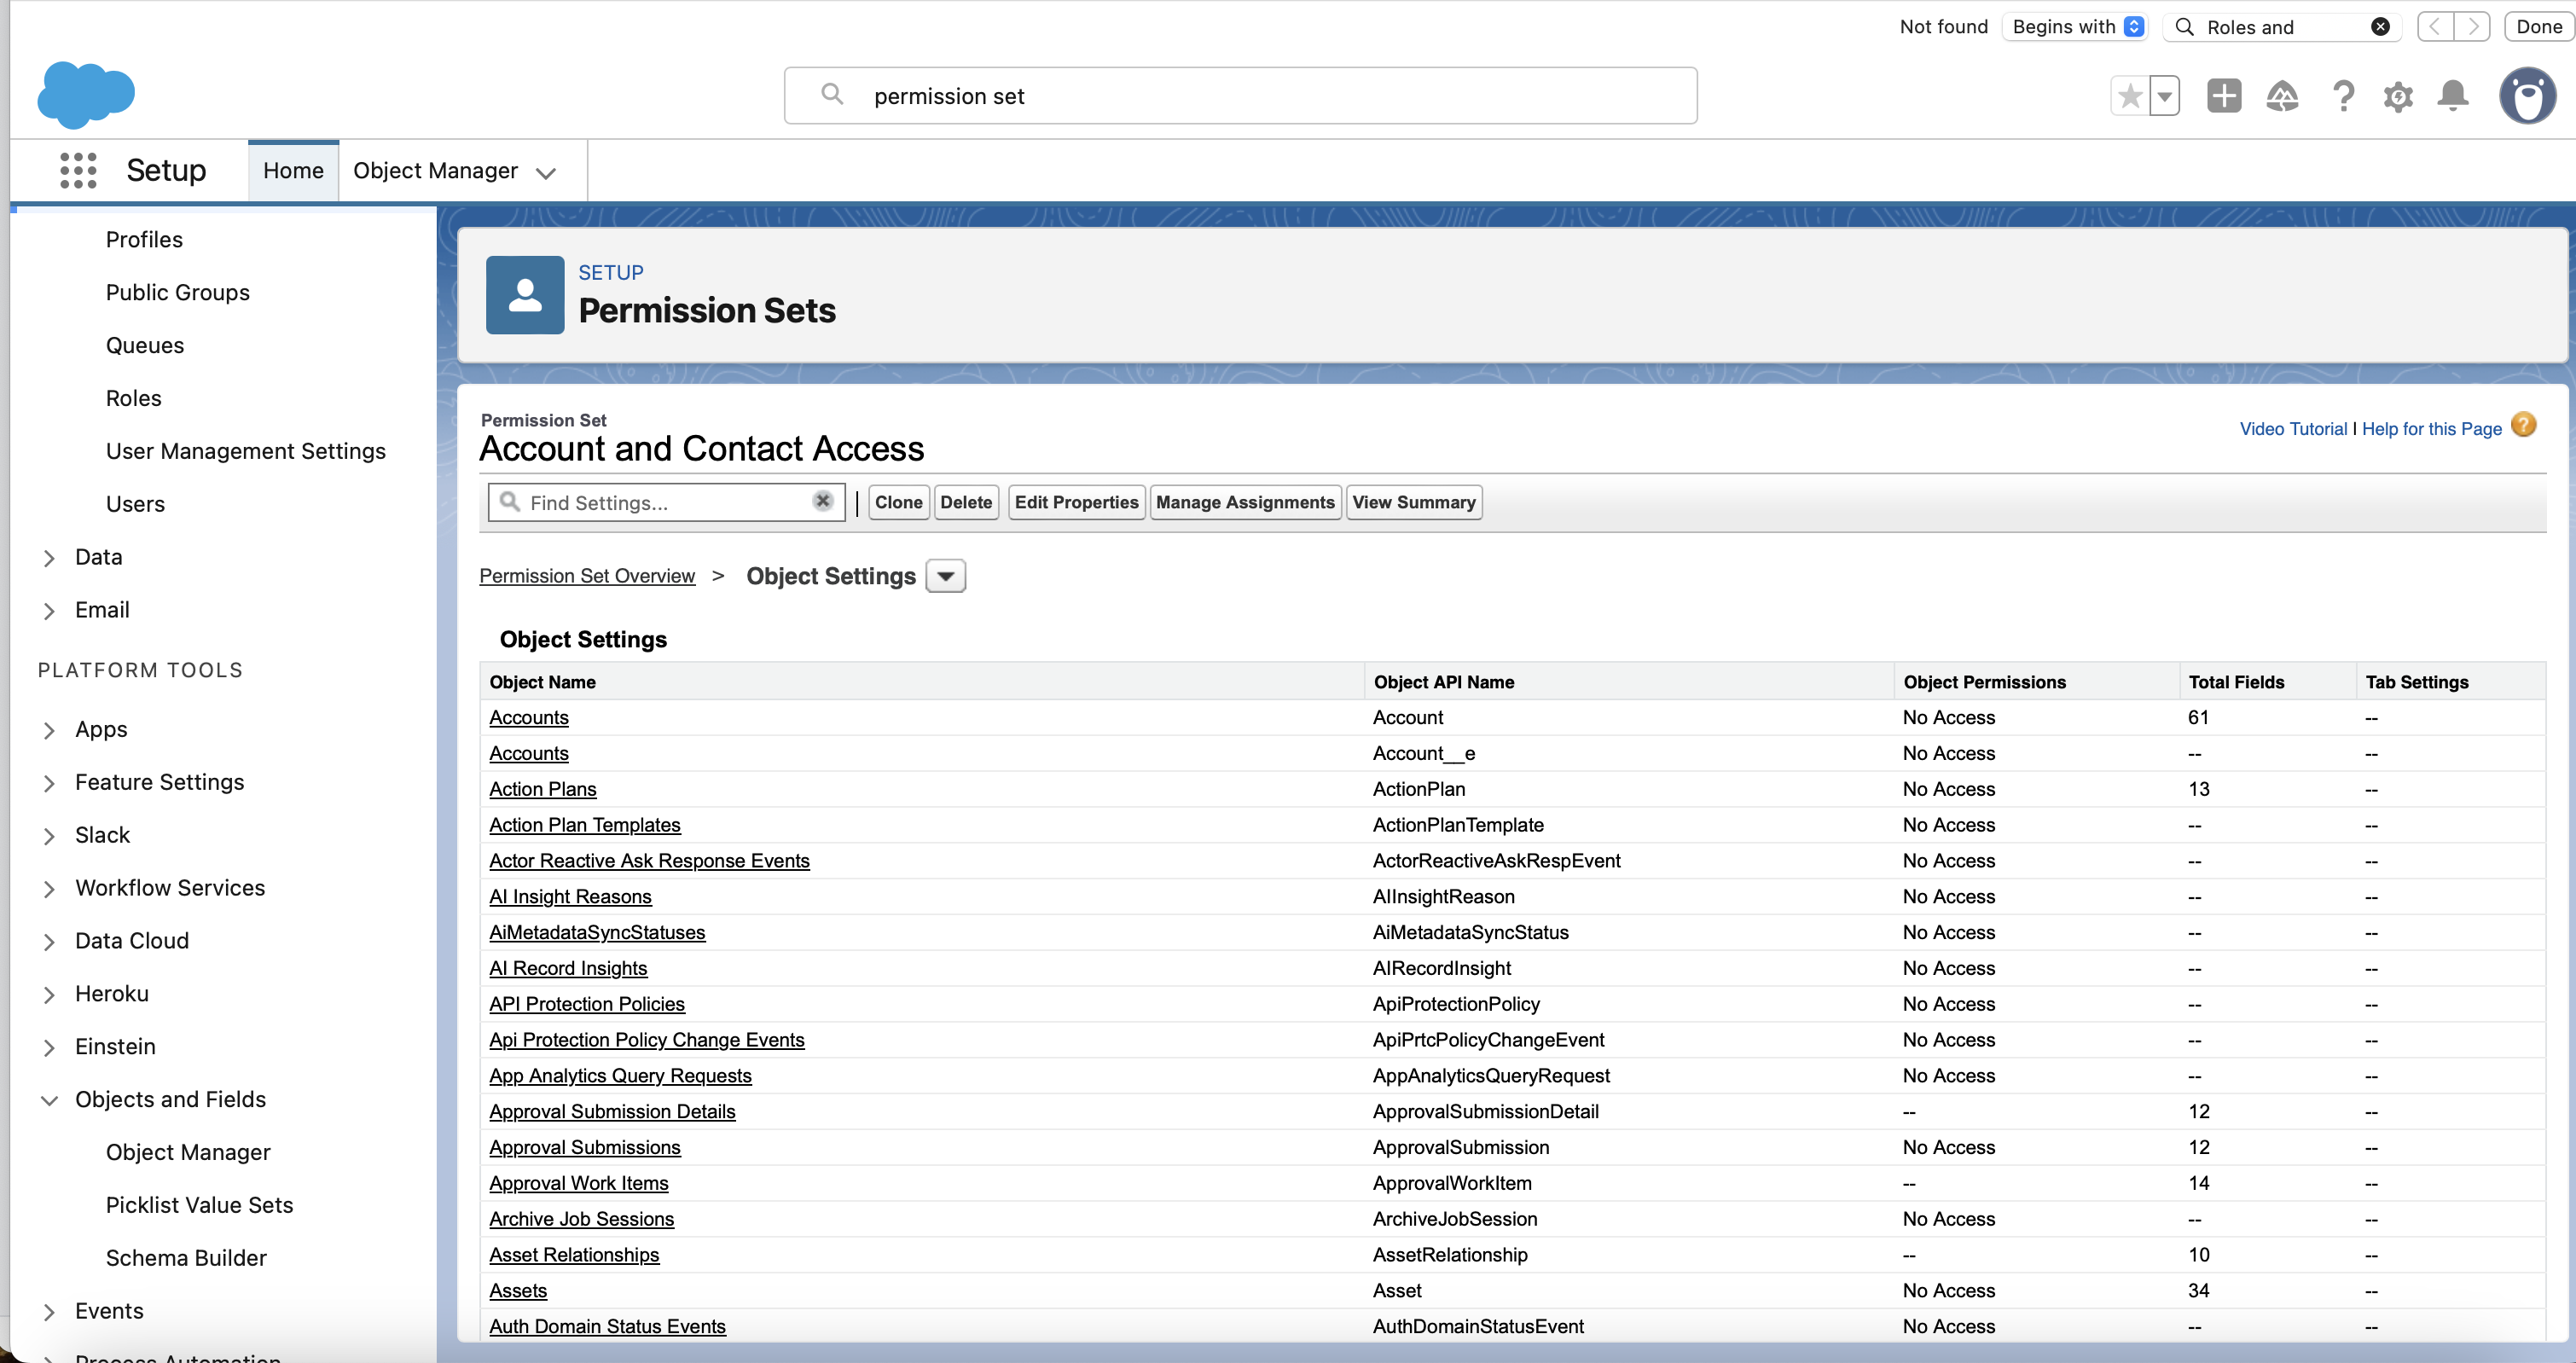
- Click on Object Settings
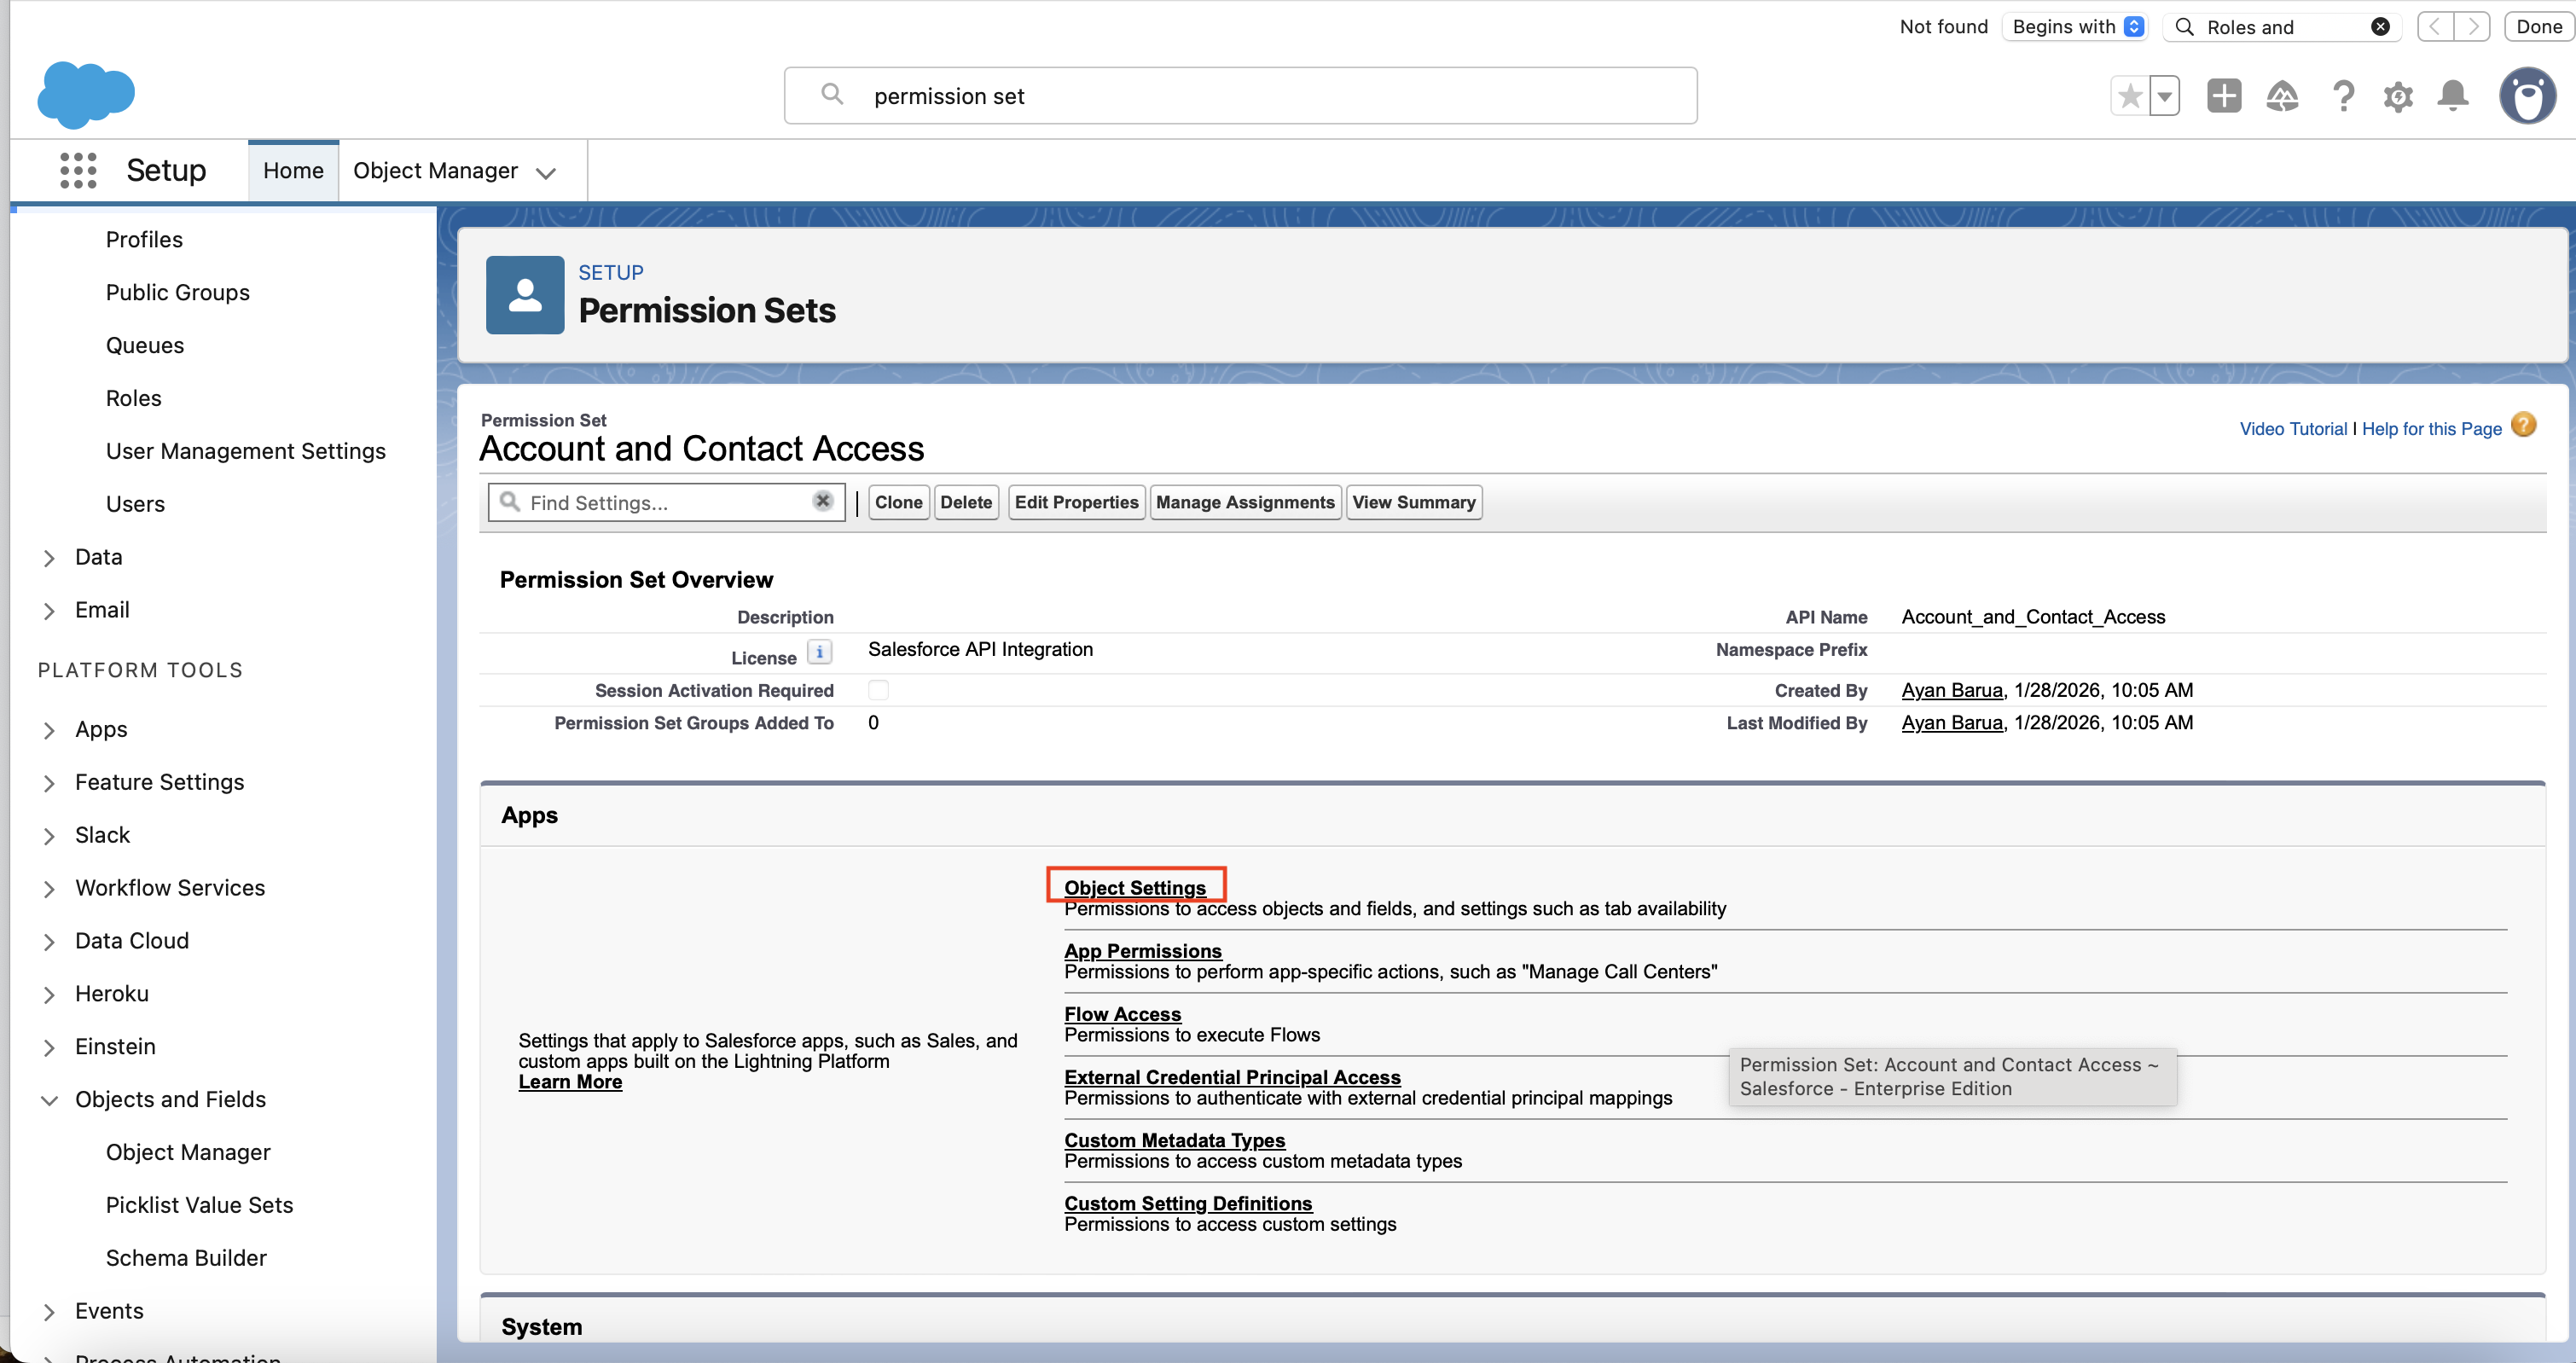
- For each of the objects that the integration needs to access you need to set up its permissions. Start by clicking on the first object, for example “Accounts”.
- Edit the permission so that all relevant boxes under Object Permissions and Field Permissions are checked. Then click on Save.
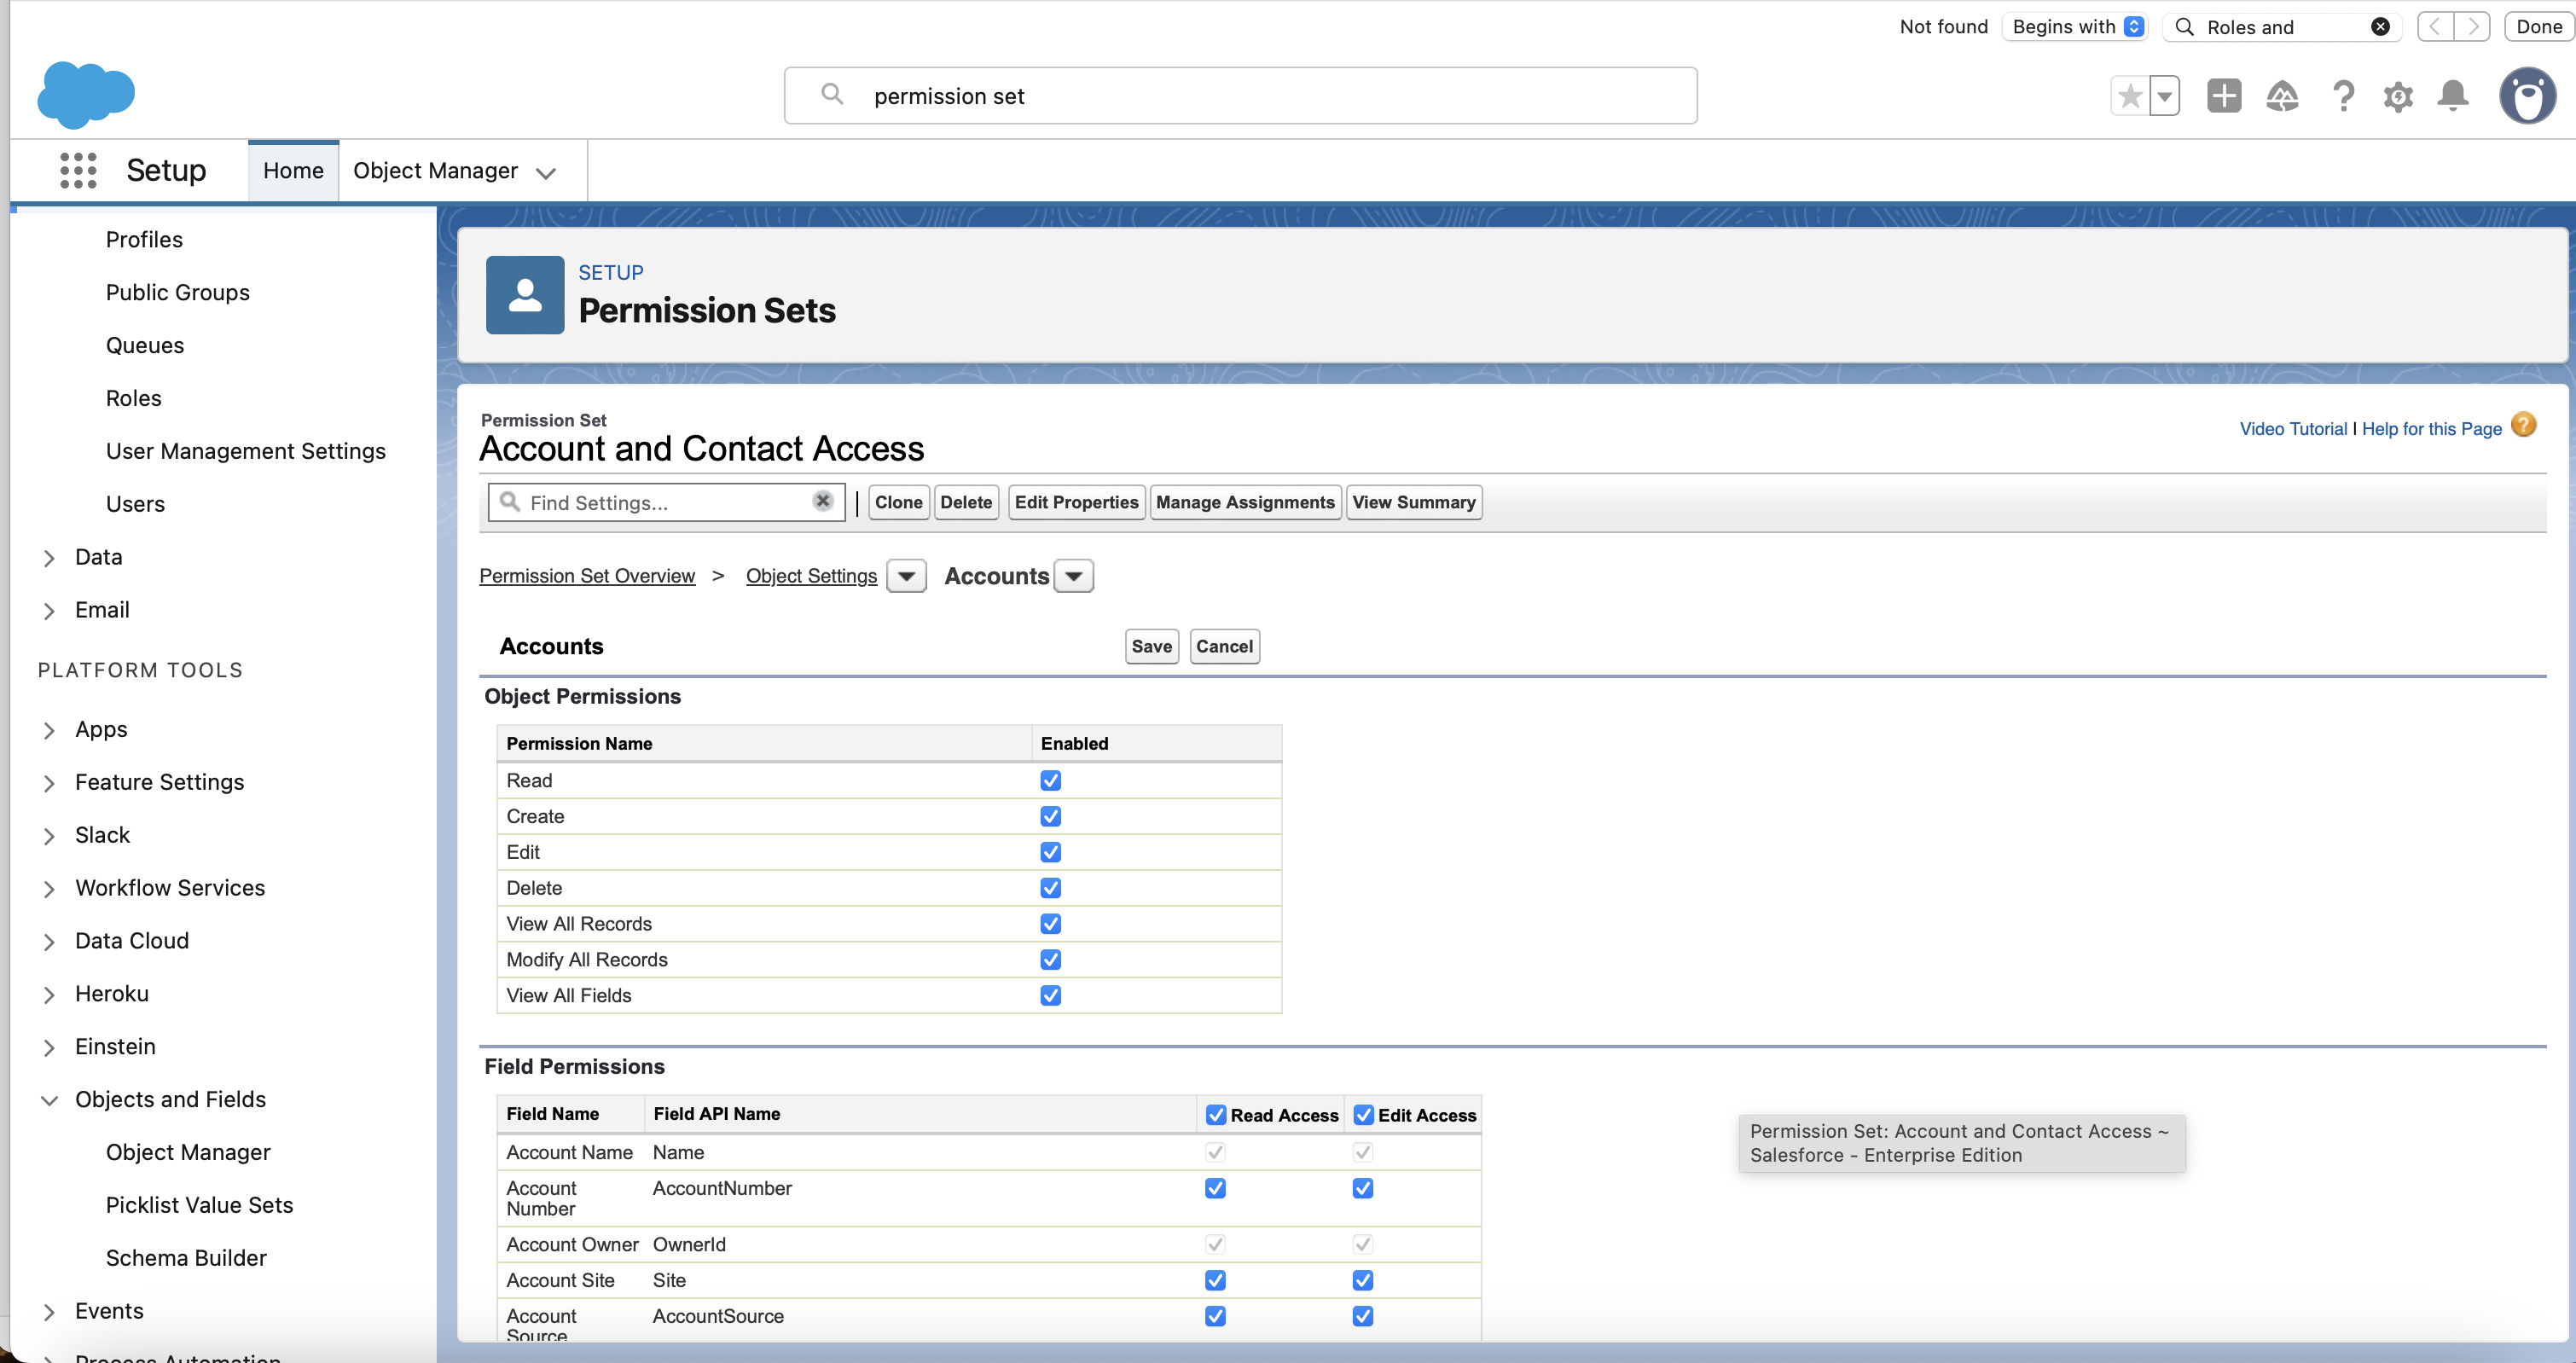
- Repeat for all the other objects that the integration needs to access.
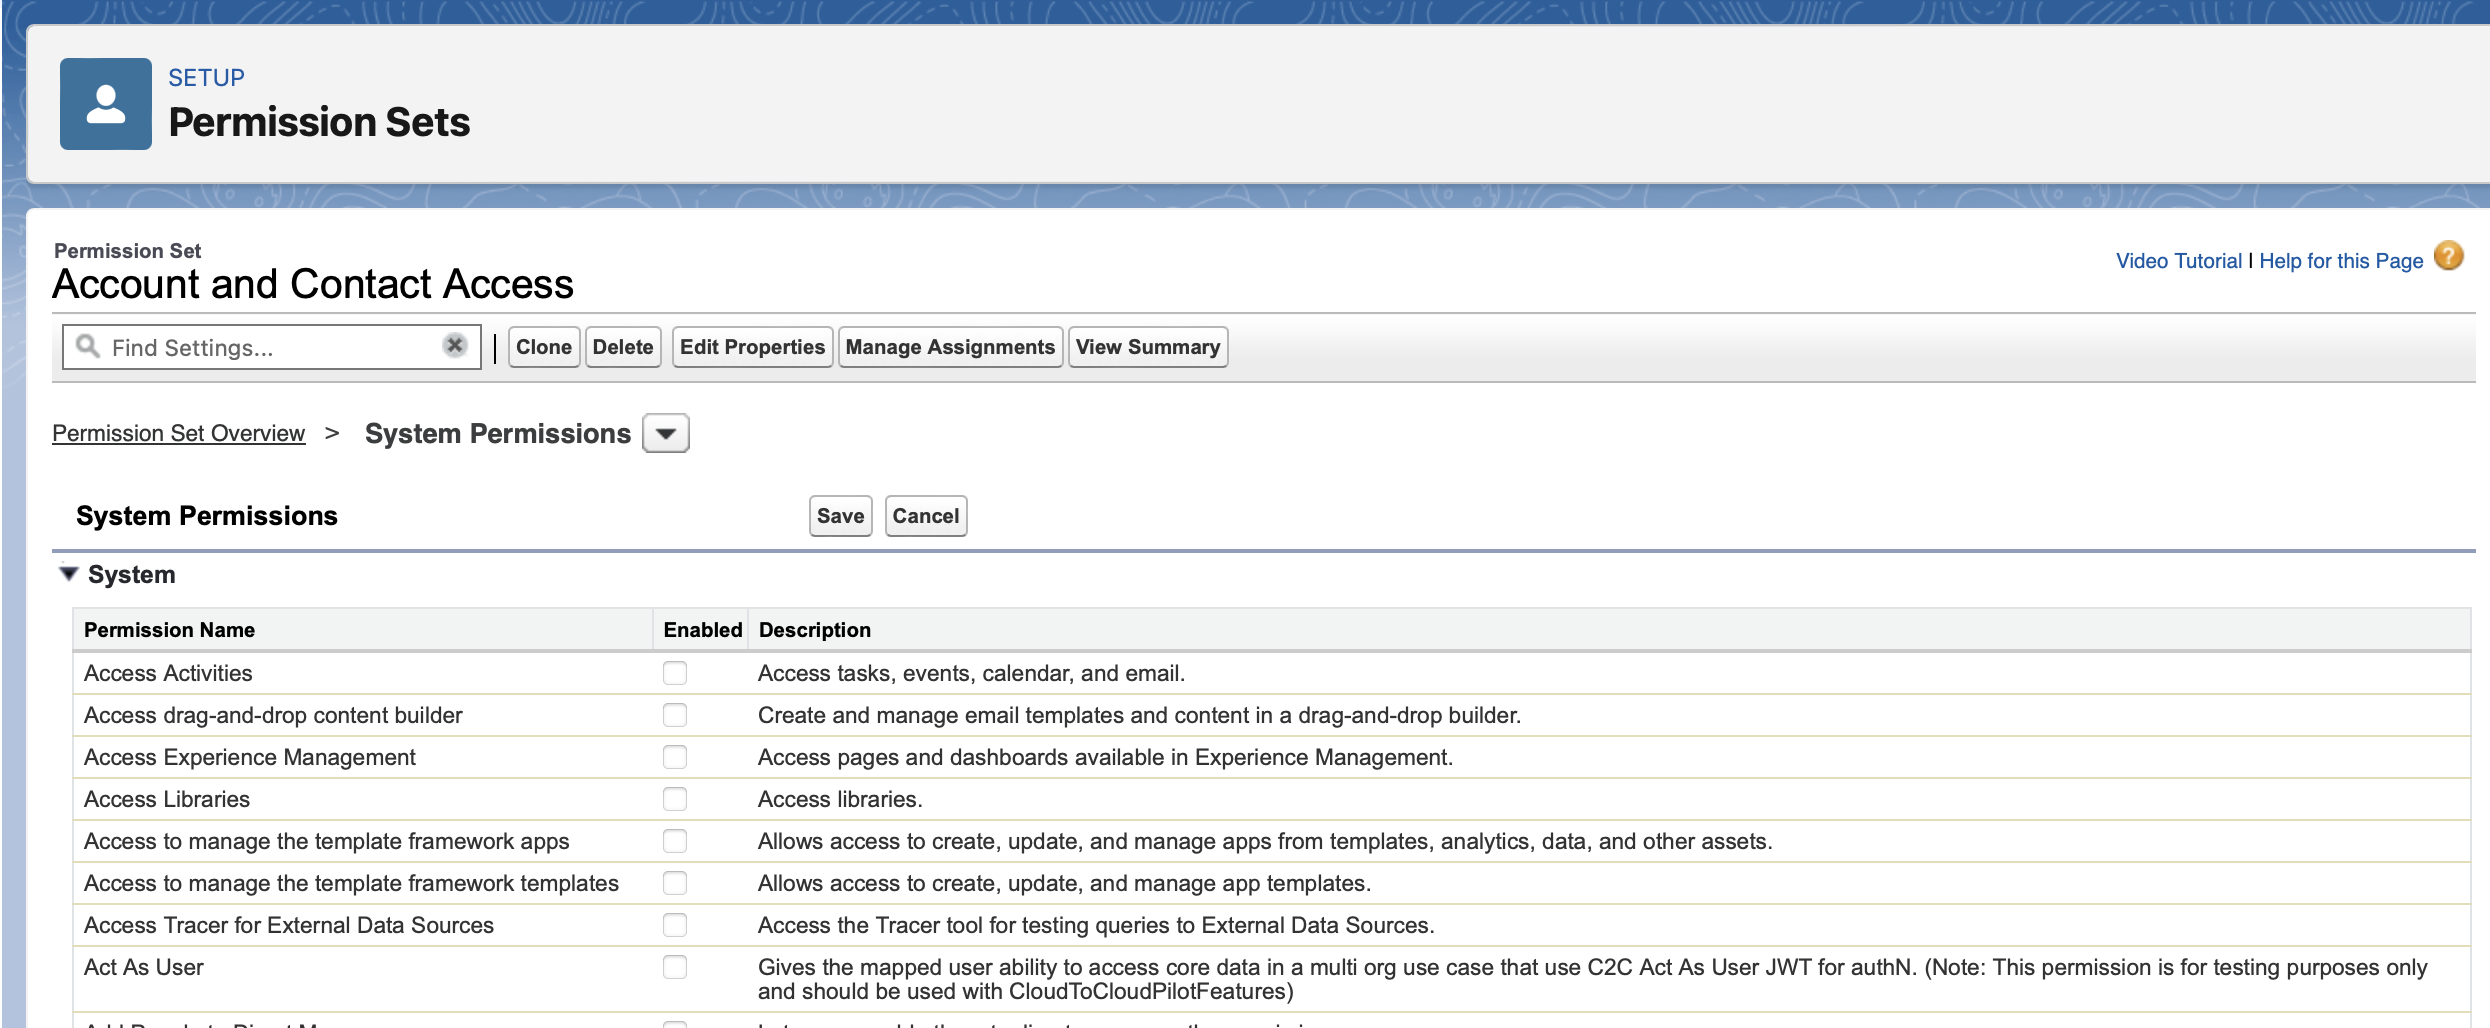
4. Configure system permissions
- Select System Permissions.
- Ensure that the checkboxes for the necessary system permissions are selected, and then click Save.
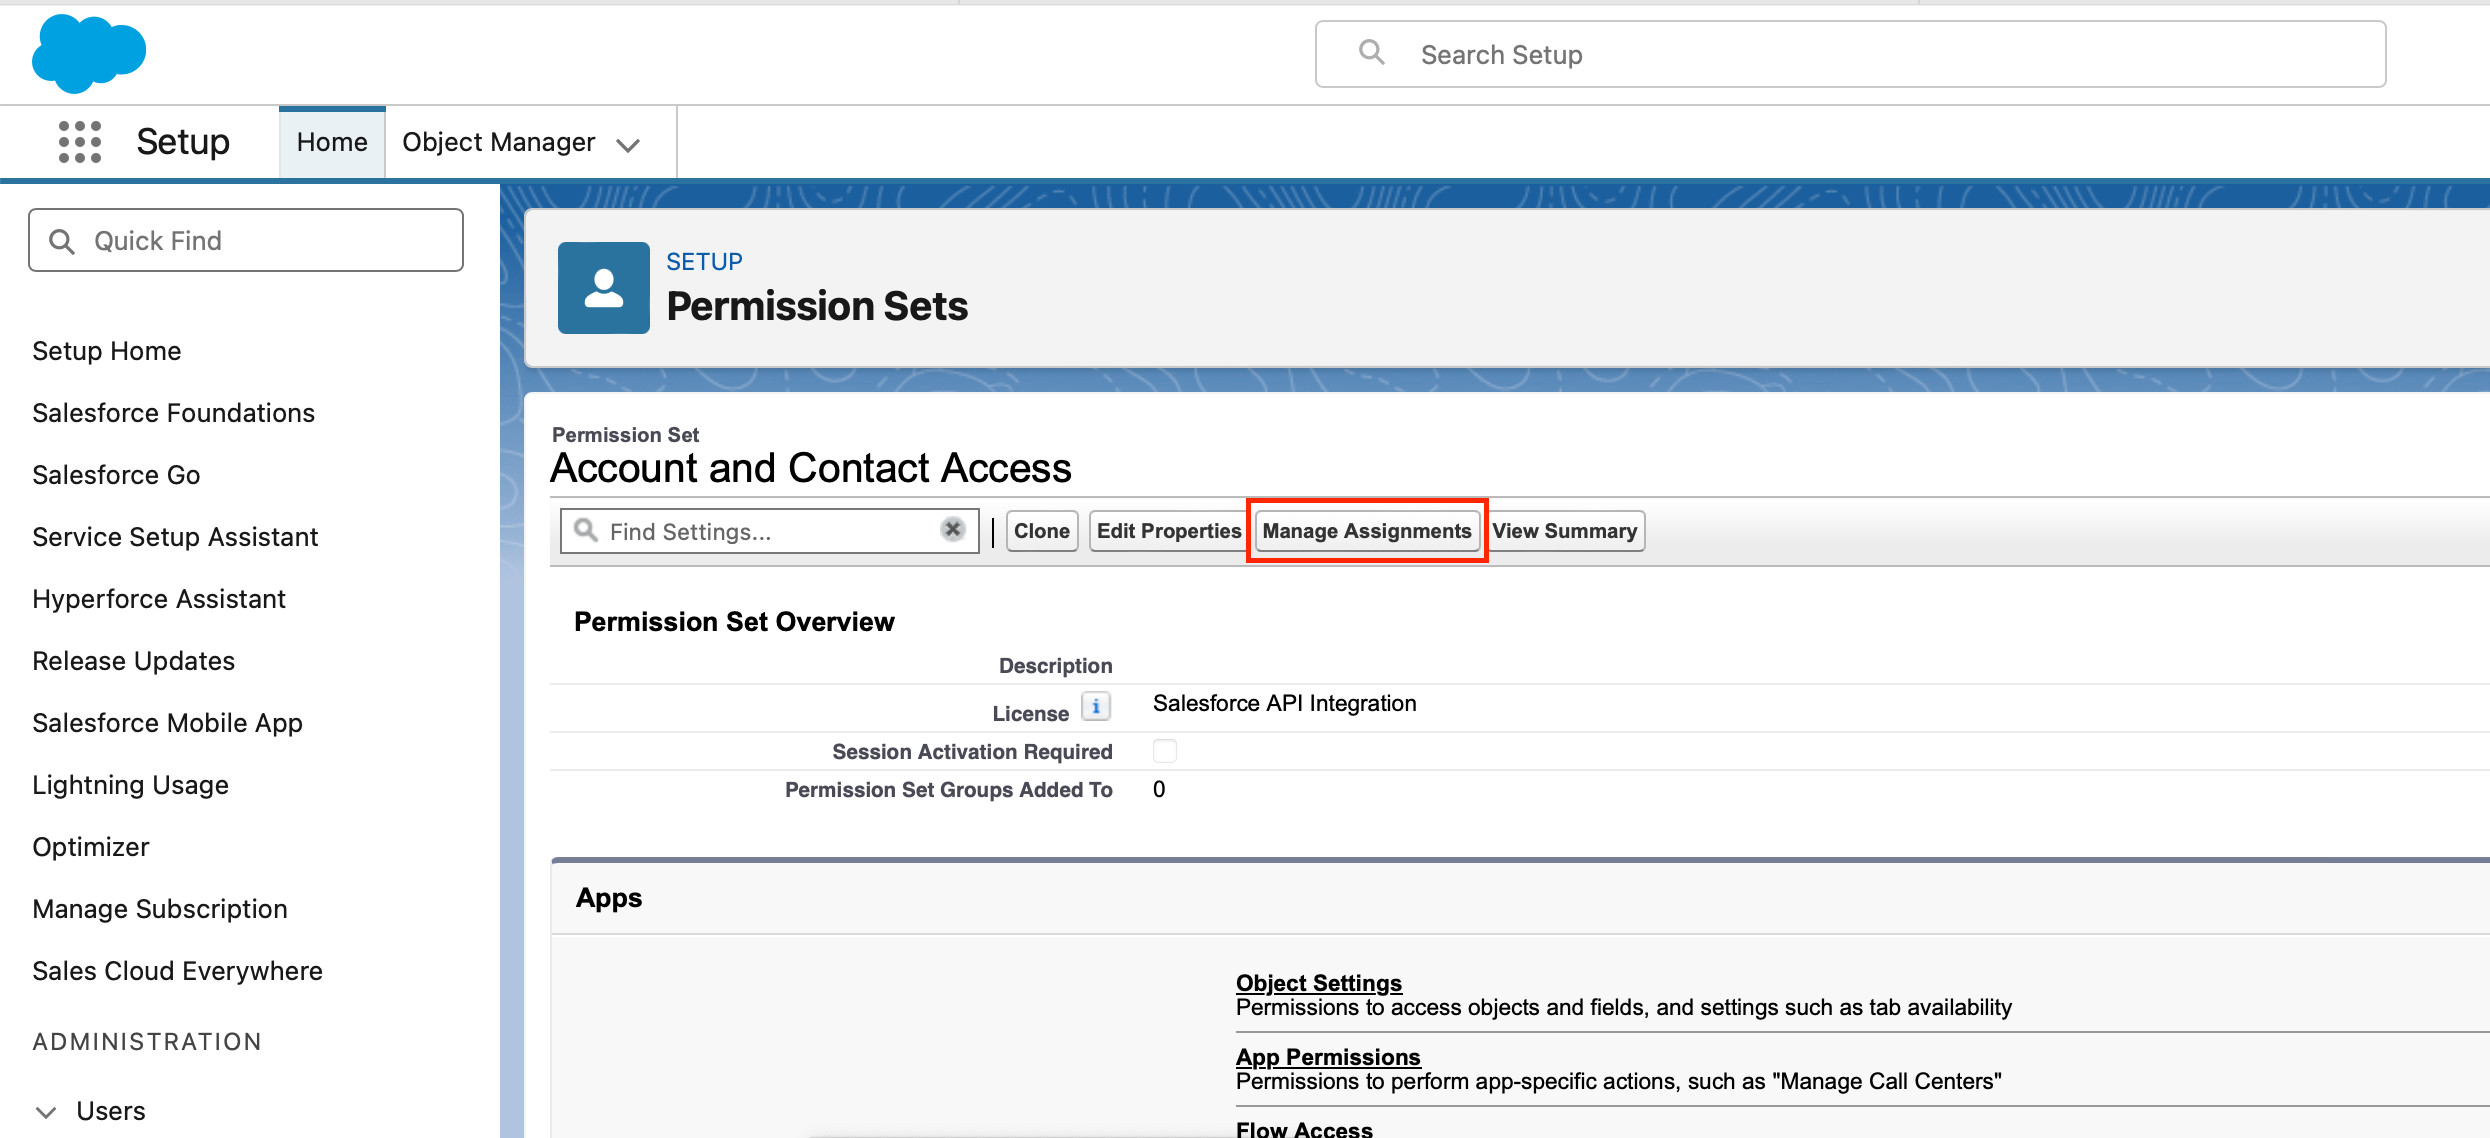
5. Assign permission set to integration user
- Click on Manage Assignments.
- Click on Add Assignment.
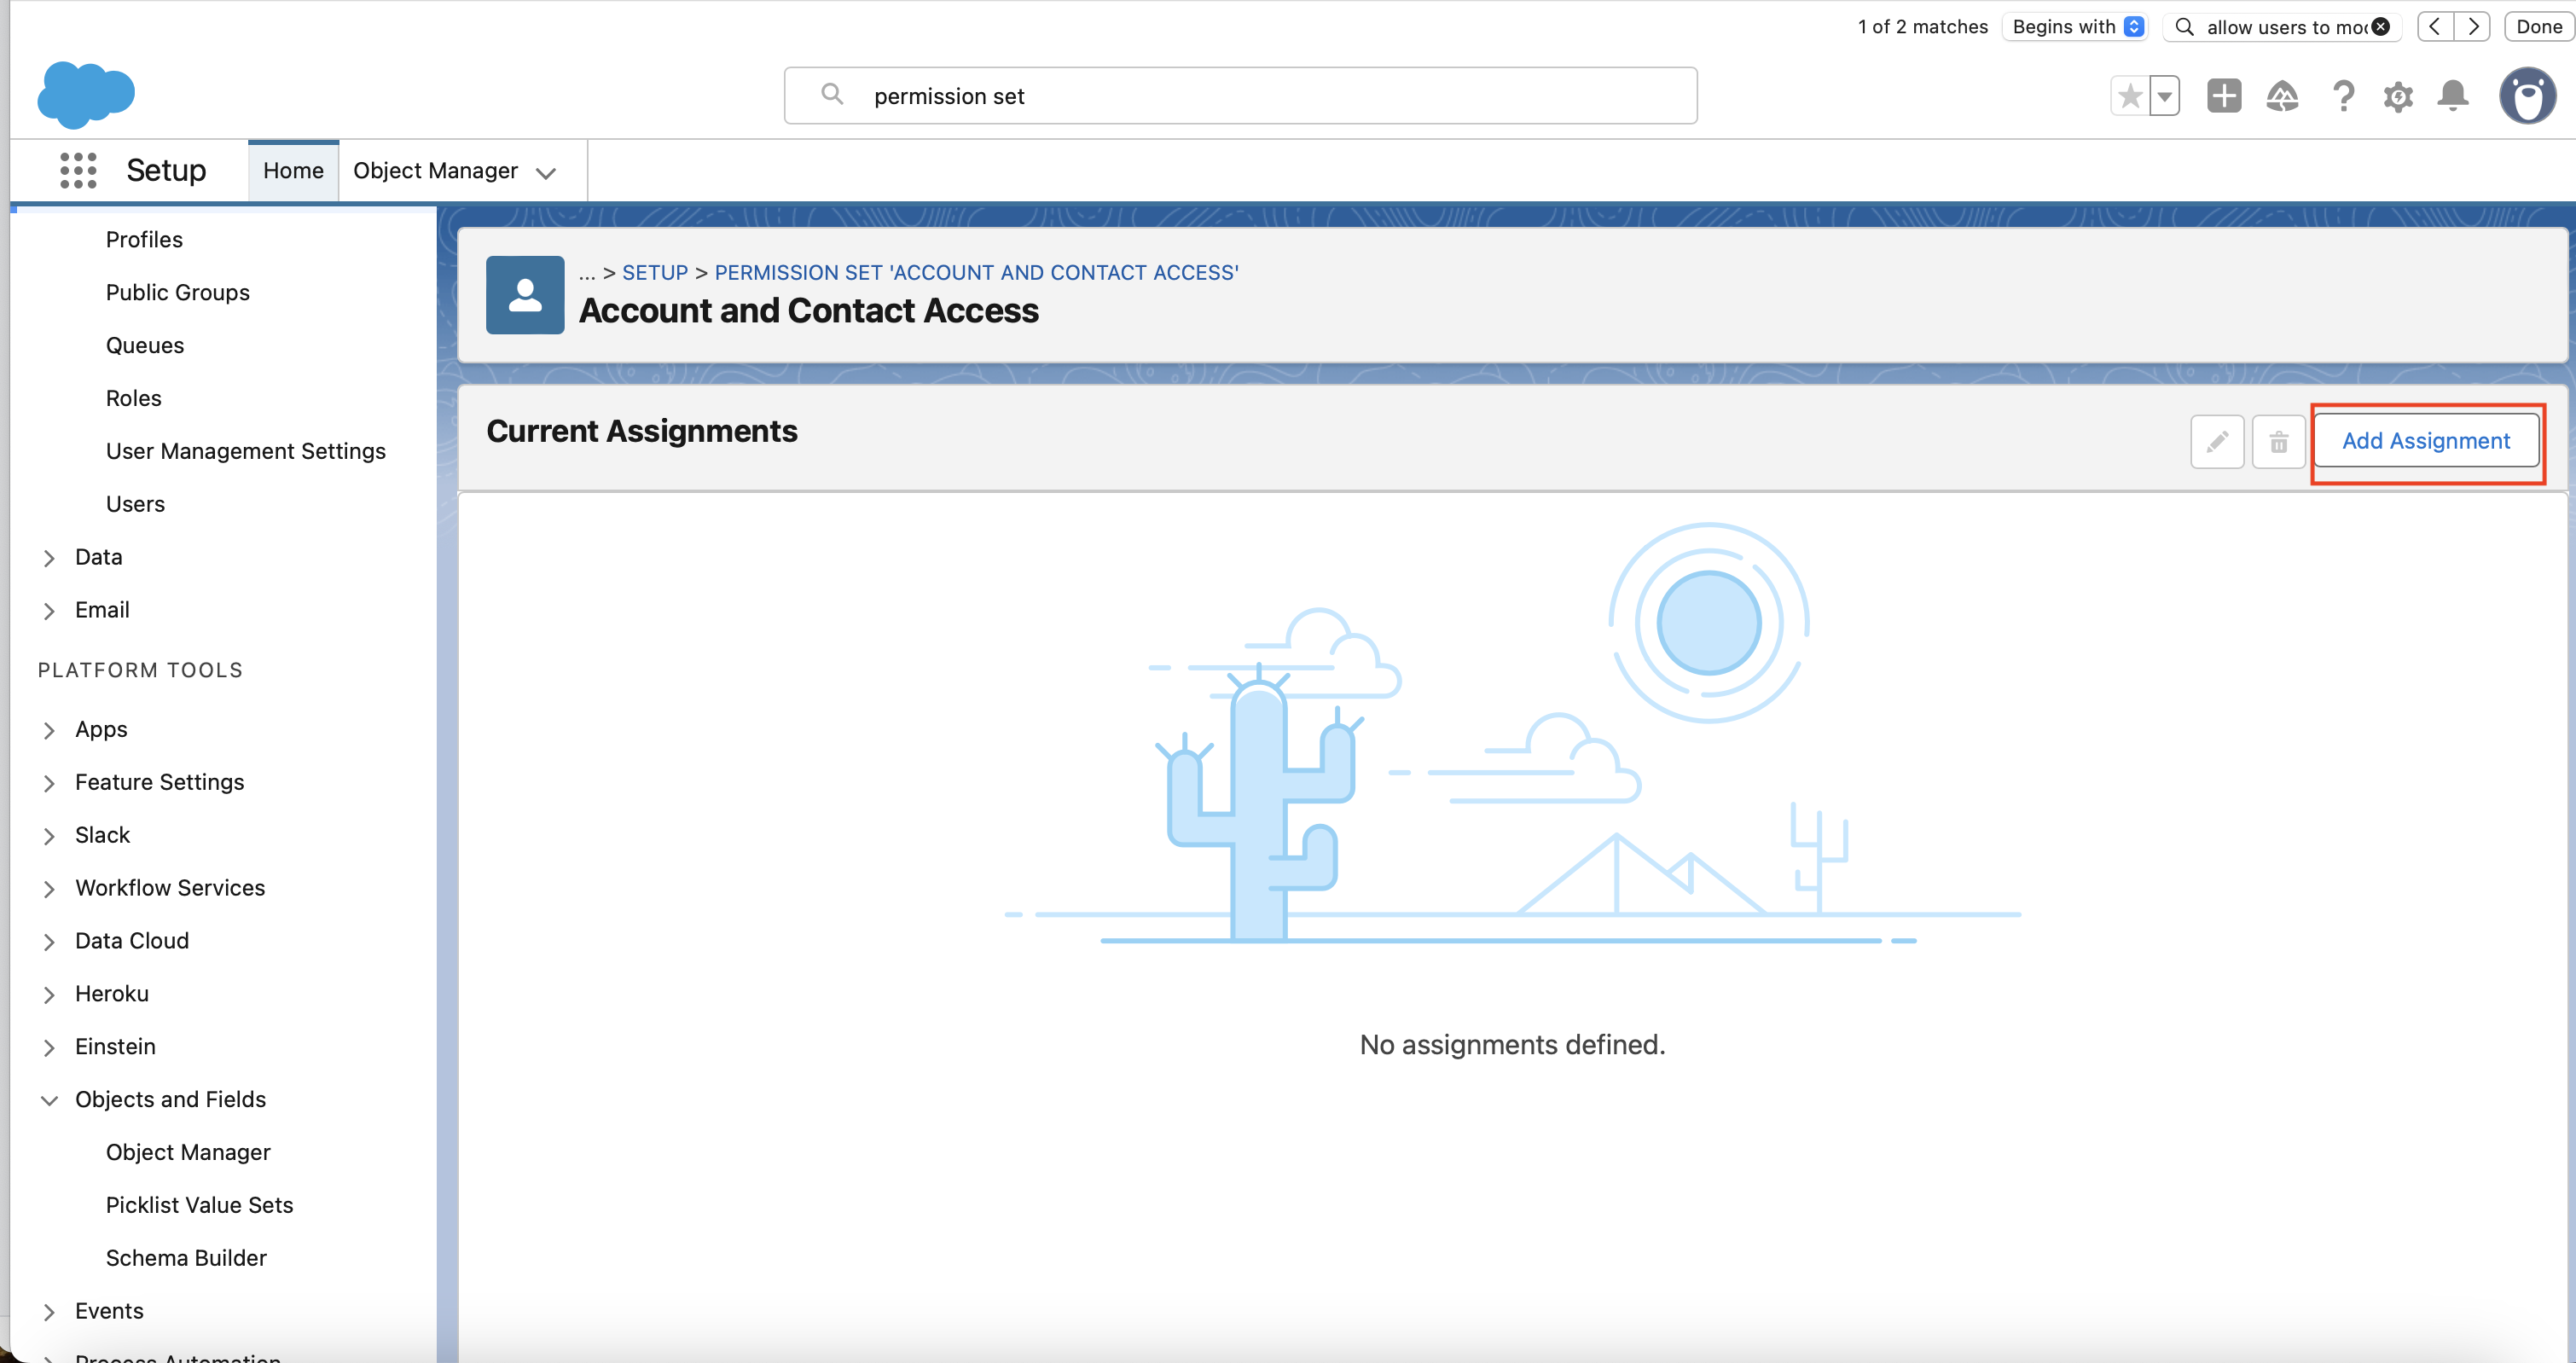
- Select the integration user you created in step 1.
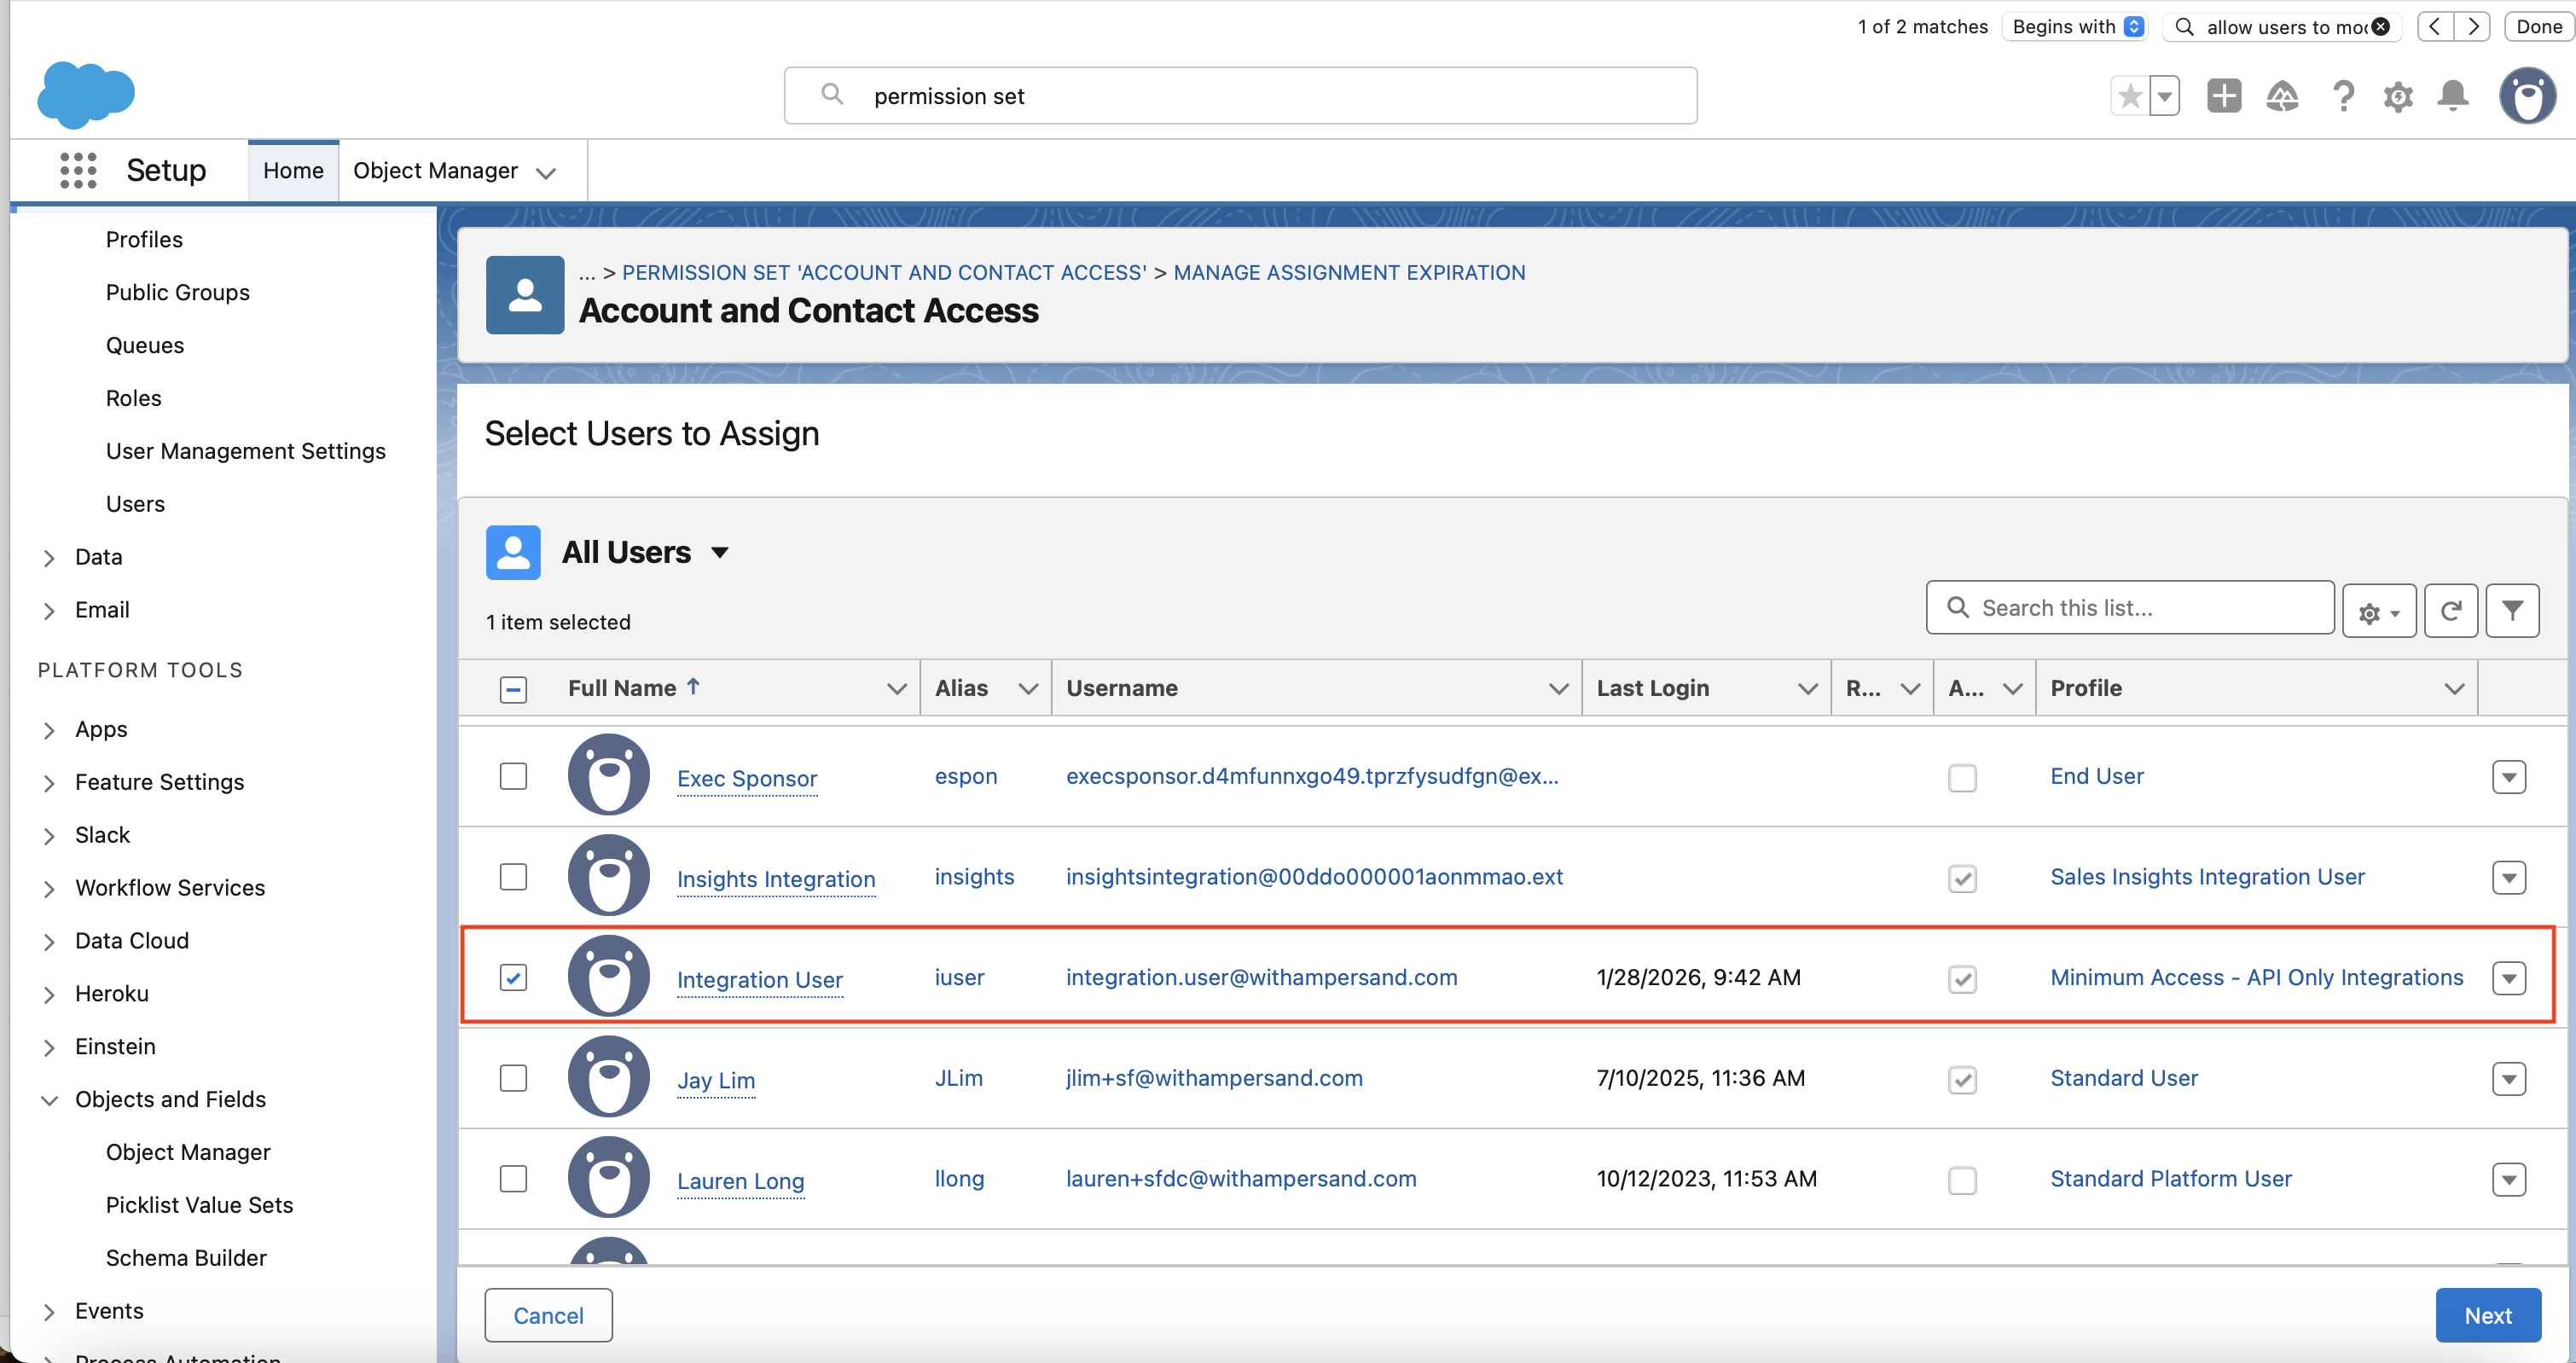
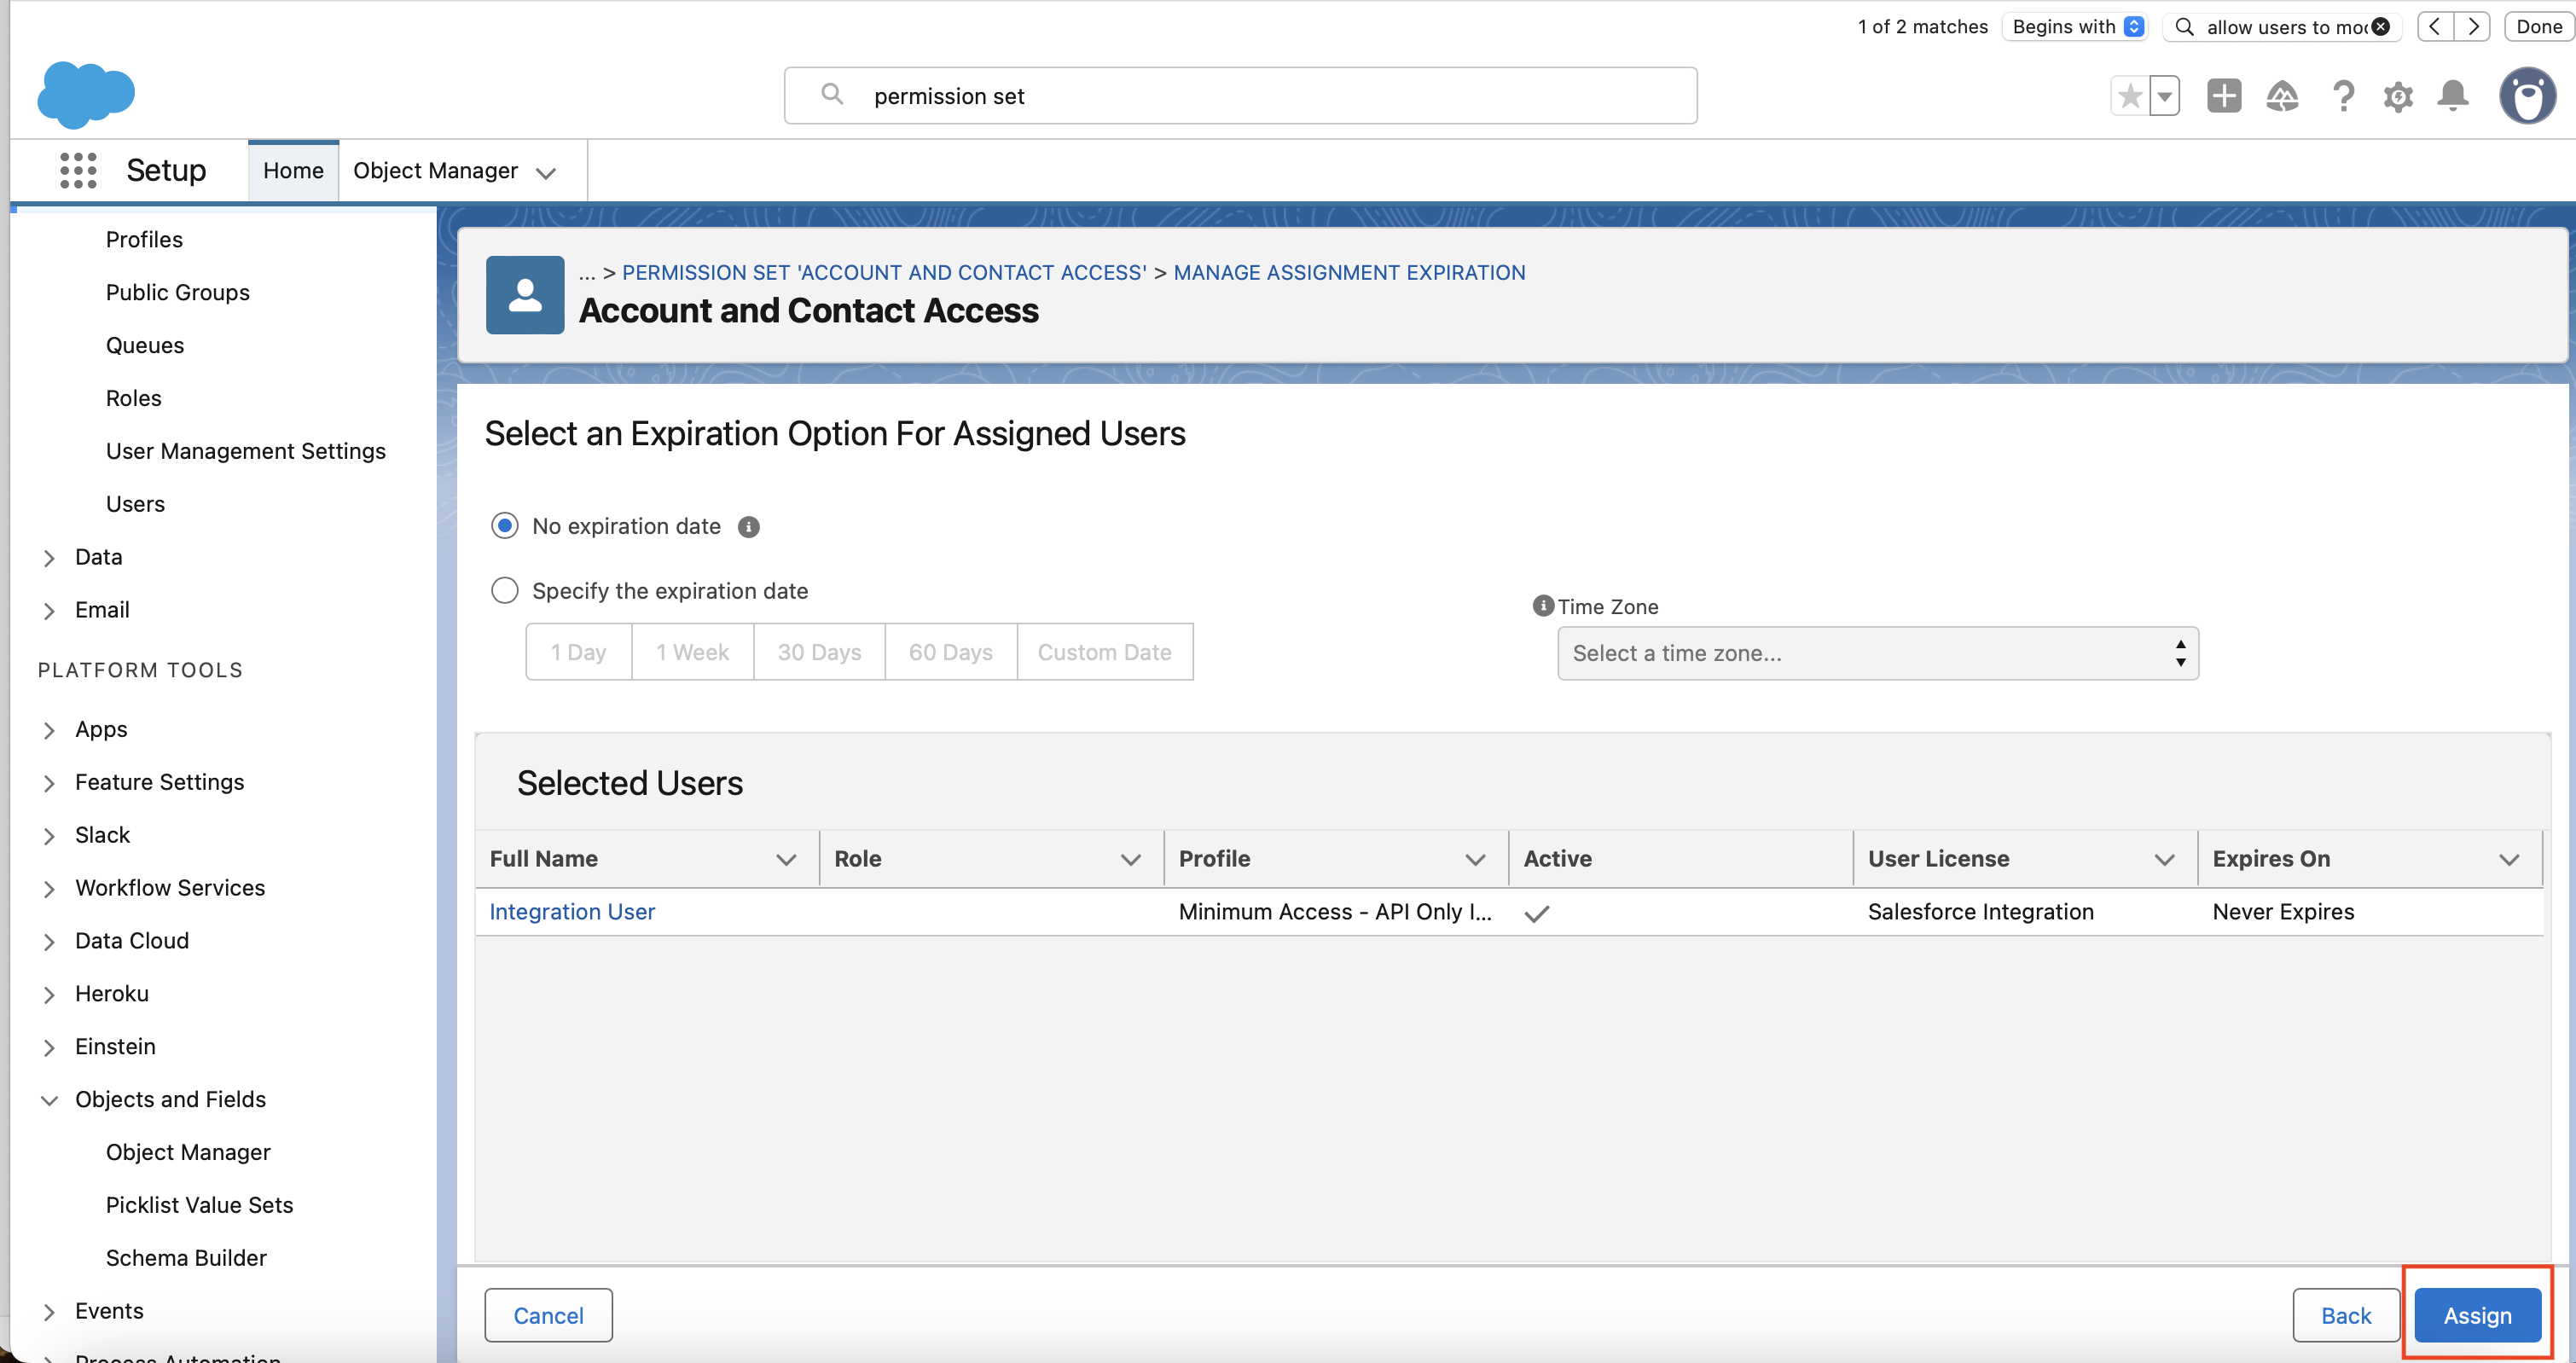
- Ensure “Expires On” is set to “Never Expires”, and then click on “Assign”.
After installing the integration
After the integration is installed, you need to configure OAuth policies to ensure the integration can maintain a stable connection.- External Client App
- Connected App
- Log in to Salesforce.
- Go to Setup.
- In the Quick Find box, search for External Client App Manager.
- Click on the name of the installed External Client App.
- Go to the Policies tab and click Edit.
- Under OAuth Policies, ensure Permitted Users is set to All users may self-authorize.
-
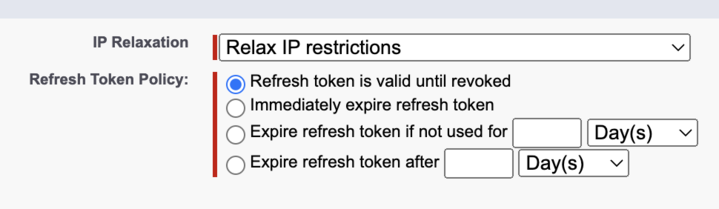
Under App Authorization, make the following changes:
- Set Refresh Token Policy to Refresh token is valid until revoked.
- Set IP Relaxation to Relax IP restrictions.
-
Click Save.
Salesforce terminology
License
A license is purchased from Salesforce and determines the maximum set of permissions that can be granted to a user with that license.Profile
A profile is a collection of settings that determines what objects, fields, and features a user can access in Salesforce. Each user has exactly one profile. Standard profiles (e.g. Standard User, System Administrator) are provided by Salesforce; you can also create custom profiles by cloning an existing one. A profile is always associated with one user license, but a user license can have multiple profiles associated with it. When you create a new user, you can pick both the license and profile of that person.Permission set
A permission set is a collection of permissions that you assign to users to grant access to specific objects, fields, and capabilities. Permission sets extend the default permissions of a profile. Users can have only one profile but multiple permission sets. A permission set is tied to a license, and only users with that license type can be granted the permission set.System permissions needed
- External Client App
- Connected App
The following system permissions are needed:
API Enabled- Subscribe Action Permissions if the integration includes real-time Subscribe Actions.
Subscribe Action permissions
If the integration contains Subscribe Actions, a number of special permissions are required. Here’s an explanation of why each permission is necessary: These permissions need to be explicitly enabled:Modify Metadata Through Metadata API Functions: Required to configure event channels and event channel memberships through Metadata API.Customize Application: Required to configure artifacts like Named Credentials, which allows Ampersand to securely connect to the event channels.
View Setup and Configuration: Enables the integration to access Salesforce setup configuration in order to create webhook subscription settings.View Roles and Role Hierarchy: Ensures the integration has the correct visibility context so Salesforce can successfully send events; without this, events may be generated but not delivered.Manage Custom Permissions: Allows the integration to create and manage dedicated event channels and channel memberships used specifically for the installation’s subscription events.