

Before installing a NetSuite integration
You will need Administrator access to your NetSuite account.1. Install the bundle
- Navigate to Customization > SuiteBundler > Search & Install Bundles.
- Search for the bundle name or ID.
- Select the bundle from the results and click Install.
- Wait for the installation to complete. This may take a few minutes.
2. Verify the deployment
- Navigate to Customization > Scripting > Script Deployments.
- Find the RESTlet deployment installed by the bundle and click on ‘View’.
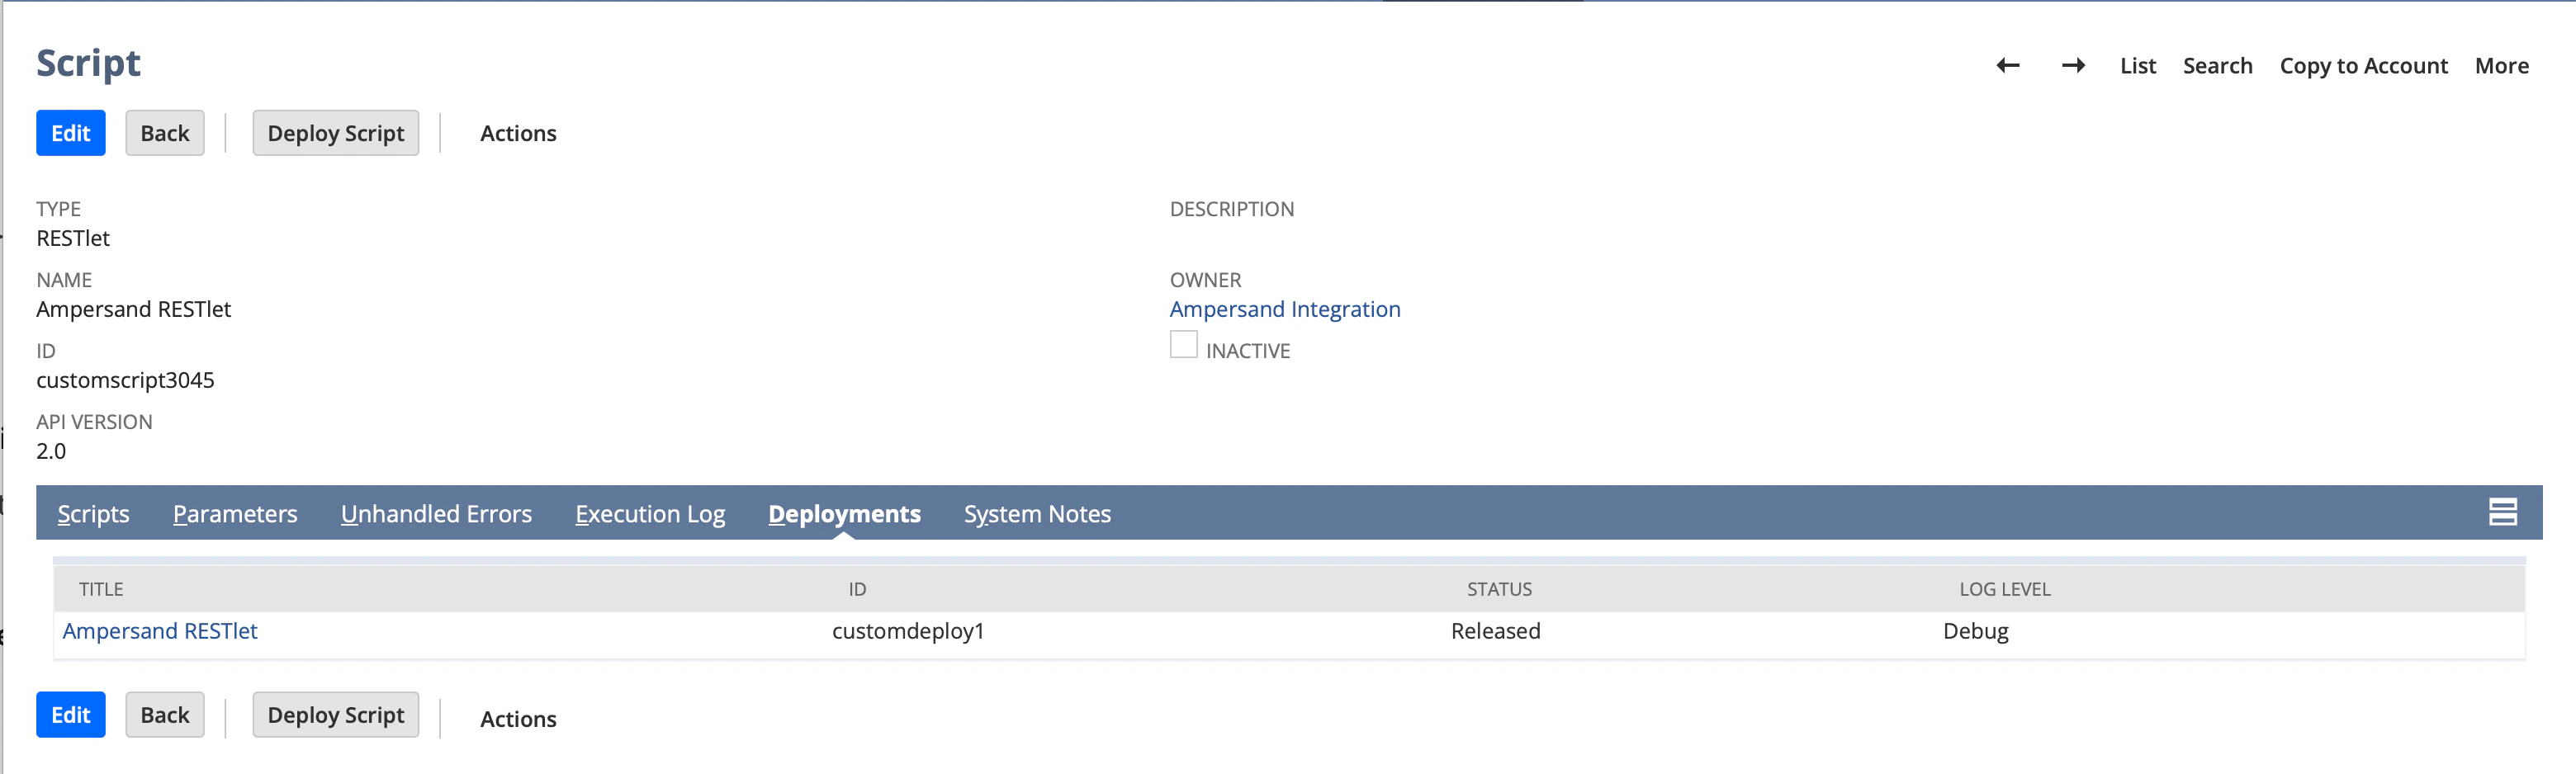
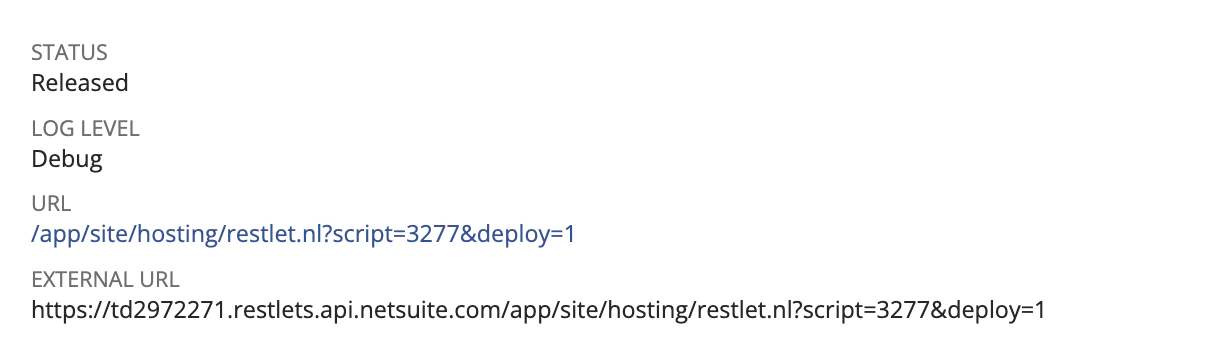
- Verify the deployment Status is Released.
- Click on the name of the script, then note the URL — you will need it for the installation step.
3. Enable required features
- Log in to NetSuite as an Administrator.
- Navigate to Setup > Company > Enable Features > SuiteCloud.
- Under Manage Authentication, check OAuth 2.0.
- Under SuiteScript, check Server SuiteScript.
- Under Manage Authentication (or SuiteTalk), check REST Web Services.
- Make sure that the following features are also enabled in your environment:
- Accounting
- Custom Records
- File Cabinet
- Click Save.
4. Create an integration record
The integration record identifies the external application that will connect to your NetSuite account.- Navigate to Setup > Integration > Manage Integrations > New.
- Enter a Name for the integration (e.g. “Ampersand Integration”).
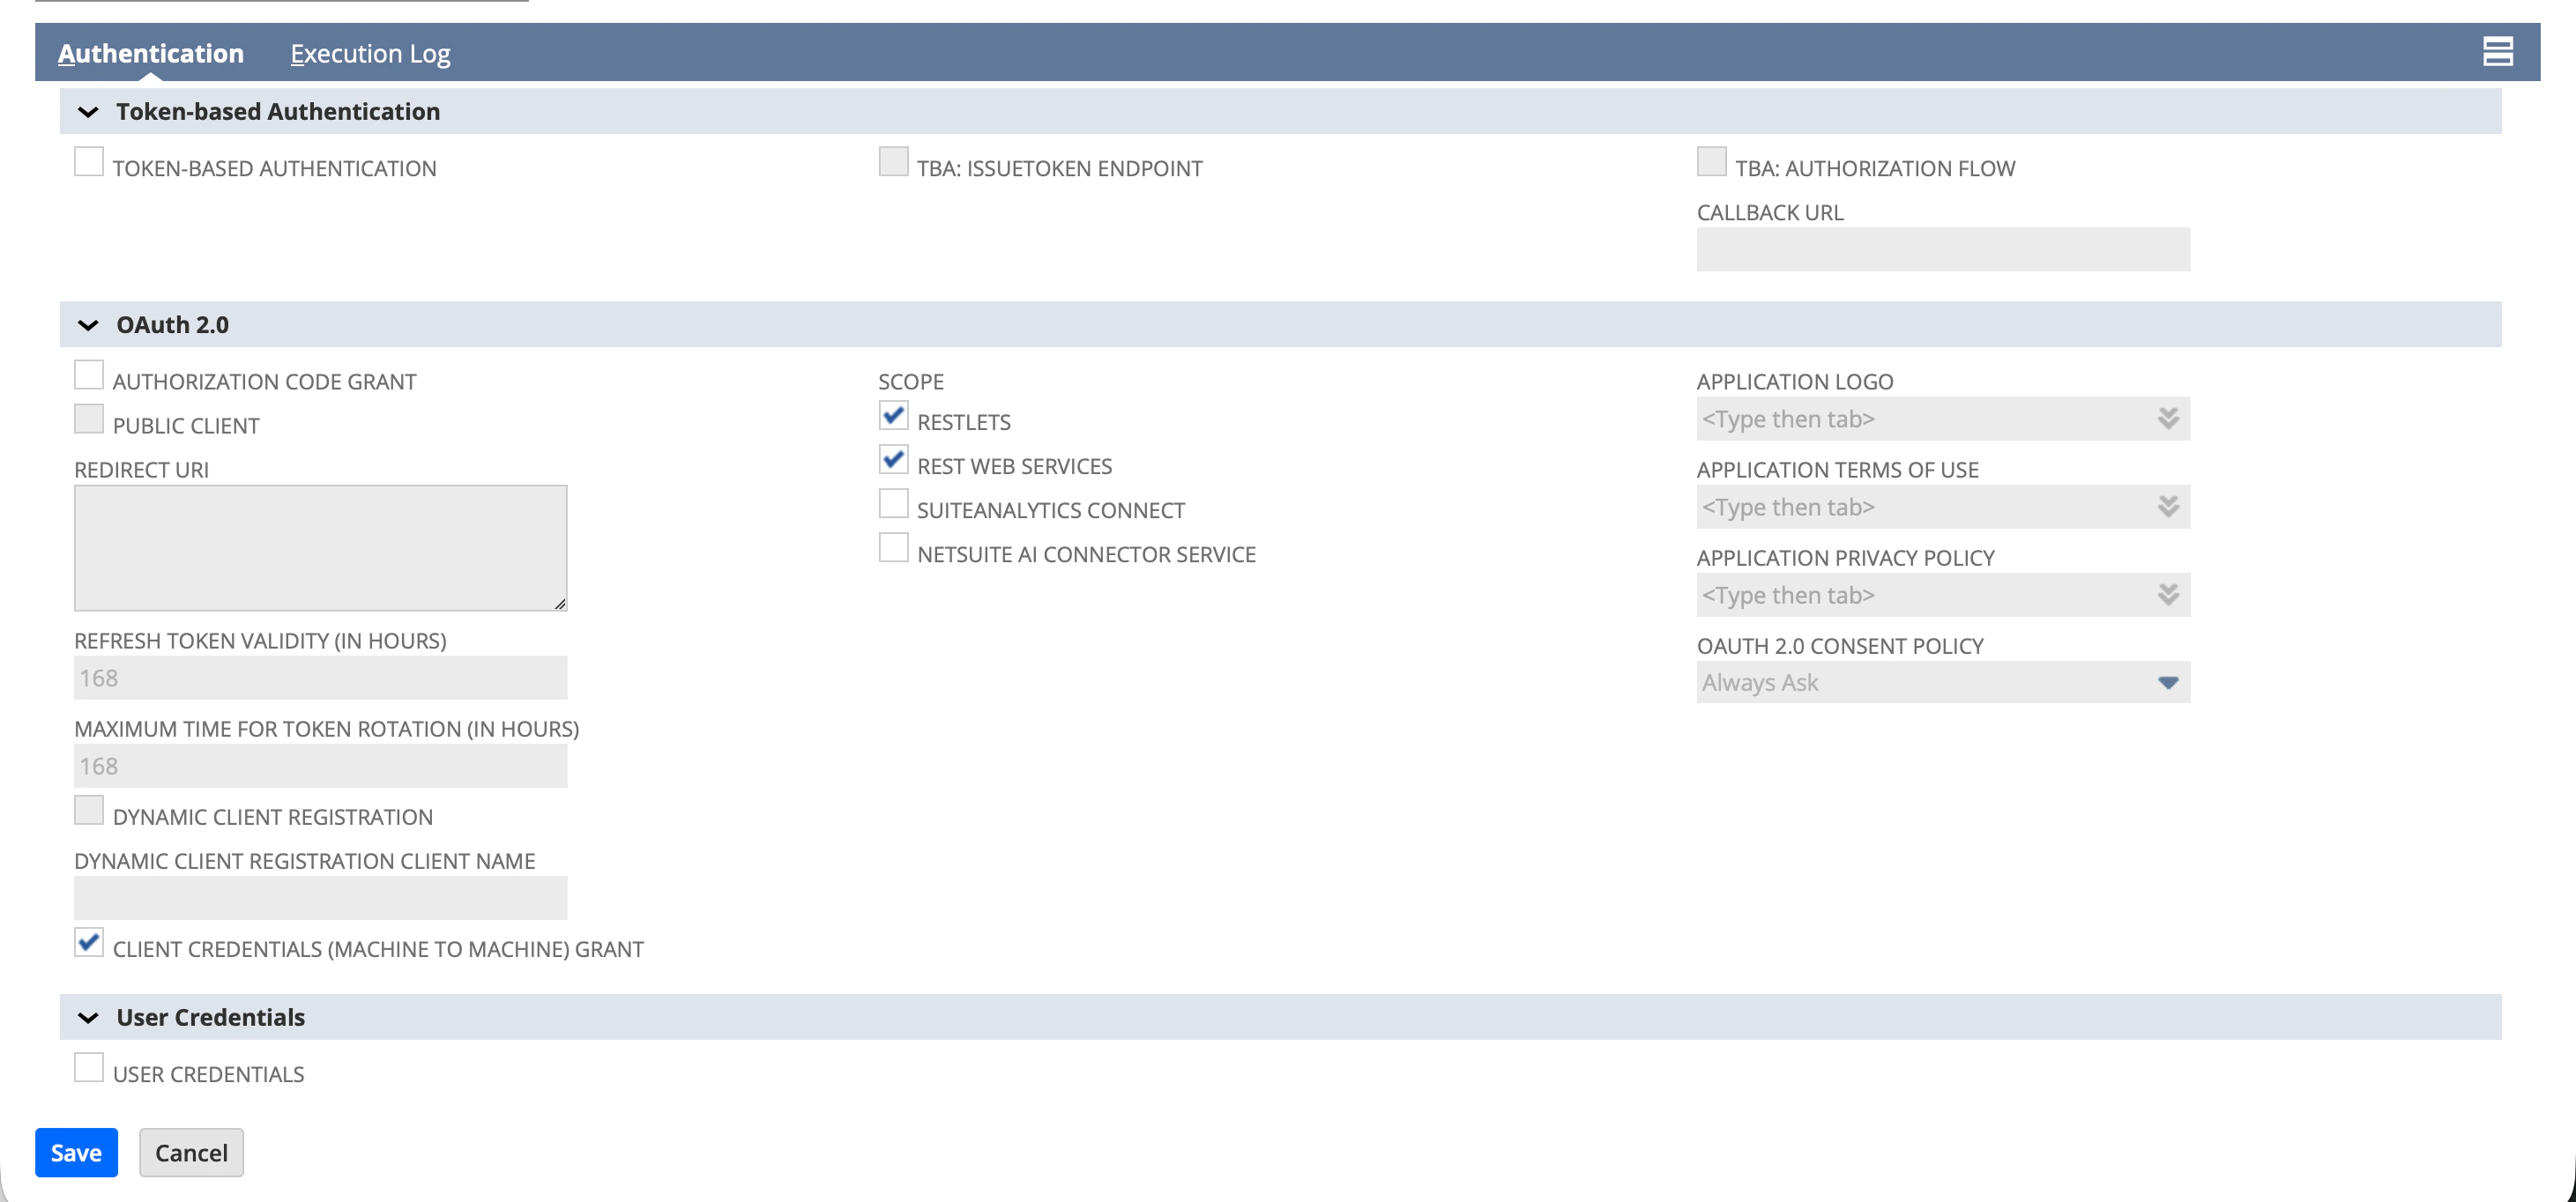
- Under the Token-based Authentication section:
- Uncheck TBA: Authorization Flow
- Uncheck Token-Based Authentication
- Under the OAuth 2.0 section:
- Uncheck Authorization Code Grant
- Check Client Credentials (Machine to Machine) Grant
- Under Scope, check the following:
- RESTlets
- REST Web Services
- Click Save.
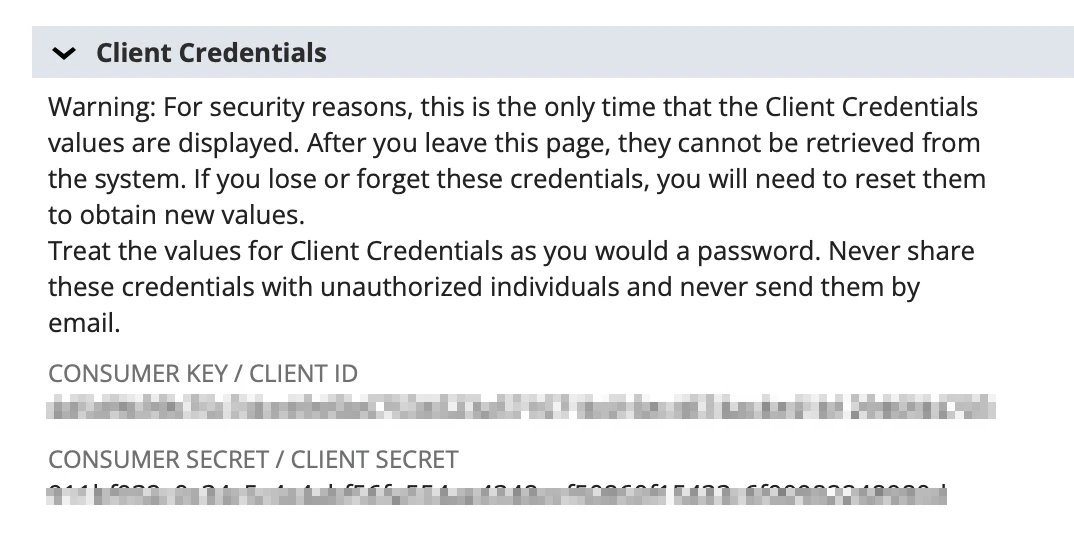
- After saving, NetSuite displays the Consumer Key / Client ID under the Client Credentials section. Copy this value and store it securely — it is shown only once and cannot be retrieved later.
5. Generate a certificate key pair
In this step you’ll use your computer’s terminal to create two files: a private key and a self-signed certificate. This is a one-time operation — if anything goes wrong, you can delete the files and start over. Before you begin, you need OpenSSL available in your terminal. macOS and most Linux distributions include it by default. On Windows, use Git Bash (bundled with Git for Windows, which includes OpenSSL), WSL, or install OpenSSL and ensure it is on yourPATH.
a. Create a folder and open a terminal in it
Create a new folder anywhere you’ll remember — your Desktop works fine. For example, create one callednetsuite-keys. Then open a terminal inside that folder so the files you generate end up there:
- macOS: In Finder, right-click the folder and choose New Terminal at Folder. (If you don’t see this option, enable it under System Settings > Keyboard > Keyboard Shortcuts > Services > Files and Folders > New Terminal at Folder.)
- Windows: In File Explorer, right-click inside the folder and choose Open in Terminal or Open Git Bash here.
- Any OS (fallback): Open your terminal app, type
cd(with a trailing space), drag the folder from your file browser onto the terminal window, and press Enter.
b. Run the OpenSSL commands
Copy each command below, paste it into the terminal right after the prompt (% on macOS, $ on Linux/Git Bash, PS> on PowerShell), and press Enter. Run them one at a time.
c. Confirm the two files were created
If the commands succeeded, your folder now contains two files:private-key.pem— your private key. You’ll base64-encode it in the next sub-step.cert.pem— your public certificate. You’ll upload it to NetSuite in step 7.
cert.pem — the files were created in whichever folder your terminal was open in.
If anything looks wrong — missing files, error messages, accidentally hit Enter too many times — just delete the files and run the commands again. The keys aren’t registered anywhere until you upload
cert.pem to NetSuite in step 7, so there’s no risk in starting over.d. Base64-encode the private key
Run the command below to print a base64-encoded version of your private key directly in the terminal. Use the version that matches your environment: macOS (Terminal)LS0tLS1CRUdJTiBFQyBQUklWQVRFIEtFWS0tLS0t.... Select and copy the entire string — you’ll paste it during the installation process.
6. Assign the integration role to a user or create a new user
The bundle will include a custom role with the permissions needed for the integration. You need to assign this role to the employee/user account that the integration will run as.- Navigate to Setup > Users/Roles > User Management > Employees (or Lists > Employees).
- Find and edit the employee record you want the integration to run as. This can be an existing user or a dedicated integration user.
- Go to the Access tab.
- In the Roles subtab, click Add.
- Select the custom role from the dropdown.
- Click Save.
If you prefer to use a dedicated integration user rather than an existing employee, create a new user/employee record first, then assign the role as described above. This is recommended for security purposes.
7. Create a machine-to-machine certificate mapping
- Navigate to Setup > Integration > OAuth 2.0 Client Credentials (M2M) Setup.
- Click Create New.
- Configure the following fields:
- Entity: Select the employee/user account the integration will run as (from the previous step)
- Role: Select the custom role that the bundle installed. Please note that the role must include the Log in Using OAuth 2.0 Access Tokens permission.
- Application: Select the integration record you created in step 4.
- Certificate: Upload the
cert.pemfile you generated in step 5.
- Click Save.
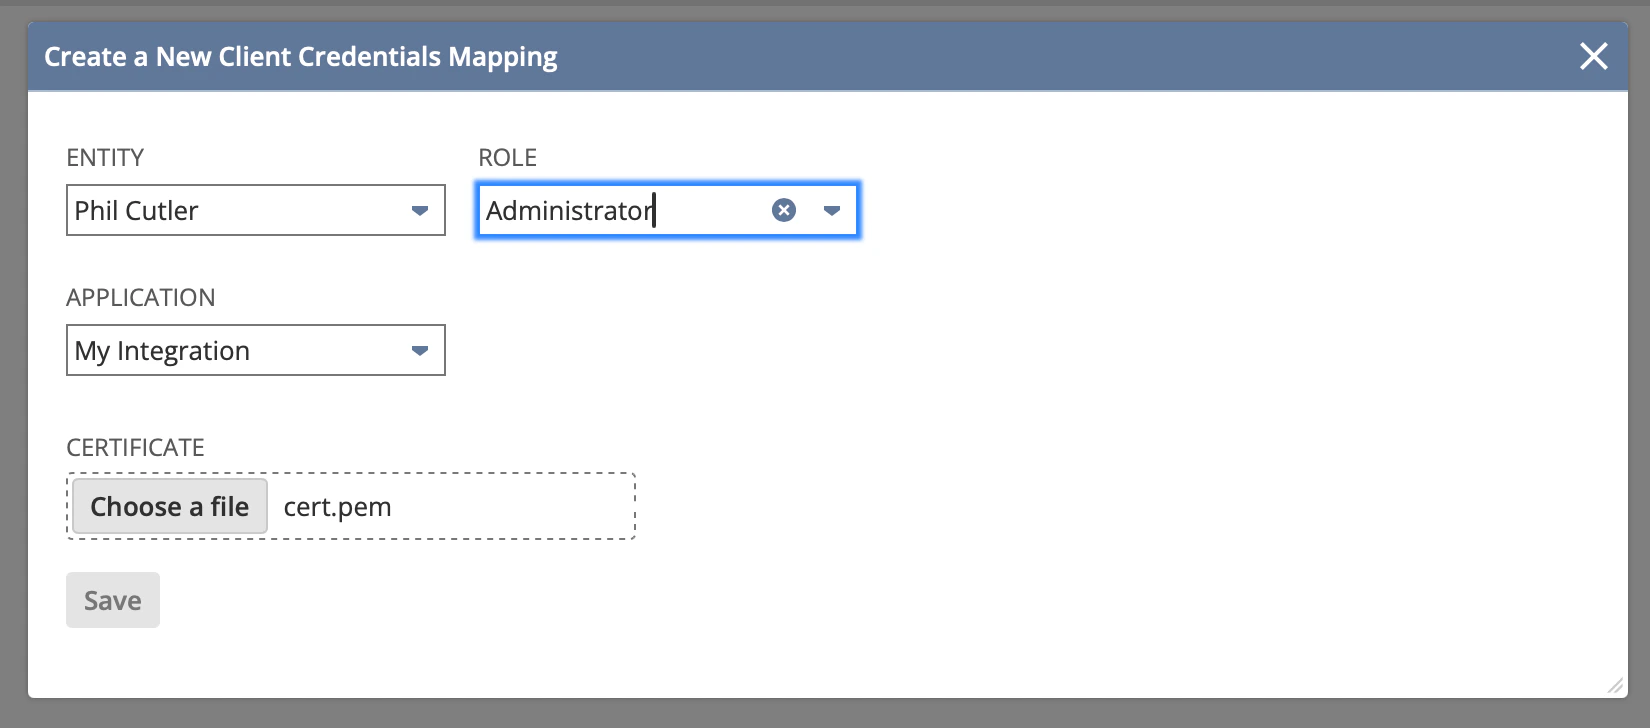
- Copy the Certificate ID from the list — you will need this value when installing the integration.

Check that the
Valid Until date for the certificate is two years in the future. NetSuite allows a maximum validity of 730 days.Installing the integration
When you are installing the integration, you will be prompted for a number of inputs: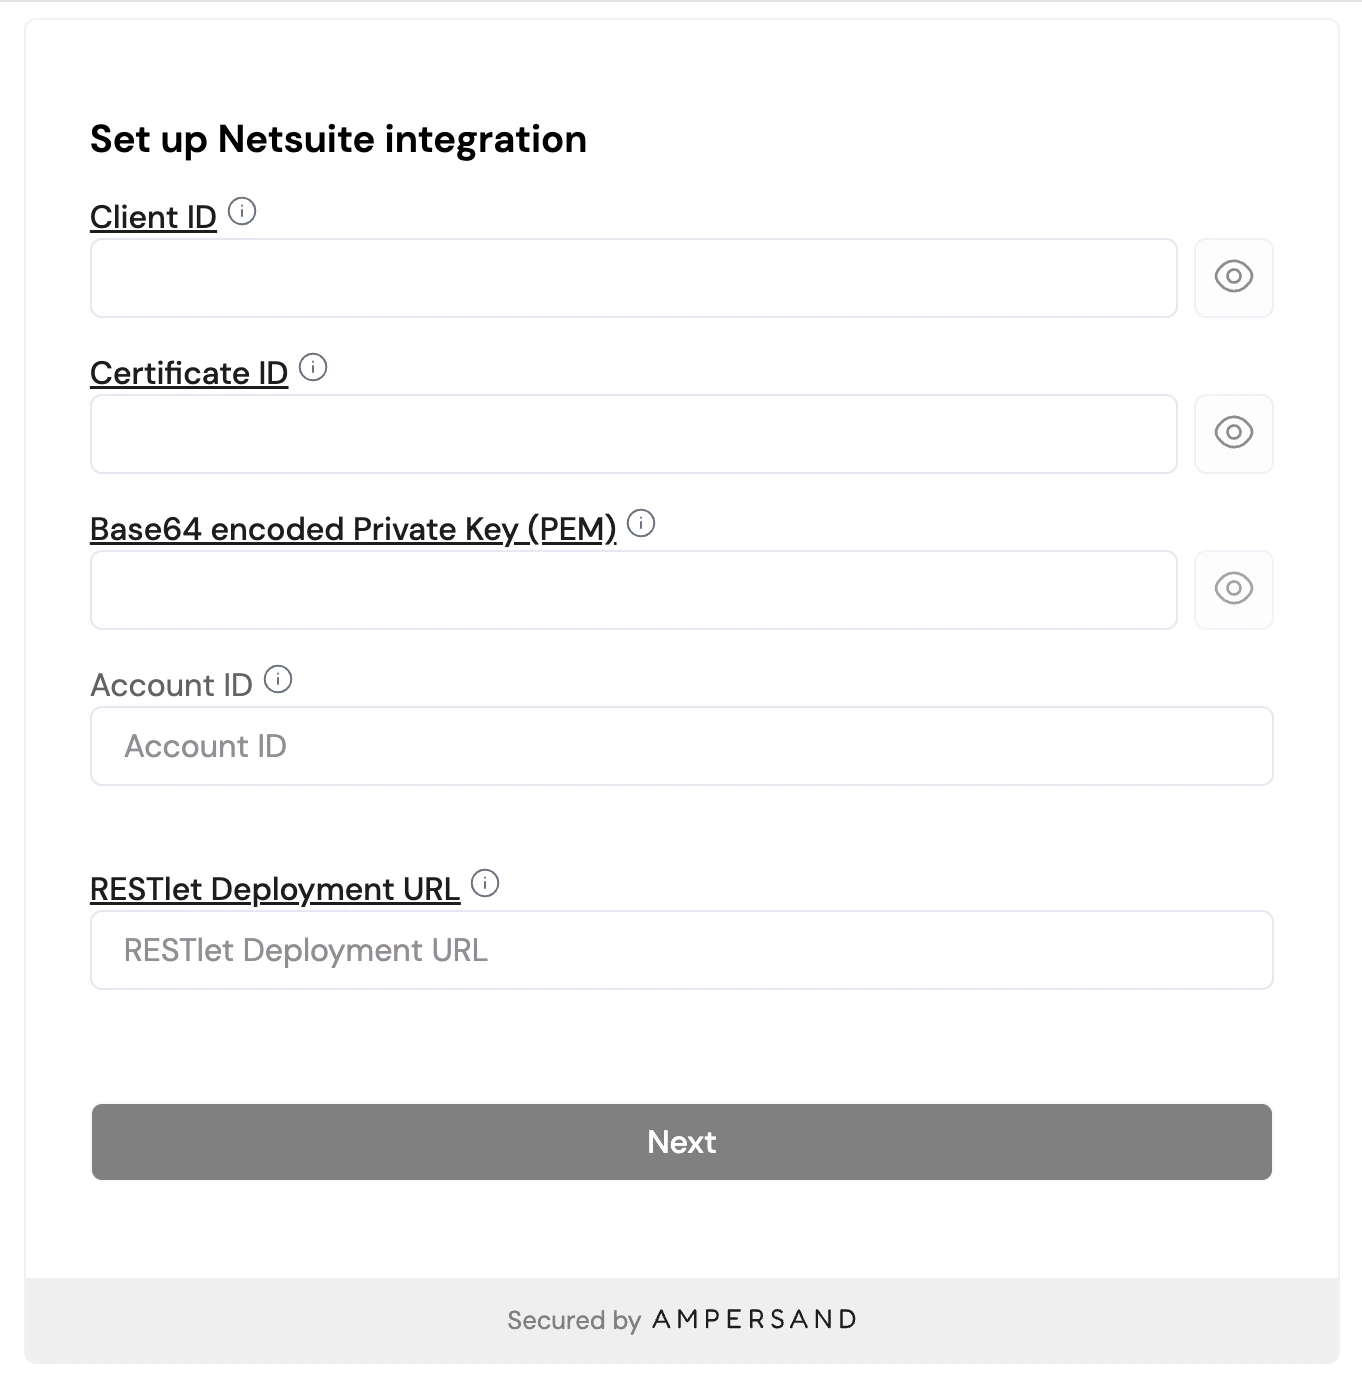
| Input | Where to find it |
|---|---|
| Client ID | The Consumer Key from step 2. |
| Certificate ID | From step 4. |
| Private Key | Base64-encoded contents of private-key.pem (from step 3) |
| Account ID | Your NetSuite URL (e.g. https://1234567.app.netsuite.com → Account ID is 1234567), or Setup > Company > Company Information. |
| RESTlet Deployment URL | This is printed out in the Deployments tab of the script (see previous step), and looks like /app/site/hosting/restlet.nl?script=3045&deploy=1. |
Sandbox accounts: If you are connecting a sandbox account, your Account ID may contain an underscore and suffix (e.g.
1234567_SB1). Provide it exactly as shown in your NetSuite URL or Company Information page.