What’s Supported
Supported Actions
This connector supports:- Proxy Actions, using the base URL
https://api.getdrip.com.
Before You Get Started
To connect Drip with Ampersand, you need a Drip Account. Once your account is created, you’ll need to contact the support team to enable OAuth, and you’ll also need to create an app in Drip to obtain the following credentials from your app:- Client ID
- Client Secret
Create a Drip Account
Here’s how you can sign up for a Drip account:- Go to the Drip Sign Up page.
- Sign up using your preferred method.
Creating a Drip App
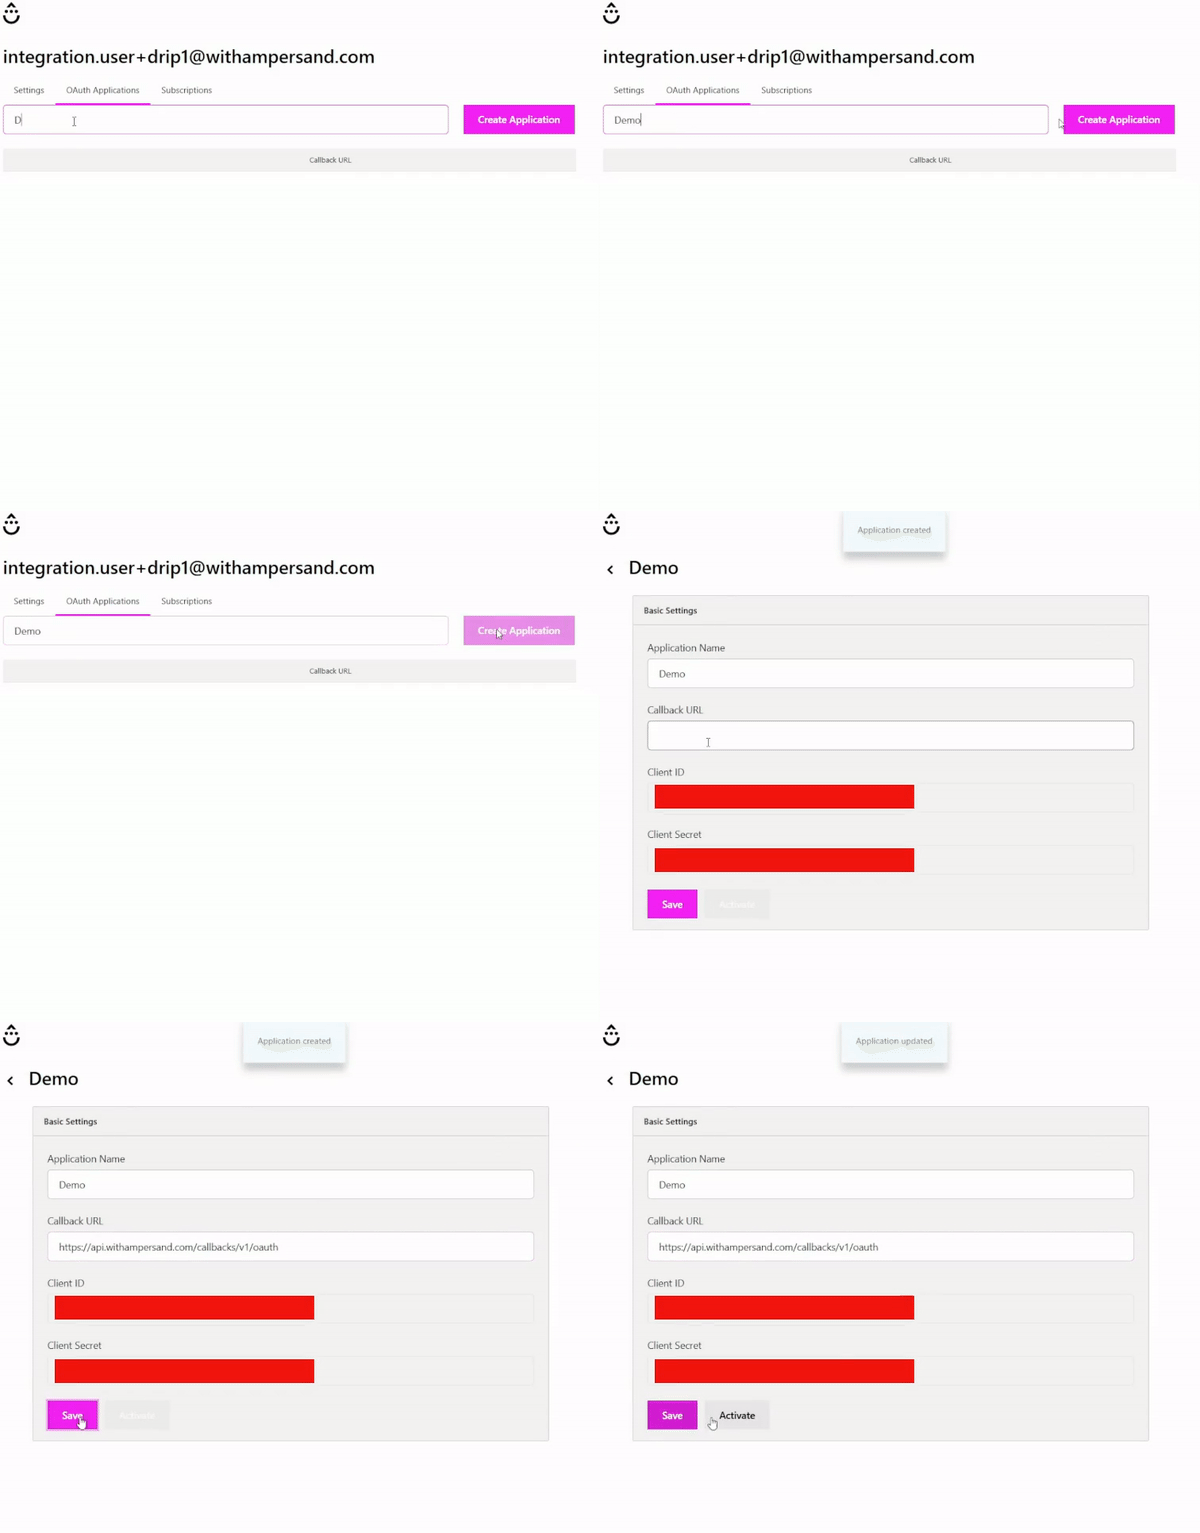
Follow the steps below to create a Drip app and add the Ampersand redirect URL.- Log in to your Drip account.
- Go to Settings > User Settings > OAuth Applications in your Drip account.
- Enter the application name in the Application Name section.
- Click the Create Application.
- In the Callback URIs section, add the Ampersand Redirect URI: https://api.withampersand.com/callbacks/v1/oauth.
- Multiple URLs can be entered in the Callback URI field by separating each URL with a space.
- Click Save. Next, you will need to Activate the app. Drip App Creation
Add Your Drip App Info to Ampersand
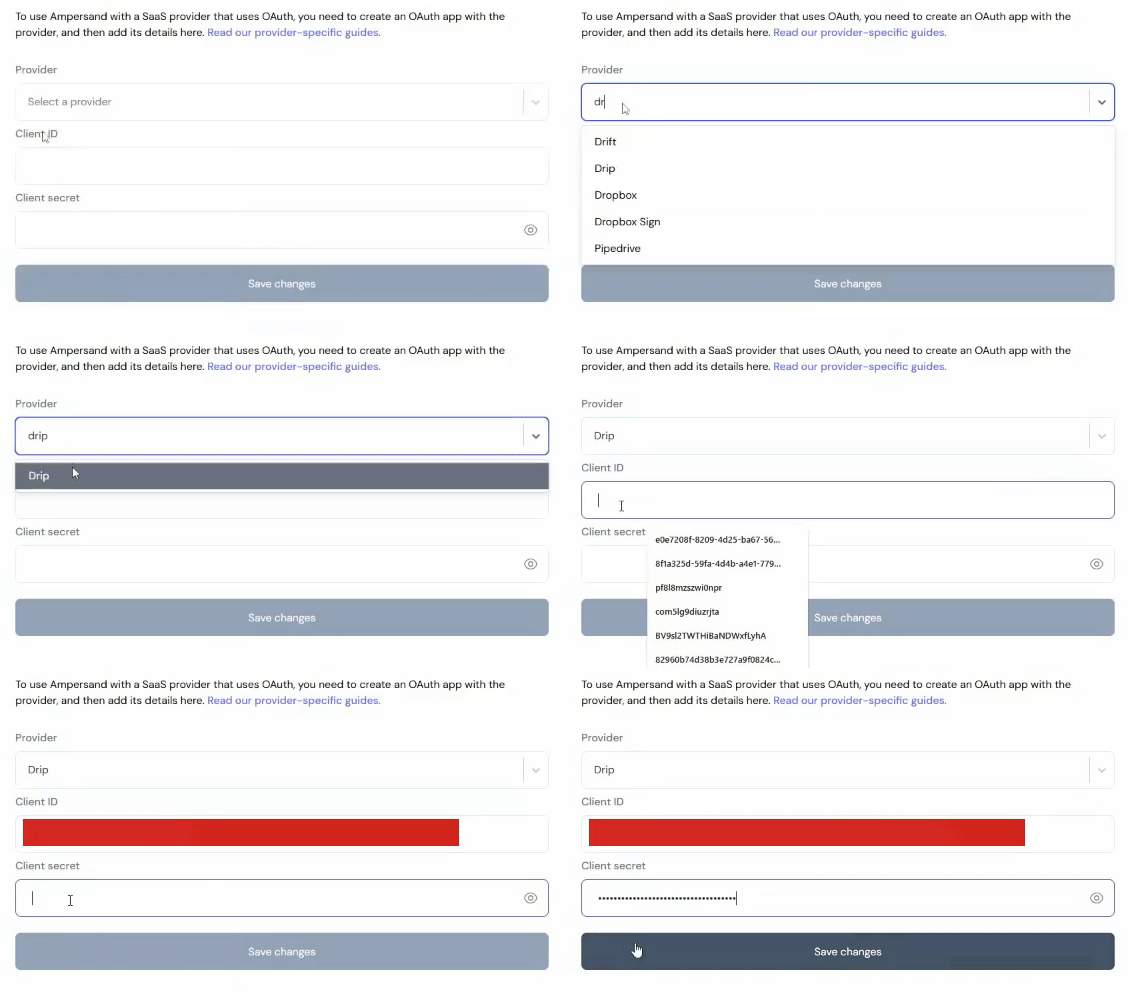
- Log in to your Ampersand Dashboard.
-
Select the project where you want to create a Drip integration.

- Select Provider Apps.
- Select Drip from the Provider list.
-
Enter the previously obtained Client ID in the Client ID field and the Client Secret in the Client Secret field.