> ## Documentation Index
> Fetch the complete documentation index at: https://docs.withampersand.com/llms.txt
> Use this file to discover all available pages before exploring further.
# PhoneBurner
## What's supported
### Supported actions
This connector supports:
* [Read Actions](/read-actions), including full historic backfill. Please note that incremental read is supported only for `contacts`, `dialsession`, `members`, and `voicemails` currently. For all other objects, a full read of the PhoneBurner instance will be done per scheduled read.
* [Write Actions](/write-actions) (create/update).
* [Proxy Actions](/proxy-actions), using the base URL `https://www.phoneburner.com`.
* Subscribe Actions are not currently supported.
### Supported objects
export const Check = () => ✅;
export const Cross = () => 🚫;
### Notes and limitations
* **Write support**:
* `contacts`, `folders`, `members`: create + update
* `dialsession`: create only
* **Read-only objects**: `voicemails`, `tags`
### Example integration
To define an integration for PhoneBurner, create a manifest file that looks like this. For a complete example, visit our [samples repo on Github](https://github.com/amp-labs/samples/blob/main/phoneBurner/amp.yaml).
```YAML theme={null}
# amp.yaml
specVersion: 1.0.0
integrations:
- name: phone-burner-integration
displayName: My PhoneBurner Integration
provider: phoneBurner
read:
objects:
- objectName: contacts
destination: defaultWebhook
schedule: "*/30 * * * *"
write:
objects:
- objectName: contacts
inheritMapping: true
proxy:
enabled: true
```
## Before You Get Started
To connect *PhoneBurner* with *Ampersand*, you will need [a PhoneBurner Account](https://www.phoneburner.com/).
Once your account is created, you'll need to configure an app in *PhoneBurner* and obtain the following credentials from your app:
* Client ID
* Client Secret
You will use these credentials to connect your application to Ampersand.
### Create a PhoneBurner account
Here's how you can sign up for a **PhoneBurner Developer** account:
* Visit the [Get Developer Account page](https://www.phoneburner.com/developer/getting_started#developer_account) and follow the step-by-step instructions to create your account.
### Creating a PhoneBurner App
Follow the steps below to create an *PhoneBurner* app and add the Ampersand redirect URL in the app:
1. Log in to your [PhoneBurner Developer Account](https://www.phoneburner.com/homepage/login).
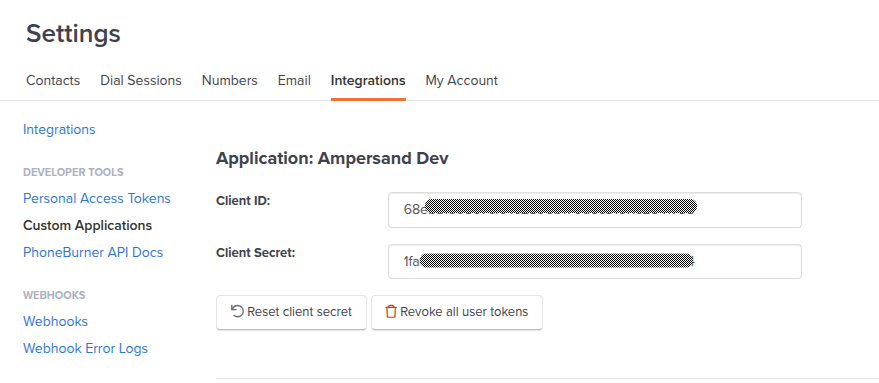
2. Click your avatar and select **My Account**
3. Open the **Integrations** tab.
4. From the left menu, select **Custom Applications**.
5. Click **Register new application**.
6. Enter the **Application Name** and **Contact** details.
7. In the **OAuth2 Redirect URL** section, enter the Ampersand redirect URL: `https://api.withampersand.com/callbacks/v1/oauth`.
8. Enter application **Description**.
 9. Click **Register application**.
You'll see the details of your newly created application. Note the **Client ID** and **Client Secret** keys as they are necessary for connecting your app to Ampersand.
9. Click **Register application**.
You'll see the details of your newly created application. Note the **Client ID** and **Client Secret** keys as they are necessary for connecting your app to Ampersand.
 ## Add your PhoneBurner app info to Ampersand
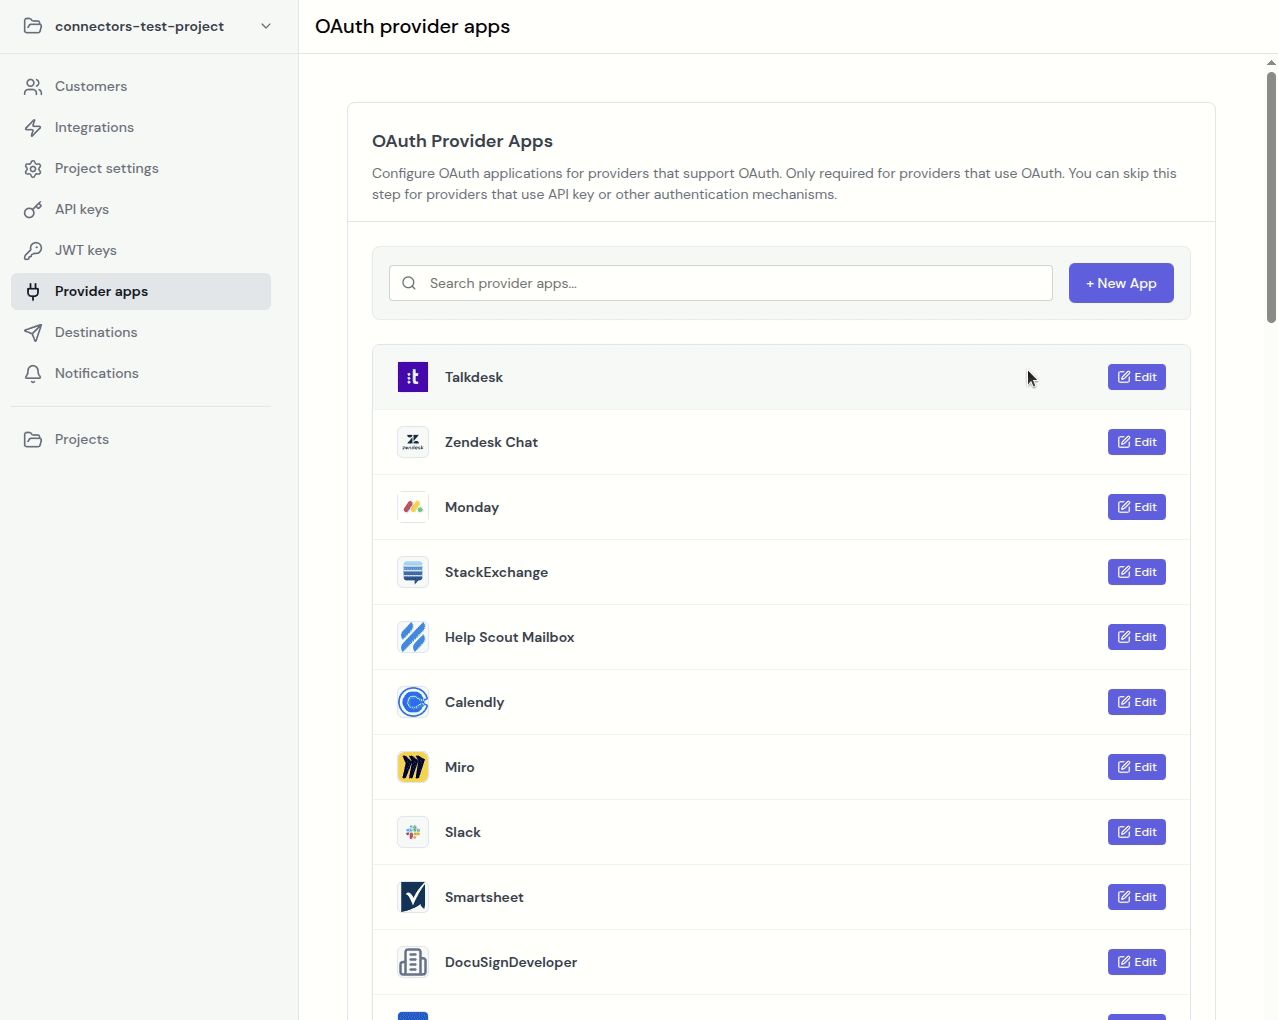
1. Log in to your [Ampersand Console](https://console.withampersand.com).
2. Select the project where you want to create a PhoneBurner integration.
## Add your PhoneBurner app info to Ampersand
1. Log in to your [Ampersand Console](https://console.withampersand.com).
2. Select the project where you want to create a PhoneBurner integration.
 3. Select **Provider apps**.
4. Select *PhoneBurner* from the **Provider** list.
5. Enter the previously obtained *Client ID* in the **Client ID** field and the *Client Secret* in the **Client Secret** field.
3. Select **Provider apps**.
4. Select *PhoneBurner* from the **Provider** list.
5. Enter the previously obtained *Client ID* in the **Client ID** field and the *Client Secret* in the **Client Secret** field.
 6. Click **Save changes**.
## Using the connector
To start integrating with PhoneBurner:
* Create a manifest file like the [example above](#example-integration).
* Deploy it using the [amp CLI](/cli/overview).
* Embed the [InstallIntegration](/embeddable-ui-components#install-integration) UI component. The UI component will prompt the customer for OAuth authorization.
* Start using the connector!
* If your integration has [Proxy Actions](/proxy-actions), you can start making Proxy API calls.
6. Click **Save changes**.
## Using the connector
To start integrating with PhoneBurner:
* Create a manifest file like the [example above](#example-integration).
* Deploy it using the [amp CLI](/cli/overview).
* Embed the [InstallIntegration](/embeddable-ui-components#install-integration) UI component. The UI component will prompt the customer for OAuth authorization.
* Start using the connector!
* If your integration has [Proxy Actions](/proxy-actions), you can start making Proxy API calls.