> ## Documentation Index
> Fetch the complete documentation index at: https://docs.withampersand.com/llms.txt
> Use this file to discover all available pages before exploring further.
# Constant Contact
## What's supported
### Supported actions
This connector supports:
* [Read Actions](/read-actions), including full historic backfill. Please note that incremental read is not supported, a full read of the Constant Contact instance will be done for each scheduled read.
* [Write Actions](/write-actions).
* [Proxy Actions](/proxy-actions), using the base URL `https://api.cc.email`.
The Constant Contact connector supports writing to and reading from the following objects:
* [account\_emails](https://v3.developer.constantcontact.com/api_reference/index.html#!/Account_Services/retrieveEmailAddresses)
* [activities](https://v3.developer.constantcontact.com/api_reference/index.html#!/Bulk_Activities/getActivityStatusCollection) (read only)
* [contact\_lists](https://v3.developer.constantcontact.com/api_reference/index.html#!/Contact_Lists/getLists)
* [contact\_tags](https://v3.developer.constantcontact.com/api_reference/index.html#!/Contact_Tags/getTags)
* [contacts](https://v3.developer.constantcontact.com/api_reference/index.html#!/Contacts/getContacts)
* [email\_campaign\_summaries](https://v3.developer.constantcontact.com/api_reference/index.html#!/Email_Reporting/getAllBulkEmailCampaignSummaries) (read only)
* [email\_campaign\_activities](https://v3.developer.constantcontact.com/api_reference/index.html#!/Email_Campaigns/updateEmailCampaignActivityUsingPUT) (write only)
* [email\_campaigns](https://v3.developer.constantcontact.com/api_reference/index.html#!/Email_Campaigns/retrieveEmailCampaignsUsingGET)
* [privileges](https://v3.developer.constantcontact.com/api_reference/index.html#!/Account_Services/getUserPrivileges) (read only)
* [segments](https://v3.developer.constantcontact.com/api_reference/index.html#!/Segments/getAccountSegments)
## Before you get started
To integrate Constant Contact with Ampersand, you must have a Constant Contact Developer account and obtain the necessary credentials.
Once your account is set up, you'll need to create an app in Constant Contact to get the following credentials:
* **Client ID**
* **Client Secret**
You will use these credentials to connect your application to Ampersand.
### Create a Constant Contact account
Here's how to sign up for a Constant Contact account:
1. Go to the [Constant Contact Sign Up page](https://v3.developer.constantcontact.com/login/index.html?_ga=2.74994962.1095369080.1723052125-94b8f87f-e462-4b81-9771-2b211eac0567&_gac=1.89512297.1720021371.Cj0KCQjw7ZO0BhDYARIsAFttkCjWgg2zwOvaQdS8IlbZamQr4AT9C2j_7t1Xm6EFPKJSJ7W0PHnV6gQaAi1WEALw_wcB).
2. Sign up using your preferred method and follow the instructions to create your account.
### Creating a Constant Contact app
Follow these steps to create an app in Constant Contact and add the Ampersand redirect URL:
1. Log in to your [Constant Contact Developer Account](https://v3.developer.constantcontact.com/login).
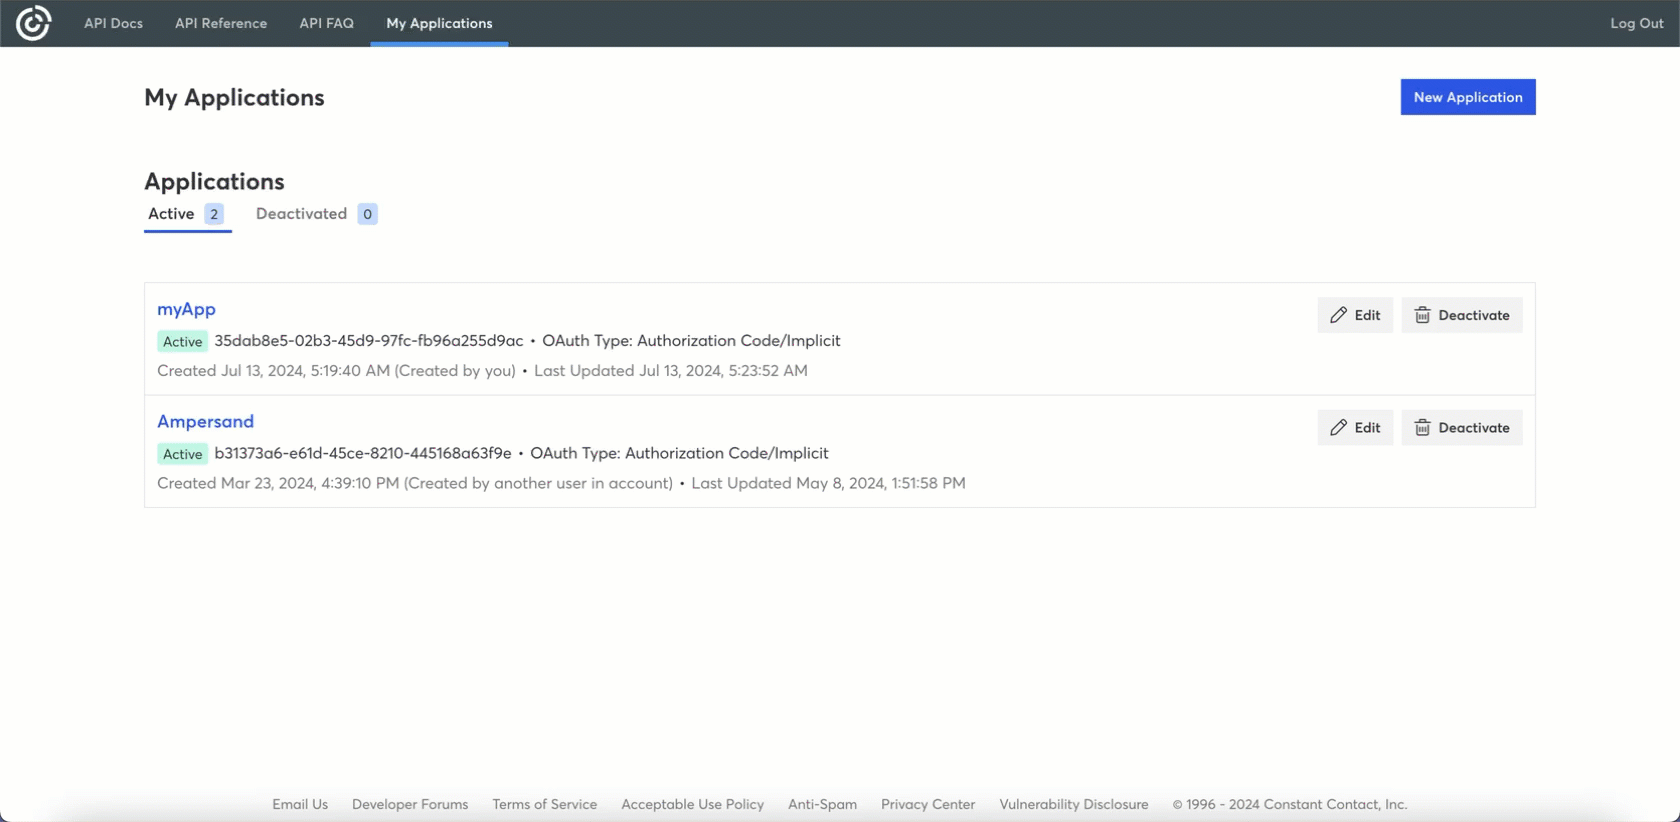
2. Go to **My Applications**.
3. Click the **New Application** button.
4. In the **New Application** dialog box, enter an **Application Name** for your app.
5. Select an **OAuth2 Flow**.
6. Choose a **Refresh Token** type.
7. Click **Create**.
 ### Adding Ampersand redirect URL in your app
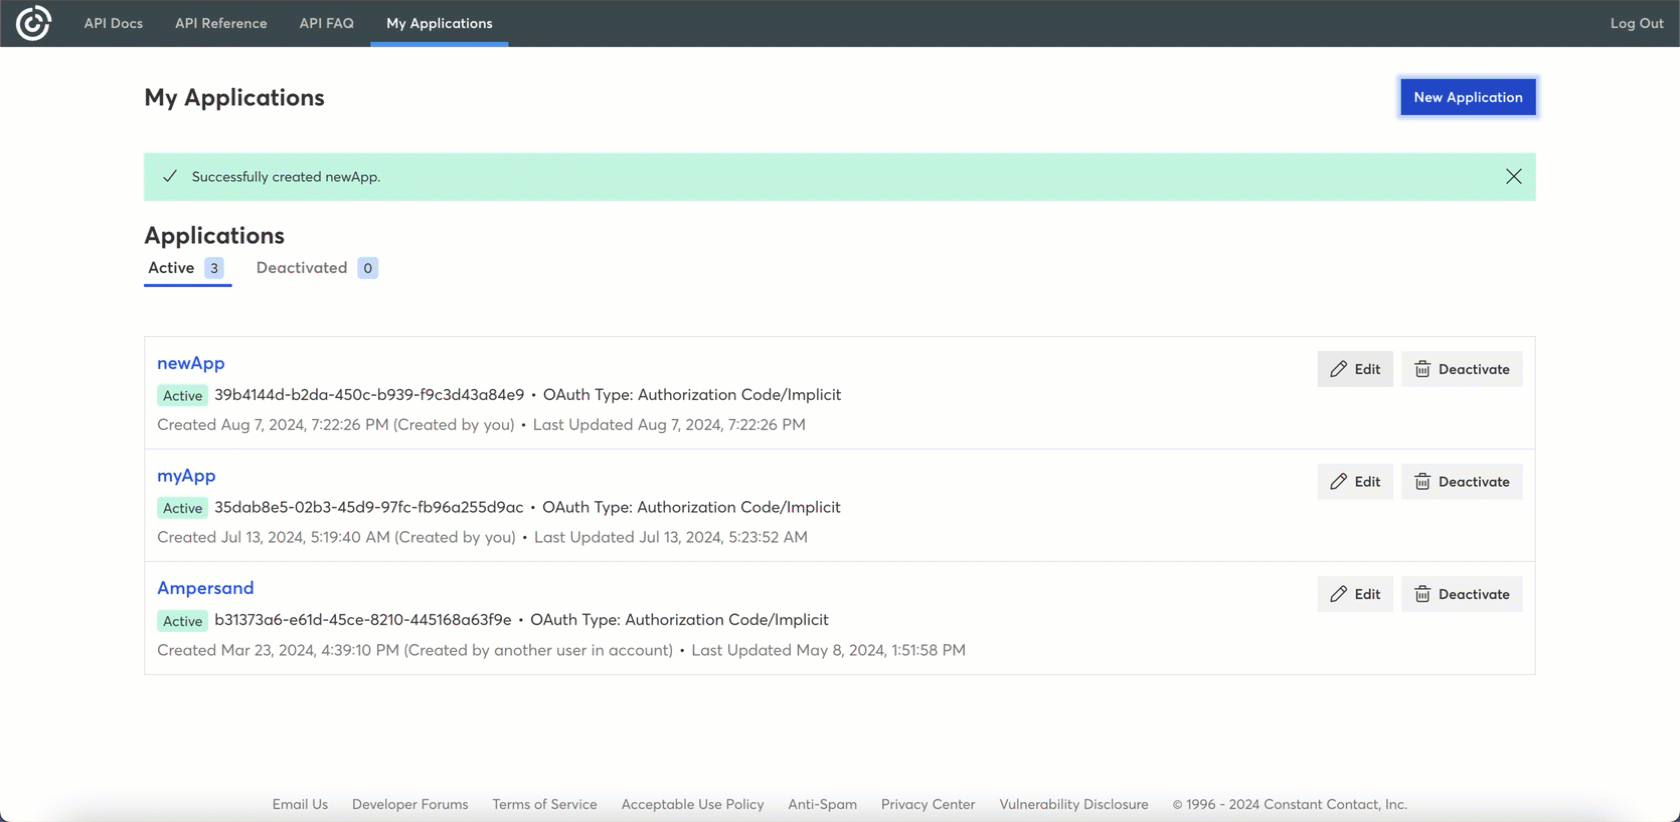
Once your app is created, you will be redirected to the **My Applications** page. Select your newly created application from the list and add the following details to your application to set up OAuth in your app.
1. In the **Redirect URLs** section, click **Add another redirect URL**.
2. Enter the Ampersand redirect URL: `https://api.withampersand.com/callbacks/v1/oauth`.
3. Click **Confirm**.
4. You will find your *Client ID* in the *API Key (Client ID)* section. Click **Generate Client Secret** to create a *Client Secret* key for your app. Be sure to note both the *Client ID* and *Client Secret*, as you will need these to connect your app to Ampersand.
### Adding Ampersand redirect URL in your app
Once your app is created, you will be redirected to the **My Applications** page. Select your newly created application from the list and add the following details to your application to set up OAuth in your app.
1. In the **Redirect URLs** section, click **Add another redirect URL**.
2. Enter the Ampersand redirect URL: `https://api.withampersand.com/callbacks/v1/oauth`.
3. Click **Confirm**.
4. You will find your *Client ID* in the *API Key (Client ID)* section. Click **Generate Client Secret** to create a *Client Secret* key for your app. Be sure to note both the *Client ID* and *Client Secret*, as you will need these to connect your app to Ampersand.
### Add your Constant Contact app info to Ampersand
1. Log in to your [Ampersand Dashboard](https://dashboard.withampersand.com).
2. Select the project where you want to create a Constant Contact integration.
 3. Select **Provider apps**.
4. Select *Constant Contact* from the **Provider** list.
5. Enter the previously obtained **Client ID** and **Client Secret** in the respective fields.
3. Select **Provider apps**.
4. Select *Constant Contact* from the **Provider** list.
5. Enter the previously obtained **Client ID** and **Client Secret** in the respective fields.
 6. Click **Save Changes** to finalize the integration.