> ## Documentation Index
> Fetch the complete documentation index at: https://docs.withampersand.com/llms.txt
> Use this file to discover all available pages before exploring further.
# Aircall
## What's Supported
### Supported Actions
This connector supports:
* [Read Action](/read-actions), including full historic backfill. Incremental read is supported for Contact, User, Number, and Call. Note that for Team and Tag, a full read of the Aircall instance will be done for each scheduled read.
* [Write Action](/write-actions).
* [Proxy Action](/proxy-actions), using the base URL `https://api.aircall.io`.
### Supported Objects
The Aircall connector supports writing to and reading from the following objects:
* [Call](https://developer.aircall.io/api-references/#call) (`call`)
* [User](https://developer.aircall.io/api-references/#user) (`user`)
* [Contact](https://developer.aircall.io/api-references/#contact) (`contact`)
* [Number](https://developer.aircall.io/api-references/#number) (`number`)
* [Team](https://developer.aircall.io/api-references/#team) (`team`)
* [Tag](https://developer.aircall.io/api-references/#tag) (`tag`)
## Before You Get Started
To integrate **Aircall** with **Ampersand**, you must register an **Aircall OAuth2** application. To do this, contact `marketplace@aircall.io` and provide the following details:
* **Name** and **Purpose** of your application.
* **Redirect URI** for an HTTPS endpoint that will handle the secure callback. Use the following callback URL for Ampersand integration: `https://api.withampersand.com/callbacks/v1/oauth`.
* **Install URI**: A valid installation URI for your application.
Once you have registered your application, you will receive two credentials: **client\_id** and **client\_secret**. These are required to connect Aircall with Ampersand.
## Add Your Aircall App Info to Ampersand
Once you have your Aircall app set up and registered, you can proceed to connect it with Ampersand by following these steps:
1. Log in to your [Ampersand Dashboard](https://dashboard.withampersand.com).
2. Select the project where you want to create an *Aircall* integration.
 3. Select **Provider Apps**.
4. Select *Aircall* from the **Provider** list.
5. Enter the previously obtained **Client ID** in the **Client ID** field and the **Client Secret** in the **Client Secret** field.
6. Enter the scopes set for your application in *Aircall*.
3. Select **Provider Apps**.
4. Select *Aircall* from the **Provider** list.
5. Enter the previously obtained **Client ID** in the **Client ID** field and the **Client Secret** in the **Client Secret** field.
6. Enter the scopes set for your application in *Aircall*.
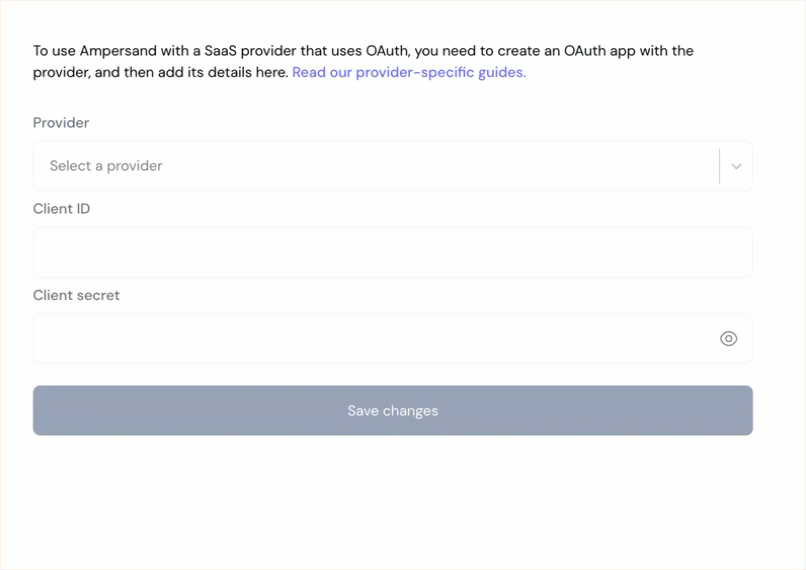 7. Click **Save Changes**.
## Using the connector
To start integrating with Aircall:
* Create a manifest file like the [example](https://github.com/amp-labs/samples/blob/main/aircall/amp.yaml).
* Deploy it using the [amp CLI](/cli/overview).
* Embed the [InstallIntegration](/embeddable-ui-components#install-integration) UI component.
* Start using the connector!
* If your integration has [Read Action](/read-actions), you'll start getting webhook messages.
* If your integration has [Write Action](/write-actions), you can start making API calls to our Write API.
* If your integration has [Proxy Action](/proxy-actions), you can start making Proxy API calls.
7. Click **Save Changes**.
## Using the connector
To start integrating with Aircall:
* Create a manifest file like the [example](https://github.com/amp-labs/samples/blob/main/aircall/amp.yaml).
* Deploy it using the [amp CLI](/cli/overview).
* Embed the [InstallIntegration](/embeddable-ui-components#install-integration) UI component.
* Start using the connector!
* If your integration has [Read Action](/read-actions), you'll start getting webhook messages.
* If your integration has [Write Action](/write-actions), you can start making API calls to our Write API.
* If your integration has [Proxy Action](/proxy-actions), you can start making Proxy API calls.